Showing posts with label Victorian Picket Fence. Show all posts

Monday, April 2, 2018

Hello with Lisa Blastick

3:30 AM 0 Comments

Hello! Springtime is in the air! So I thought I would make a springtime card scene using lots of Cheery Lynn Designs die cuts. This card is 4.25 x 6 inches. I typically make 5 x 6, but with the stitched rectangle frame I made it a bit smaller. 


A couple of clouds, a whimsical tree, fence, a cat, grass 2, a butterfly, and tiny flowers it really came together quite quickly. 


I added tiny pearls to the centers of all the flowers. 


The sentiment was stamped in brown ink and fussy cut out. Tip:( I cut out the tree in green and colored the tree and branches in brown ink. I also cut out the cat in green and colored it brown to match the tree) :)


Thanks for stopping by today! 
Have a great day!
Hugs Lisa

Monday, March 12, 2018

Easter Basket with Lisa Blastick

3:30 AM 0 Comments

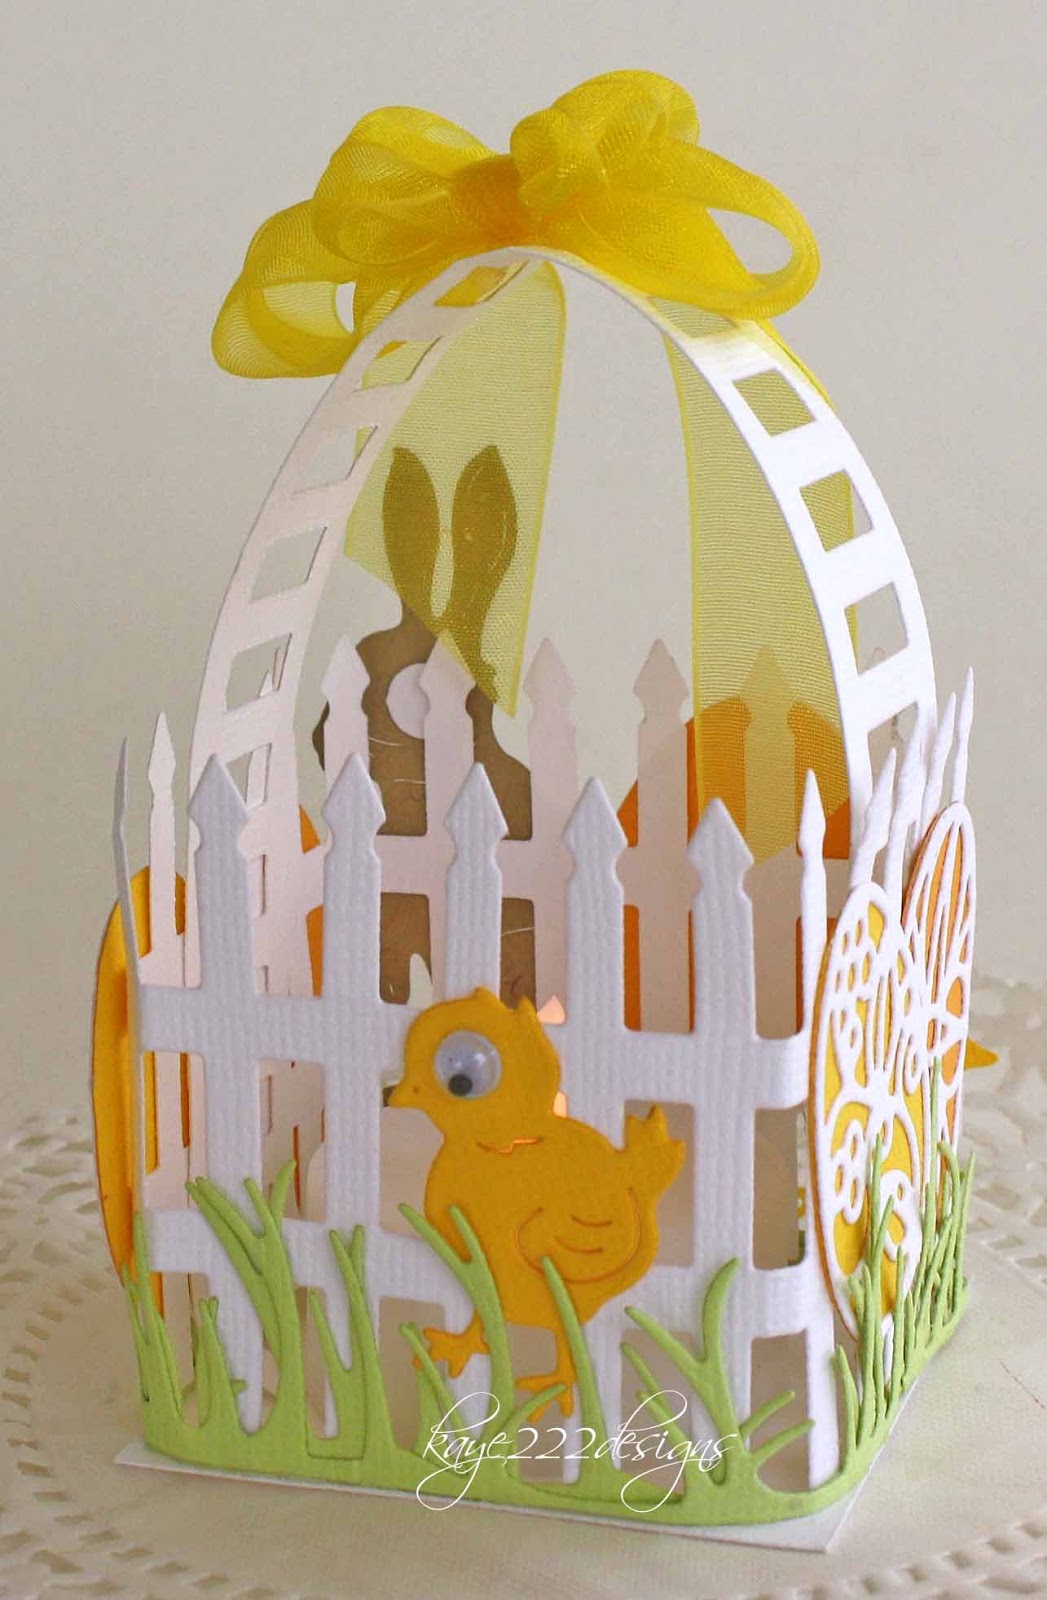
Hello! Thanks for stopping by today! Sharing a new Easter Basket this year using lots of Cheery Lynn Designs die cuts. I have been making several cards for the upcoming holiday and I made a couple of different baskets for treats and tea lights over the years. Today I have a new version of those adorable baskets that you can set on your table with tea lights or give away as mini treat gifts.


I used 2 sets of the victorian fence. One is scored every 2 inches and glued at the ends for the square basket. The other I used the center for the basket handle. I then added a 2.25 x 2.25 inch square on the bottom. Decorate however you like. I used grass twice around the bottom, easter eggs, bunnies and chicks. The animals always get googly eyes and lastly a sheer ribbon bow on top. 


A view with the tea light. Just love this basket!


Thanks for stopping by today!
Have a great week!
Hugs Lisa 

Tuesday, May 2, 2017

You Make Me Smile With Lisa Blastick

1:30 AM 3 Comments

Hi everyone! Welcome back to a fun new card for Cheery Lynn Designs
I have been busy with life and family lately so I believe I had lost my Mojo for a bit....But today I think it came back...at least for a little while! 
I wanted to make a straight Z Fold Card for some time now...who would have known it would be super fast and easy.... this is a 4.5 inch x 11 inches. You just fold it in half and then half again. 
The bottom is the 2 inches x 11 inches, fold it the same and you place it the opposite way to create the little box. I added a little center for extra flowers...


I used 5 different die cuts..."victorian fence" "whimsical tree of life" "whimsical sun and cloud" "garden gate" and "floral bouquet kit" The colors were scream "springtime" to me! 


I cut out 2 trees, one sun, one each of the clouds and one extra cloud, 2 sets of the small and larger flowers in pink, purple and yellow, 5 sets of small and large leaves, one garden gate and one big strip of the victorian fence with a little bit extra to finish to the end. 


Here you can see it is flat for easy mailing...the sentiment I stamped over the top of the cloud and tree. In the centers are silver gala glitz and the sun eyes are silver brads to match the gala glitz. 


Thanks for stopping by today!
Have a wonderful week!
Hugs Lisa 

Tuesday, March 21, 2017

Easter Wishes With Lisa Blastick

3:30 AM 3 Comments

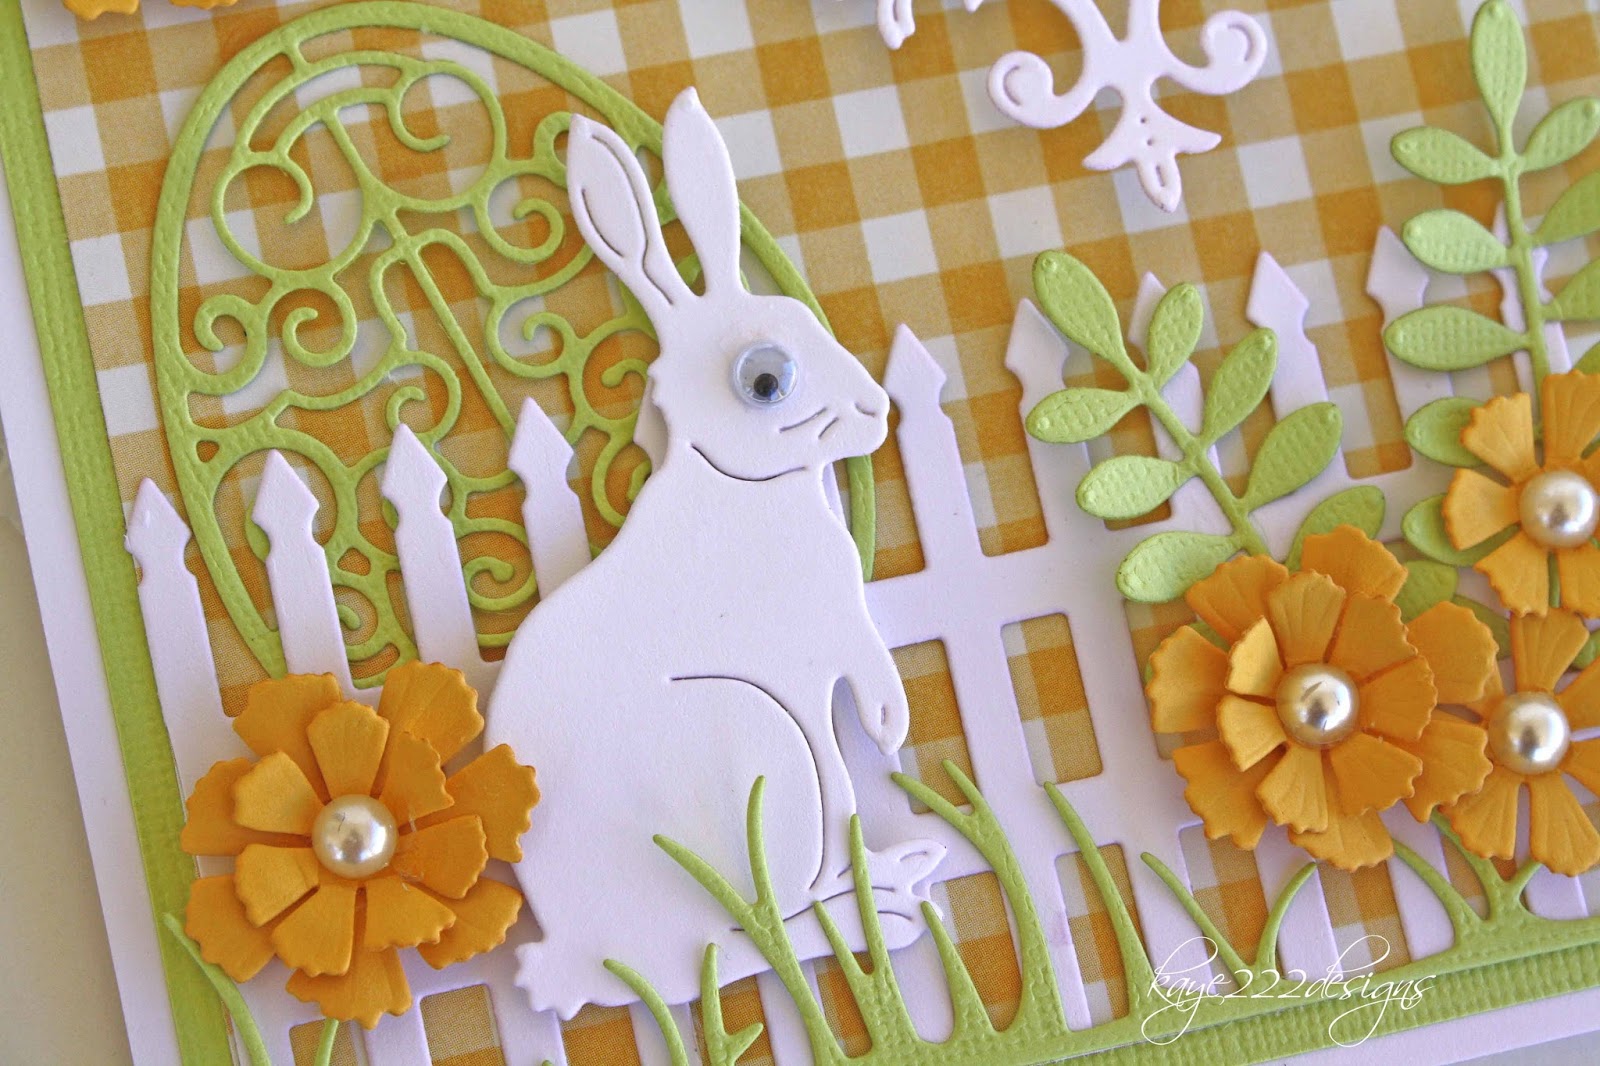
Hi! Welcome back to another Easter card for Cheery Lynn Designs! I had a fun time making this Easter card using several die cuts from Cheery Lynn Designs. I adore the "bunny" and I added his fun eye. The "lace egg" in the background is so delicate... Perfect for Easter. 


I stamped the sentiment on the "quatrefoil tag" in black ink. All the flowers are "sweet williams strip" and I added pearls in the center. The "floral bouquet kit" is a must have because there are so many flowers and leaves to choose. I also added the "grass border" and "victorian fence" 


A closer view...love the details on the tag...


The adorable bunny, egg, flowers and grass...


The inside using the "curved border set" Easy to place a gift card behind. 


Thanks for stopping by today! 
Hope you enjoyed! 
See you soon....
Hugs Lisa

Wednesday, April 13, 2016

Beach Box Card with Lisa Blastick

3:30 AM 3 Comments

Hi everyone! I wanted to share with you today a beach box card using several Cheery Lynn Designs dies! This is my first box card and it was really was to fun to make. There are so many different sizes of box cards. This size is easy to place in an envelope to mail. It folds flat and is approximately 4 x 5.5 inches. There is a video on you tube by Meg Loven that is a tutorial on the base of the card. You can see it here. Thank you! 


On the bottom of the box I used "victorian picket fence" with some "grass border 2" because I was thinking of the fence sometimes you see along the beach with bits of grass. 


Here I used "ship's anchor" and I inked the chain in white. I placed a small sentiment on top. The "tiny flourishes" are throughout the box. 


I also wanted to add some "starfish" So I made two in white and two in kraft cardstock.   Then in the center I used  "lighthouses" in kraft cardstock and layered white cardstock behind the window openings.


All the flowers are from "sweet william" and I placed pearls in the centers. The largest ones were using all the flowers and as I made them smaller I just cut some of the larger ones out. 


The larger greenery pieces in the background are "fanciful flourish" and I cut them up and placed them throughout the few layers in the center.


One closer view of the center. 
Hope you enjoyed my fun beach box card! 

Cheery Lynn Designs Dies Used:


Thanks for stopping by today! 
Be sure to check out this week's challenge for your chance to win 
$20 at the Cheery Lynn Designs store! 
Hugs Lisa 

Saturday, December 26, 2015

Winters Day by Julie Lavalette

3:30 AM 1 Comments

Hi everyone, it's JULIE hosting the blog today. Hope you all have had a lovely Christmas Day and Santa left you some new craft goodies. In Scotland it is unusually very mild for this time of year and no signs of snow yet, so I decided to make a Wintry Scene onto my card.

I started with a greyish blue cardstock and scattered some chunky white Embossing Powder on it to give a snowy effect. Next, I tattered and shaded the edges with Distress ink. 
My Tree and Icicles I applied the same technique as I did on my Wall Hanging last week which you can see HERE.


My Winter Sign I die cut out in black cardstock and fussy cut a layer in white cardstock distressing around the edges and gluing onto my sign, adding the word Winter and some more white embossing powder.


Finishing off my card with accents of Flower Soft snow.

Thanks for stopping by today and good luck to everyone entering our Weekly Challenge.

Cheery Lynn Dies Used:


Crafty Hugs, 

Julie x


Wednesday, June 24, 2015

You Are Beautiful With Lisa Blastick

3:30 AM 1 Comments

Hi, It's another Wednesday with Lisa. Today, I'm sharing with you a new card for Cheery Lynn Designs. This week challenge is "anything goes" so I thought I would try to make a scenery in the summer. I used a Window, Ivy, Little Flowers, Butterflies, Fence, Grass, Clouds and A Little Bicycle. Whew! 
I haven't made a scenery card before, but I have seen many of them. Giving it a try myself, I can really appreciate all the love that goes into each tiny piece. 


There are 7 sets of red flowers diecut from the "Baby's Breath Flower Kit" I added liquid pearls in the center of the flowers. There are 4 "Ivy Flourishes" 2 layered on each of the top corners. The "Victorian Picket Fence' was cut to fit and 2 layers of "Grass Border" on top. They were also cut to fit the 5 x 6 card. The "Window A" was diecut in white and then glued to Kraft Cardstock. I then cut the window pieces out in a red patterned paper and then in the red cardstock for the windows. The red cardstock was crimped to represent window curtains. I then layered the top of the window with "Dutch Daisy Set" and finished it with a bit of black cardstock cut thin with scalloped scissors. 


The "Little Pink Bicycle" was cut 3 times in red, black and Kraft and layered on top of each other. I added 2 little clouds from "Clouds and Rain" and printed up the title from my computer. The tiniest butterfly from " Mini Dimensional Butterflies" was diecut in black cardstock, I added 5 of them to finish this summer card. 


Cheery Lynn Diecuts Used:


Thanks for stopping by today! Hope you enjoyed! 
Be sure to stop by Cheery Lynn Designs Blog and enter this week's challenge "anything goes" for your chance to win $20 at the Cheery Lynn Designs store
Have a great week!
Hugs, Lisa


Wednesday, June 3, 2015

You Sparkle So Much With Lisa Blastick

3:30 AM 4 Comments

Hi everyone!
Lisa back today. sharing a new card for Cheery Lynn Designs. It was inspired by this week's "Red, White, & Blue" challenge. The Fourth of July is my favorite holiday of the year! So I had to use all the fun diecuts and embossed plate I could get my hands on for this one card! :)
The card is 5x6 inches. I usually dont make this card on the side but I new that I had to show off the beautiful Patriot Swag on the perfect Victorian Picket Fence. 


I used two pieces of Curved Border Set to make the border on top. For the sentiment, I used three different fonts and printed it on cardstock. Then I diecut it with Pierced Stacker #4 and added 100 Stars of the sides. Party Balloons in the two smallest sizes in different patterned paper are in the background and I added embroidery floss for the strings on the balloons. Last but not least, I diecut the Chrysanthemum Strip, added a bit of shine with a jelly roll pen and final touch up with cream pearls in the centers to represent fireworks. 


The inside for writing your personal message I used the USA/Canada Embossing Plate. 
It was the perfect size for my card! 


Cheery Lynn Diecuts Used:


Thanks for stopping by today! Be sure to stop by the Cheery Lynn Designs Blog to enter our weekly challenge "Red, White & Blue" for a chance to win $20 at the Cheery Lynn Designs Store
See you next week! 
Hugs, Lisa

Saturday, May 2, 2015

Birdhouse Card by Julie Lavalette

3:30 AM 4 Comments

Hi Everyone, It's Julie here today. I immediately fell in love with the new Fancy Birdhouse die as soon as I saw it and gathered inspiration for my 7 x 7 card from feeding all the birds that visit my garden.


My background was made with shading Distress inks over cardstock, stamping on feathers to give a cloud effect and spritzing with water. I tattered the edges with a Distress Tool.


I layered my grass in two shades of green and shaded a little Distress Ink onto my fence to shabby it up a bit.


My Birdbath was layered twice with a little Silicone Glue added into the bath part to give some extra dimension and Distress ink added to it and my birds for shading.


My sign was cut out in white and the pole area coloured with a Black Copic Pen. I layered the oval area twice with Silicone Glue and stamped on my sentiment and added a little bird.


My branches and leaves were all shaded with Copic Pens and my Blossom had a little Distress Ink added into the centre with a little yellow Stickles.


My sun is made using the Sunflower die, colouring also with Copics and adding a little orange Stickles. My Birdhouse was cut out 3 times and shaded with Distress ink. I paper pieced the fence area twice and my roof three times to give the effect of being 3D.

Well I do hope you like my card which was a lot of fun to make. I have another few plans for the Fancy Birdhouse die which I will share with you over the coming months.

Cheery Lynn New Release Dies Used:


Other Cheery Lynn Dies Used:


Thanks for stopping by today and good luck to everyone entering our weekly challenge.


Julie x

Friday, March 14, 2014

Garden Gate Card

3:30 AM 13 Comments

Hello Everyone!

Corina here again for my second Friday post as March Guest Designer.

I wanted to share a Spring themed card that I made last week. I enjoy the snow here in Canada but now I am longing for Spring to come.

I pieced together two Cheery Lynn dies - the Garden Gate and the Victorian Picket Fence to create the front flaps that interlock. They worked so well together!

Once again, all my flower were cut out from white cardstock and then inked and sprayed with homemade shimmer spray. I added the trellis, greenery, hummingbirds, which also were all cut from white cardstock and a few pearls.

I would like to thank you for the positive comments last week on my first post. Please keep the comments coming!!

I used:
Garden Gate - B124
Victorian Picket Fence - B123
Trellis - B298
Tiny Things with Wings - B266
Horizon French Flair Boutique Stacker Frames - DL271
Tiny Flower Kit (Set of 3) - B376
Shasta Daisy - B310
Cuties 3 - B151
Cuties 1 - B149
Grass Border - B126
Ivy Corner Flourish - B315
Ivy Strip - B304
Olive Branches - B147
Sentiment Frame #1 - B189

Take care,
Corina Finley

Remember to Live, Laugh & Create!

Monday, December 2, 2013

Blessed is the Season with Rhonda

3:30 AM 2 Comments
Happy Monday crafty friends!  It's Rhonda here today to host the blog.

My card for today features some of my favorite stackers, the coved rectangle and a scalloped french flair! I actually was working with a bag of my scrap cuts from various projects. Sometimes when I cut something and think I will use it, I change my mind. I save each and every one of these in a goody bag for a future project.

"Blessed" (A2 sized card)

I started with my coved rectangle, added the fence, then layered my tiny doily and scalloped french flair for the sentiment.  It was adhered with pop dots so I could layer in the leaves and flourishes.

Some details...

Cheery Lynn Designs dies used:

Don't forget we have an all new challenge for you to play along with this week!  The theme is "Tis The Season" and you can find all of the details here.  There's a fabulous $20 prize to shop in the Cheery Lynn Designs store to be won!

Thank you for spending a few minutes with us here on the blog today!

Friday, November 15, 2013

Fall Garden with Guest Designer Jodi Baune

3:30 AM 3 Comments
Hello, Jodi Baune here and today I am sharing another fall card I created featuring my dies from Cheery Lynn Designs


I began my card by cutting the background from pattern paper using the Scalloped Coved Rectangle Nesting die, and the coordinating Silver Coved Rectangle from white cardstock.  Next I inked the Woodgrain Embossing Plate  with distress ink....I just rubbed the inkpad directly onto the embossing plate.  I then embossed the cardstock as usual.  The ink was stamped into the impression as it embossed!  Cool huh!


The stem for my Sunflower came from the Expandable Tiny Borders plate.  I just trimmed it to the length I wanted! Don't you love the tag?!  I'm so happy the set comes in a variety of sizes so I can chose the one that best fits my need! The wreath was created from flowers in the BAF#2 and BAF#3 sets.  The little Mum was created using several layers from the tiniest Darling Daisy!  The little Pumpkins are my favorite of the fall dies!  I cut each pumpkin twice, then trimmed the outer edge away and adhered the smaller portion with foam adhesive to add dimension.    All the leaves and flourishes were cut from white cardstock and inked with Ranger distress ink. 

Cheery Lynn dies used:

Thanks for stopping by!


Copyright Statement


All content, including designs, pictures and words are the exclusive property of the author of each blog post. Information shared here is for inspiration only and may not be copied for publication, competition or profit. Thank you for your cooperation.

SOCIAL MEDIA 2


Follow Us @jointhemakersmovement


All content, including designs, pictures and words are the exclusive property of the author of each blog post.
Information shared here is for inspiration only and may not be copied for publication, competition or profit. Thank you for your cooperation.