Showing posts with label Chicks. Show all posts

Saturday, March 31, 2018

Celebrate Easter with Cheryl Walker

1:00 AM 1 Comments
Hello Crafty Friends, Cheryl here with a sweet Pop Up Easter Card designed for Cheery Lynn Designs using some super darling dies they carry. LOVE the sweet bunny and chicks together, aren't they just darling???!!!! I think I used 9 Cheery Lynn Dies on this one...hehehe I really had a lot of fun designing this card to share with you all!

On my card I started with cutting the sweet bunny out using design papers for her. Next I did distress her and her dress.  She is so cute, love her! I will use her on other cards, not just for Easter. She does have one of the Tiny Flowers made from the tiny flower die. The chicks were cut using white card stock and then colored in with 2 yellow Copic markers. I can totally see them cut in a yellow batik or some kinda 2 tone yellow print card stock, and then distressed, that would be so cute. I did add eyes using the Viva Pearl Pen in black. Also another flower on one of the chicks.

Greenery was cut using the Olive branches and Flourish #3 dies, and cut with a olive tone card stock. I added little flowers made using the Tiny Flower kit to the greenery. I also used a LOVE Heart from the Sweetheart Candy die.

The frame was cut using 2 different dies for my scenery and sentiment. I chose to use the beautiful Mirror Mirror Doily Frame die, and the Scandinavian Oval Doily. Sentiment is from ODBD.

Cheery Lynn Designs Supplies Used:
C182 Easter Parade (girl bunny)
B528 Chicks (2 used)
DL307 Scandinavian Oval Doily cut in white
DL286 Mirror Mirror Doily Frame(used only the 2 small dies for the sentiment)
B147 Olive Branches
CAFLRS-3 Flourish #3
B675 Sweetheart Candies
B376 Tiny Flower kit
B934 Pop Up Celebrate
Cheery lynn Big Sister Die cutting machine
Best Glue Ever
Mini Platform S192 
Full Size cutting platform set S180 

Other supplies Used:
Design Paper Heidi swapp paper pad
Ribbons and foam squares, Scotch Tape are all from Really Reasonable Ribbon
Viva Pearl pens,
Copic Markers
Sewing machine
AC yellow card stock
I want to wish you all a Blessed Easter and thank you so much for stopping by and taking a peek at my card for today!
Hugs to all,
Cheryl

Monday, March 12, 2018

Easter Basket with Lisa Blastick

3:30 AM 0 Comments

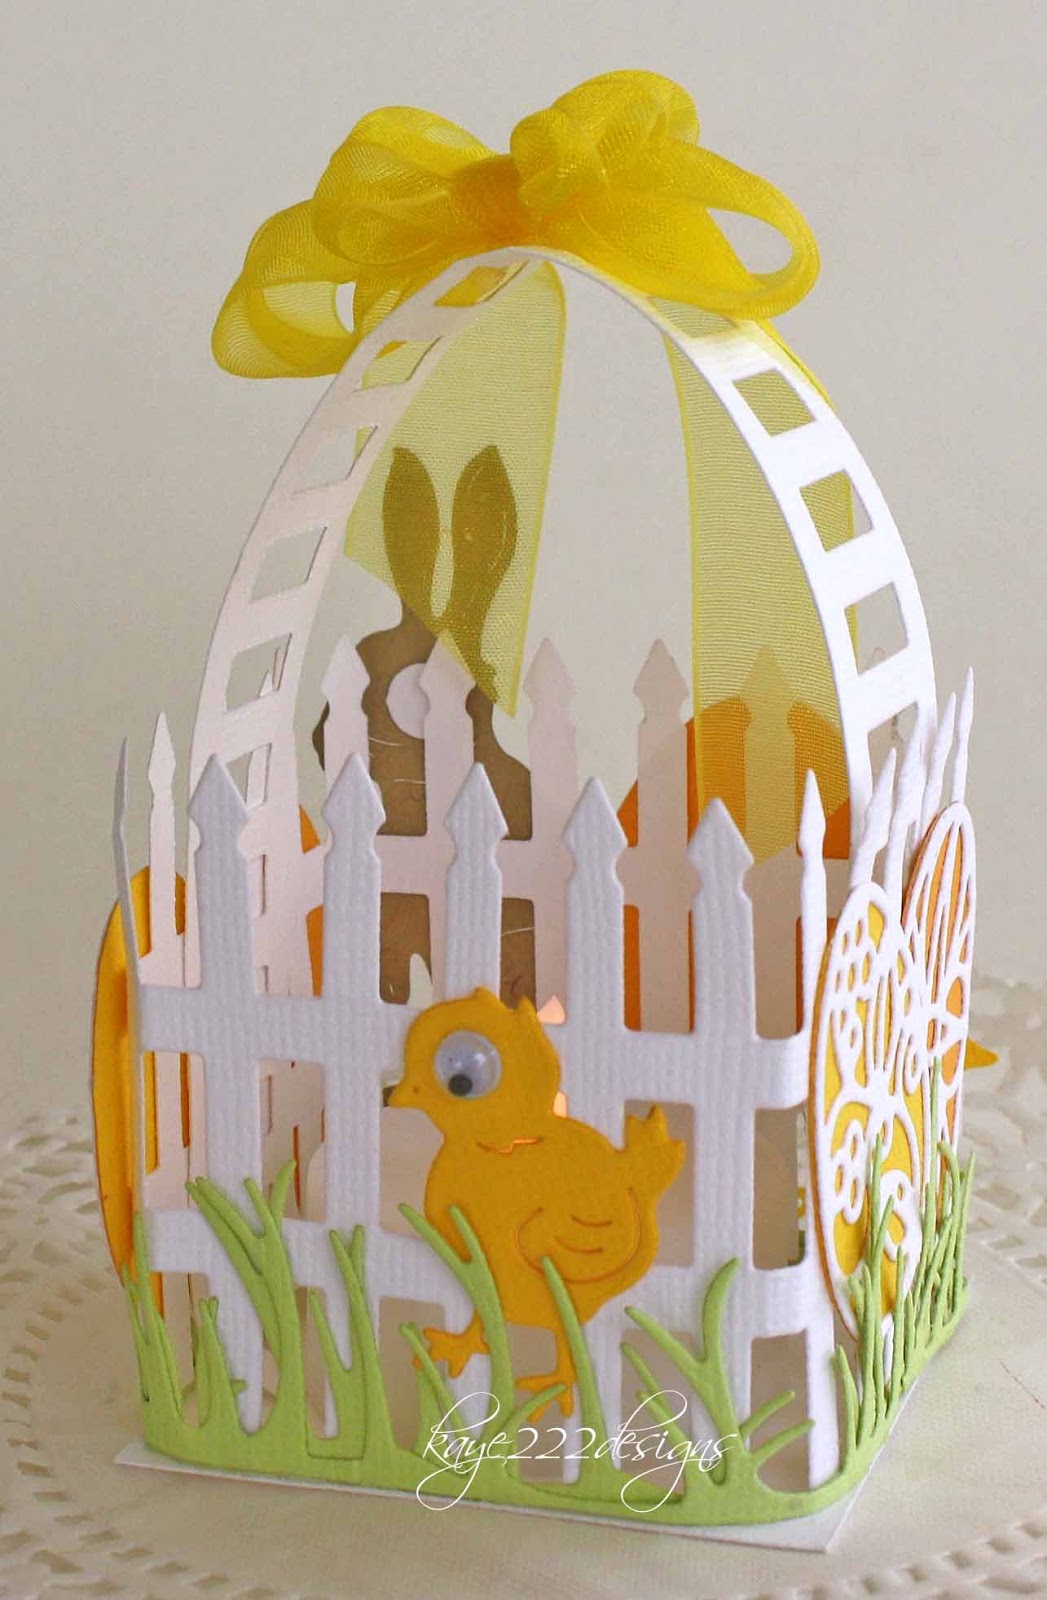
Hello! Thanks for stopping by today! Sharing a new Easter Basket this year using lots of Cheery Lynn Designs die cuts. I have been making several cards for the upcoming holiday and I made a couple of different baskets for treats and tea lights over the years. Today I have a new version of those adorable baskets that you can set on your table with tea lights or give away as mini treat gifts.


I used 2 sets of the victorian fence. One is scored every 2 inches and glued at the ends for the square basket. The other I used the center for the basket handle. I then added a 2.25 x 2.25 inch square on the bottom. Decorate however you like. I used grass twice around the bottom, easter eggs, bunnies and chicks. The animals always get googly eyes and lastly a sheer ribbon bow on top. 


A view with the tea light. Just love this basket!


Thanks for stopping by today!
Have a great week!
Hugs Lisa 

Monday, February 26, 2018

Baby Chicks Card and Treat Bag by Cherry Nelson

4:30 AM 0 Comments
Happy Monday my friends!  My day today here at the Cheery Lynn Designs blog.
Easter kinda crept up on me.  It's just a month away! 
I got out some fun springy goodies and went to work creating a card and matching mini treat bag using some fun dies from Cheery Lynn Designs.
 I used the Tags #1 and cut a negative image of the sweet Chicks three piece set.

 I did some hand stamping to add some detail.


Cheery Lynn Dies

Tuesday, April 4, 2017

Easter Egg Hunt by Julie Lavalette

3:30 AM 0 Comments

Hi everyone, it's JULIE here today and I thought I would share some inspiration for an Easter card in a vintage design.


Cheery Lynn have many cute Easter Dies that embellish our crafty designs so well. My sweet little chicks were diecut from a yellow patterned cardstock and I coloured their beaks and feet with Copic Pens and added a touch of Black Liquid Pearls for their eyes.


My rabbit was also cut in patterned paper adding a fluffy cotton tail and some Liquid Pearls also to his eye.


My Stackers were all layered up in different shades of paper adding a little cheesecloth behind my image.

Cheery Lynn Dies Used -

Thanks so much for stopping by today to see my card and I hope you have a lovely creative week.

Crafty Hugs,
Julie x

Saturday, March 26, 2016

Happy Easter by Julie Lavalette

3:30 AM 4 Comments
For our March Blog Hop Featuring IOE Plates and FRAME-IT Embossing Folders, please click HERE.  


Happy Easter Weekend to all our lovely followers. It's JULIE here today hosting the blog. Thanks so much to everyone for stopping by my own Blog for our current Blog Hop, I was overwhelmed with all your lovely comments. This week I have made a Spring card filled with Easter inspiration.


I started by layering 2 layers of paper onto my base card adding Stickles at the edge for a touch of sparkle. I layered on part of my doily as an accent, this helped my Basket pop from the design against the busy floral paper.


My Happy Easter was layered twice for a shadow effect, adding my branches and flowers which had been shaded with Copics.


My sweet Easter Chicks were shaded with Distress Inks. I coloured their feet and beaks with Copics and finished them by adding a little black liquid pearls onto their eye. Mounting them onto the Grass Border Strip.


My Basket I die cut in purple cardstock and then used our Special Effects technique demonstrated HERE to get the background. Layering in my Eggs with a touch of Silicone Glue and adding a little Satin Bow.

Thanks for stopping by today and good luck to everyone entering our Current Challenge - Anything Goes and please check out our current Blog Hop HERE.

Crafty Hugs, 
Julie x

Cheery Lynn Dies Used:

Saturday, March 12, 2016

Easter Cupcake Baskets by Julie Lavalette

3:30 AM 3 Comments

Hi Everyone, it's JULIE here today and I am sharing with you some Easter Inspiration using our fab new Cupcake die.


These cute little baskets which measure approx 3" diameter by 4" height are easy to make and once I worked out all the measurements it didn't take long to make the second one. So let me show you how to make them.


I started by cutting my Cupcake Wrapper from cardstock and added a double layer of grass to the base. To get the grass strip to curve around your cupcake die, layer on sections measuring about 2 inches in length, offsetting the grass on each layer.


For my base I used the 2 largest dies in the Circle Classic set. You will see in this photo I cut my die out and then drew around the outer part of my smaller die and fussy cut out some notches.


My Cupcake Wrapper I added a little bit of glue to the die cut join for added strength for the weight of my chocolate eggs and formed the shape of my cupcake. I then bent all my notches up on my circle and added a little glue to each one, pushing my circle down into my cupcake to form the base of my basket, pressing all the notches onto my cupcake wrapper.


This makes it all lovely and neat and the grass disguises the notches on the inside.


Next I added on my handle with some brads, you will notice I have the pretty side of my Brad to the inside of my basket as I hid the closure with a flower on the outside.


Now the fun bit of adding all my Easter Chicks, sweet Bunny and flowers.


I disguised my join on the cupcake wrapper be carefully placing a Chick or Bunny over the join.


I finished off my baskets with a pretty bow and some Chocolate Mini Eggs which had been gathered inside a Cello bag that we normally place our cards into. I tied with some Easter ribbon and a die cut Sweetheart Candy.


Cheery Lynn Dies Used:


Thanks so much for stopping by today and you still have plenty of time to join in our Current Challenge which is Doilies.

Crafty Hugs, 
Julie x 

Saturday, February 21, 2015

Easter Chicks Tutorial by Julie Lavalette

3:30 AM 4 Comments

Hi Everyone, it's Julie here today and I thought it would be nice to share an Easter card with Spring colours and these three gorgeous little Chicks from our recent CHA release.

Here are the steps on how to make it, this first photo shows the reverse side. 


Using the French Flair Scalloped die cut the largest die in Orange and Green cardstock. Cut the Orange layer in half, down the middle and attach with adhesive onto the back of your Green layer for a shadow effect around the edges.


Repeat this process using the second largest French Flair Scalloped die and Yellow and Striped Pattern Paper.


Die cut Happy Easter in Orange, Yellow and Green cardstock offsetting and adhering each layer together.


Die cut your Easter Chicks in Orange and Yellow cardstock again slightly offsetting. Lift the Yellow layer of wing slightly up. On the reverse of your Chick lightly press the point of a Black Pen into the centre of the eye. This now defines the eye area.


Die cut your Heart Oval in White Cardstock and mount Yellow card in the coordinating die cut from the Classic Ovals.


Cut out your Shasta Daisy Strip in White Cardstock and using your Craft Dauber or a small ball of cotton wool begin tapping some Scattered Straw ink into all the centres.


Once dry shape petals on a foam mat with a stylus tool. Assemble layers up to desired effect with adhesive. Finally adding a layer of Flower Soft into the Centres with adhesive.
Die cut the Leaf Strip in Green and shape leaves on a foam mat with stylus tool.


Using a square card 5"7/8 by 5"7/8 start to adhere you layers onto your card as in photograph. Adhere Happy Easter with glue onto the Oval Centre and then layer onto the card with foam pads.
Finally arranging and adhering on the Chicks, Leaves and Flowers to the card to finish.

Cheery Lynn Dies Used :


Thanks for stopping by today and remember to enter in to our Weekly Challenge and if you are a winner you will receive a $20 spending spree here at Cheery Lynn Designs.

See you all next week.

Julie x


Copyright Statement


All content, including designs, pictures and words are the exclusive property of the author of each blog post. Information shared here is for inspiration only and may not be copied for publication, competition or profit. Thank you for your cooperation.

SOCIAL MEDIA 2


Follow Us @jointhemakersmovement


All content, including designs, pictures and words are the exclusive property of the author of each blog post.
Information shared here is for inspiration only and may not be copied for publication, competition or profit. Thank you for your cooperation.