Saturday, April 30, 2011

Masculine Card with Cheery Lynn Designs Dies

3:30 AM 5 Comments
Can you believe that it is the last day of April already... spring is in full swing where I am at in Michigan (finally!) and that alone makes me feel so happy... but add to that the chance for me to stop in here at the Cheery Lynn Designs blog to share another card I created using Cheery Lynn Dies and I'd say life is pretty darn good right about now (not to mention the fact that it is also SATURDAY..yay!).

When I was putting together my thoughts about what I wanted to create today, I decided it was high time we tackled another masculine card. I don't know about you, but for me, creating cards for men is far more challenging than creating cards intended for a female recipient. 

For today's card you'll need a set of three stamps that are small enough to use together (these are DarkRoom Door stamps), a sentiment stamp, some Core'dinations cardstock, (I used Irish Mint from the Chocolate Box Collection), the Core'dinations Sand-It Gadget, the second, third and fourth dies from the Rectangle Cheery Lynn Designs Card-Maker's Stackers collection, Cheery Lynn Designs Lattice 1 die, Rustic White cardstock, ribbon (mine are from Papertrey Ink) and Baker's Twine (from Kraft Outlet). You will also need, ink (I used Ranger Archival in Coffee), and your favorite tabletop die cut machine.


Here's how to recreate this masculine card:
  1. Create 4 1/4 x 5 1/2 card base from Rustic White cardstock
  2. Cut a piece of Irish Mint cardstock to 4 x 5 1/4; emboss with Lattice 1 die and lightly sand to achieve the worn look.
  3. With the fourth die from the CardMaker's Stackers Rectangle die, die cut piece of Rustic White cardstock and adhere to embossed Irish Mint Cardstock; wrap with ribbon and Baker's Twine and adhere to card base.
  4. With the second die from the CardMaker's Stackers Rectangle die, die cut piece of Rustic white cardstock and stamp images as shown.
  5. With the third die from the CardMaker's Stackers Rectangle die, die cut piece of Irish Mint cardstock and adhere to back of stamped cardstock; adhere to card front with Pop Dots to add dimension.
  6. Stamp sentiment on piece of Rustic White Cardstock and adhere to card front as shown.
Cheery Lynn Designs CardMaker's Stackers dies make it so easy to create perfectly spaced layers with a cleanly embossed edge for your cards and other papercraft projects as well.  More examples of how I've used the CardMaker's Stackers dies for cardmaking are here, here, and here . Other examples of how I used the Lattice 1 die are here.

I hope you have a wonderful weekend and be sure to stop in at the Cheery Lynn Designs blog every day for more inspiration from the entire Cheery Lynn Designs Design Team!

Friday, April 29, 2011

Celebrating MOM

3:30 AM 11 Comments
Mother's Day is right around the corner, May 8, 2011.
Have you made your mom a card yet?
I have a cute card to share today. It celebrates all those trying dinners when your mom would tell you to EAT YOUR VEGETABLES.
This card is in remembrance of my mom.
When she was little, she hated peas! She called them those "squishy little green things."
I love to think of new things to doe with my VEGGIE TALES dies.
I sit and go through countless puns to use with them.
Here is what I came up with for Mother's Day.

Now before you get all excited, I do not think there are a mom and daughter duo on VEGGIE TALES. I just made this up with what I had.

I used paper from KAISERCRAFT called

Nan's Favourites

, it all came together perfectly.
Luckily Mama Pea wears about the same size clothes as MADAME BLUEBERRY, so we borrowed some things from her.

Now for my PUN! I ap"PEA"ciate you, get it? (I appreciate you)
Yes, I know I am so punny!
Here is the inside of my card.


I hope you have enjoyed my "SHOW & TELL" today. On a side note, it just hit me, my 1st grader always has Show & Tell on Friday's too! I will have to tell him we have that in common!
Until next time! Have a great day and EAT YOUR PEAS!!

Products used in today's project:

Thursday, April 28, 2011

A Layout from Liz

1:30 AM 6 Comments
Hello, I am so glad you are visiting with us on the Cheery Lynn blog.
Today I am going to share a LO I made of my oldest daughter who wears nothing BUT Aeropostale. I remember being her age and demanding that I only wear Guess jeans so I think this may be payback from my childhood.
I used lots of fabulous Cheery Lynn dies on this page, it was fun. :)


The cute little bicycle is one of our newer dies called Little Pink Bicycle. I think its adorable!


Here is my complete list of dies used:

Little Pink Bicycle
Floral Heart
Spring Fling Frame
Little Stackers Circles
Pretty Petal
Flourish
Basic Optimistic Alphabet Font
Pennant Die

Check back often for lots of ideas from the Cheery Lynn Designs DT!

~Liz

Wednesday, April 27, 2011

Cheery Lynn Designs Doily and Rosette card

3:30 AM 9 Comments
For my Cheery Lynn Designs project today, I decided to create a card using nothing but Cheery Lynn dies.  I started with a plum-gray card base 5 7/8" square.  To that I added a 5 5/8" panel of Cryogen white paper embossed with my Diamonds and Starburst embossing plate.  I love that I can emboss such a large panel without having to seam it together.  Next I moved on to my main focal point, starting with my English Tea Party Doily, I die cut a piece of the plum-gray card stock.  Next I added a Little Stackers Scallop Circle die, cut from Cryogen white.  This fits perfectly inside the center of the doily.

I have wanted to try creating a rosette from a border die ever since my fellow DT member, Irit, posted her tutorial.  So using my 12" Frills and Hearts border, I die cut a plum-gray piece.  Then I scored down the center of the hearts and on the points between the hearts.  Following Irit's directions, I joined the ends and flattened it, using a smaller Little Stackers Scallop Circle die to glue it in place (both top and bottom)  Here is a closeup of the rosette.  To create the starburst embellishment on the top of the rosette, I trimmed out the center of my Canadian Kaleidoscope Doily, die cut from the plum-gray card stock.  I added a pearl to the center for the perfect finishing touch.  I think this would make a fabulous topper for a gift box.

Now it was time to complete the card.  I cut another border panel from the plum-gray card stock adding a piece of Cryogen white paper that I added texture to using my Rectangle Large Stitcher plate.  This created a border piece for the center of my card.  I added some pearls to the four corners of the card and I was done.  This card has an amazing amount of texture and dimension.  I hope you like it!

Tuesday, April 26, 2011

More bits and pieces using CLD DIES

3:00 AM 7 Comments
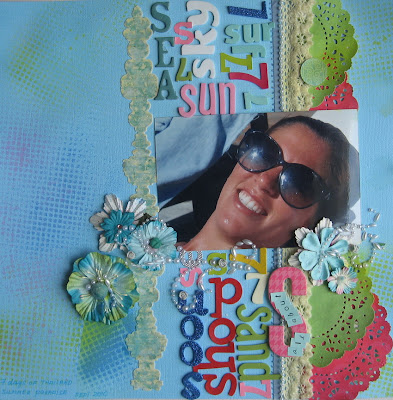
Another post showing  some of our great Cheery Lynn Designs Dies in action. Projects done using some of CLD dies on each one, but not too many of them - and still it make all  the difference! So here they are-2 LOs and one card this time

The first one is a lo named Catching the waves, done using this Sea Shells by the Seashore  border die, some as a photo frame and some as the single cut pieces of shells and I also used the seagull cut as a template for the birds on the upper corner and filled it with Ranger enamel paint

The second one is another Cameo card- this time I used the Frills and hearts border
and Little oval nested stackers here


The last one for this post is my lo called All about 7- and as you can see the CLD
French Pastry Doilies
Those dies are the real stars of this page and my DD too, lol 


So don't wait- grab yourself some great CLD dies and do some new and fancy projects with them too  

Monday, April 25, 2011

Another Day...

3:30 AM 7 Comments
Hey there CLD blog readers!! It's Tanisha here on this wonderful Easter Monday. Did you have a great holiday, yesterday? I celebrated as I have for the past few years...dinner with my in laws at a restaurant. It's great because we get to spend time together and no one gets stuck cooking or washing dishes...can't beat that, right?!

In the midst of prepping for the Easter Bunny's arrival, I put together this layout using a sketch that I found on the My Little Shoebox blog, Creative Imaginations Beach Cottage line (which is what was lying on my scrap table) and some fabulous CLD dies. I used the flowers from the Floral Hearts die, Dimensional Butterflies Bundles, Scalloped Diamonds Border, Little Stackers Scalloped Circles, XL Nesting Stackers Coved Rectangles, and XL Classic Circles Nesting Stackers to complete this layout.

The layering dies are wonderful and so easy to used. I didn't want to use the entire Floral Heart die, so I simply cut small strips of paper, taped them to the portion of the die that I wanted cut (in this case, the flowers) and ran it through my cuttlebug.

I layered several different size circles, a border, and the dimensional butterflies to add interest to the center of the layout.

Just look at the amount of detail there is in the dimensional butterflies. They make me want to reach out and touch each one.


Supplies used:


I hope you've enjoyed your visit to the blog!! Be sure to stop by during the week to see what the rest of the DT is up to!

Tanisha

Sunday, April 24, 2011

vintage nautical card - Kianel

3:50 AM 11 Comments
Hello good friends!
Kianel here with you today!
First of all i would like to wish everyone a HAPPY EASTER!!
That done, i can show you a birthday card i made for my little nephew in a vintage style. No patterned papers on that one, just backgrounds that i handmade with CLD dies and distress inks. Stamps are from Magnolia, Florilège designs and Eskiss design. flowers are from Prima. Lace is coming from my stash. All layers are on 3D pads to give more depth to the card.
To make the base of my card i used a white paper that i cut with "large stackers nesting die square" and embossed it too to get a frame. I then inked my paper with distress and stamped the text on it.
Here is the detail picture of the handmade background. i used the "old parchment" grunge embossing plate on a white cardstock that i had previously covered with blue distress ink. Once embossed, i cut it with the large rectangle stackers for cardmakers and inked it with darker blue ink and brown ink.


Detail of the font which size is absolutely perfect for the cardmakers. The font dies are used with white paper which is then colored with distress ink, stamped with a text and crackled to give it an older look.


Here is a close up of the dimensional buttons set 5, of which i used the 2 that fitted perfectly my nautical theme. There are embossed and cut in white paper and then inked with distress. The big one is tied with a rope bow and the little ones are fixed with copper brads. The same is done with the leaves with a mix of the small and the large set.


Finally, here is a close up to show you the frame i used to back my Magnolia "Edwin". I cut it out in white paper, stamped a text and inked. I then cut a piece of paper to fit the frame and make the background.


Here are the CLD dies i used on this card (click to go to the shop):
Square - Classic LG Stackers Nesting Dies Rectangle Buttons5
Large Embossing Pad Kit Old Parchment Slightly Script  5/8" Tall Upper/Lower Case
All Star Frame Dimensional Small Leaves #2 Dimensional Large Leaves #2
That's all for me and i am glad you stayed all the way long with all the pictures.
Have a nice Easter break and enjoy all the chocolate eggs! Don't forget to pop by everyday to discover the marvellous creations of my dt mates!
Lots of love from France, Kianel.

Saturday, April 23, 2011

Live Simply with Cheery Lynn Designs

3:30 AM 4 Comments
I just recently received the Cheery Lynn Designs 2 x 3 inch Hibiscus flower die.  I found it to be so beautiful in its' simplicity that I knew exactly what I wanted to do to highlight this little die cut.... create a card of course. The simplicity and beauty of this flower pairs perfectly with the sentiment of the card... to "Live Simply". (I should attempt to heed that advice!) :-).

Beth Moore
Directions to create this card:
  • Create a 4 1/4 x 5 1/2 inch card base from white cardstock.
  • Cut a 2 x 5/ 1/2 inch piece of white cardstock and emboss with Extra Large Damask Embossing Plate.
  • Adhere embossed cardstock to left side of card front.
  • Using the Hibiscus die, cut one flower from red cardstock and adhere to card front.
  • Using the Hibiscus die, cut another flower from red cardstock and adhere three of the red petals on top of the matching petals already on the card. Use Pop Dots to adhere the petals to add dimension.
  • Using the Hibiscus die, cut one flower from yellow cardstock and adhere stamen to front of card.
  • Using one of the Little Stackers Nesting dies Scalloped Oval die cut one oval from red cardstock.
  • Using  corresponding Silver Stackers Oval die cut one oval from white cardstock and stamp with sentiment.
  • Adhere sentiment to red scalloped oval and adhere to card front with Pop Dots.
Thank you for joining us today and be sure to check back in tomorrow and every day for more inspiration from Cheery Lynn Designs.

Friday, April 22, 2011

How to make cute, FABULOUS!

3:30 AM 7 Comments
Today I am going to show you how to make a fast and easy, hydrangea type, flower you can use for many different types of projects. I am going to use my hydrangea as a TOPPER for this adorable box of jelly beans.


Here you can see I have assembled most of the items I will be using.
I used one of the SCALLOPED CIRCLE dies that was slightly larger than the box lid. You will want to start with a slightly larger circle, than you want your flower to be, as the circle shrinks during the flower formation.


To start, take a sponge dauber and ink all the edges of your pieces. I have 6 circles and 3 butterflies (I will only use 2 of them though) After you have inked all the edges of your pieces, take them all and crumple them up.
Crumple only 1 butterfly.


Stack all the circles together and punch a hole through the center of the stack.


Insert a coordinating brad into the center and your flower should look something like the next image.


Starting with the top layer, crumple each layer, taking care if you have double sided paper, you are getting both sides to show.

When you are done crumpling you will end up with something of a ball shape. Gently loosen the layers to create a nice, full and fluffy flower. Let’s get ready to assemble our box now.


Using some decorative tape, cover the edges of the box lid and add the completed flower with butterfly attached to the top of the lid.


With the 2 butterflies, layer them with a piece of dimensional foam in between the layers and attach it to the flower.


This would be a great idea to give a friend, a neighbor or a child’s teacher.

It is just the right size to say “I’m thinking of you!”


Here is a close up of the final product.


As I stated earlier, you can use these flowers on a wide range of projects. The size of flower is determined by what size circle you are using. To give you another idea, here is the same flower, created as instructed above, but I smaller die from the Little Stackers set.


I made a custom sized bag/box, thinking they would make cute wedding, bridal or baby shower favors.


I hope you have enjoyed this tutorial, what will you make with these flowers?

A scrapbook page, a card? Be sure to let me know.
This has been Jeannie from THE POLKA CABANA, thanks for stopping by.

Products used in today's projects:


Copyright Statement


All content, including designs, pictures and words are the exclusive property of the author of each blog post. Information shared here is for inspiration only and may not be copied for publication, competition or profit. Thank you for your cooperation.

SOCIAL MEDIA 2


Follow Us @jointhemakersmovement


All content, including designs, pictures and words are the exclusive property of the author of each blog post.
Information shared here is for inspiration only and may not be copied for publication, competition or profit. Thank you for your cooperation.