
As we made an Exodus from Egypt- I used some Egyptian stamps here and we also call this Holidays spring and freedom one- so flowers and colors are for spring, butterflies are for freedom.
The big stitched circle was made with CLD Stitcher plate large Circle is a shape of the most expensive Matza bread and the square shapes are for the most common one type.
Those scalloped squares were made with Little Stackers Scalloped Square Nesting Dies, and then I added 2
French Pastry doilies- the blue one was cut for a center circle only, and I also used this Frills and Hearts border die again- fantastic border for any occassion.
And as always- the MUST adaptor plate - you need it, believe me, you just need it for better cutting- so go to our shop and enter it to your shopping cart! And add some doilies, stackers and stitching dies too- the best one I ever used!
And now for a small tutorial I promised to you.
Take your border die- I used Scalloped Diamond Border one, some fine paper strip, some glue and let's begin..
Folded flower tutorial
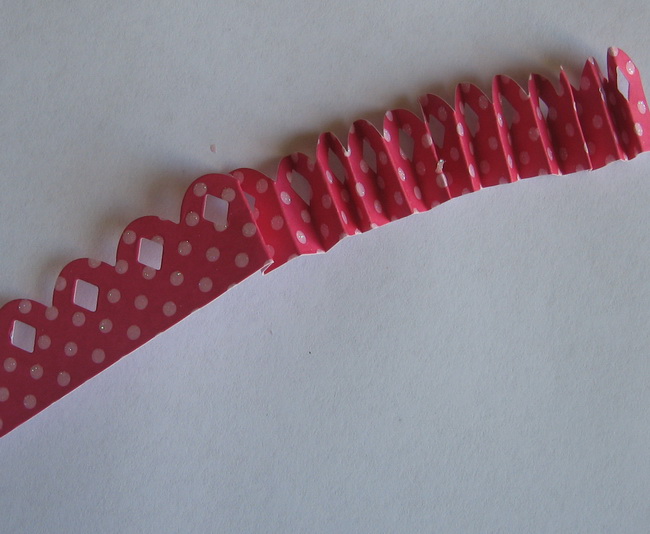
Step1. Cut a 1'' stripe from your favorite paper, die cut it with CLD border die
I used this Scalloped diamond border die- but it can be any scalloped die from CLD shop
 Step 2. Take the cut strip and begin to fold like an accordion fold- do it about 1/4 '' mostly- I know it's a bit hard with a cardstock, but then your flower will be stable more than with thin paper.


 Step 4:Now go to your stash and find some nice button, big crystal or small flower to use as your flower center. Enjoy it!

Now try to make some of those flowers by yourself and show them here. We really want to see what you can make from all those fancy paper strip you have for ages and one of Cheery Lynn Designs border dies.
I used this Scalloped diamond border die- but it can be any scalloped die from CLD shop


Fold your strip as shown here
Step 3.Get yourself 2 cardstock flowers and add some glue over the lower one, then glue the ends of your folded stripe as shown, I didn't use dies for those flowers, I just got them from somewhere, but you can also use one of our flower small dies for those parts of a flower.
Layer the flower over the glued flower and add another cardstock glued flower over the top of your folds.


Now try to make some of those flowers by yourself and show them here. We really want to see what you can make from all those fancy paper strip you have for ages and one of Cheery Lynn Designs border dies.


Irit, What a nice post. I love the flower with the Diamond Border. Great ideas!!
ReplyDeleteBeautiful Irit!! Thanks for the tut!
ReplyDeleteGreat job Irit and thanks for the tutorial too!
ReplyDelete