Showing posts with label Rhonda Van Ginkel. Show all posts

Thursday, March 26, 2015

Give Thanks and Farewell with Rhonda

3:30 AM 5 Comments
Thursday greetings to you! It's Rhonda here to host the blog today for one last time.

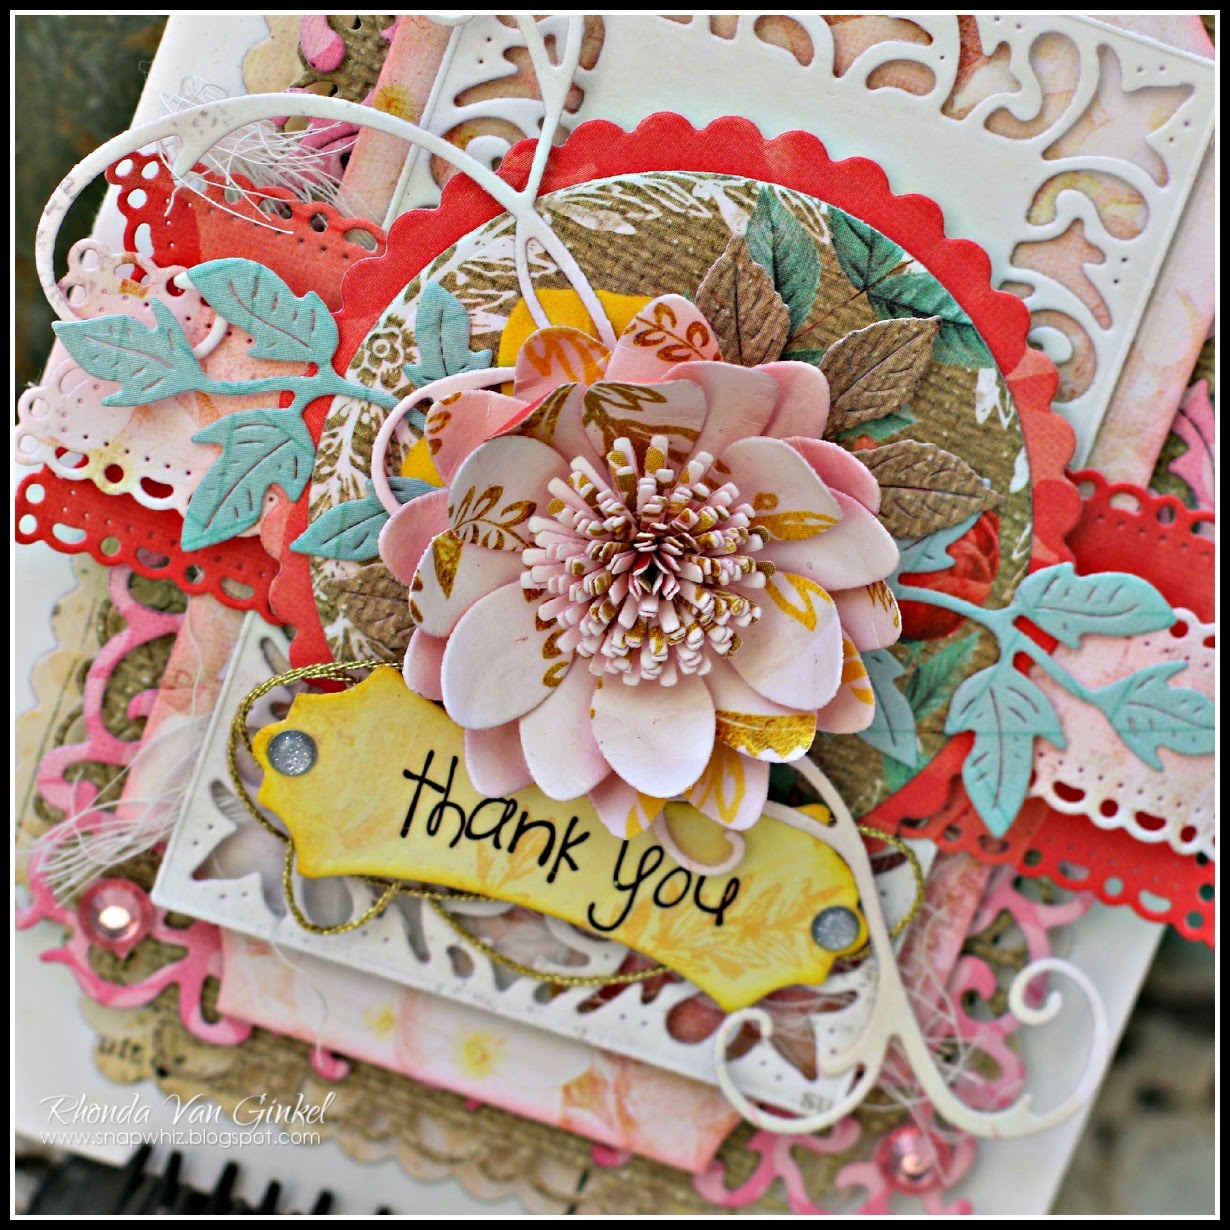
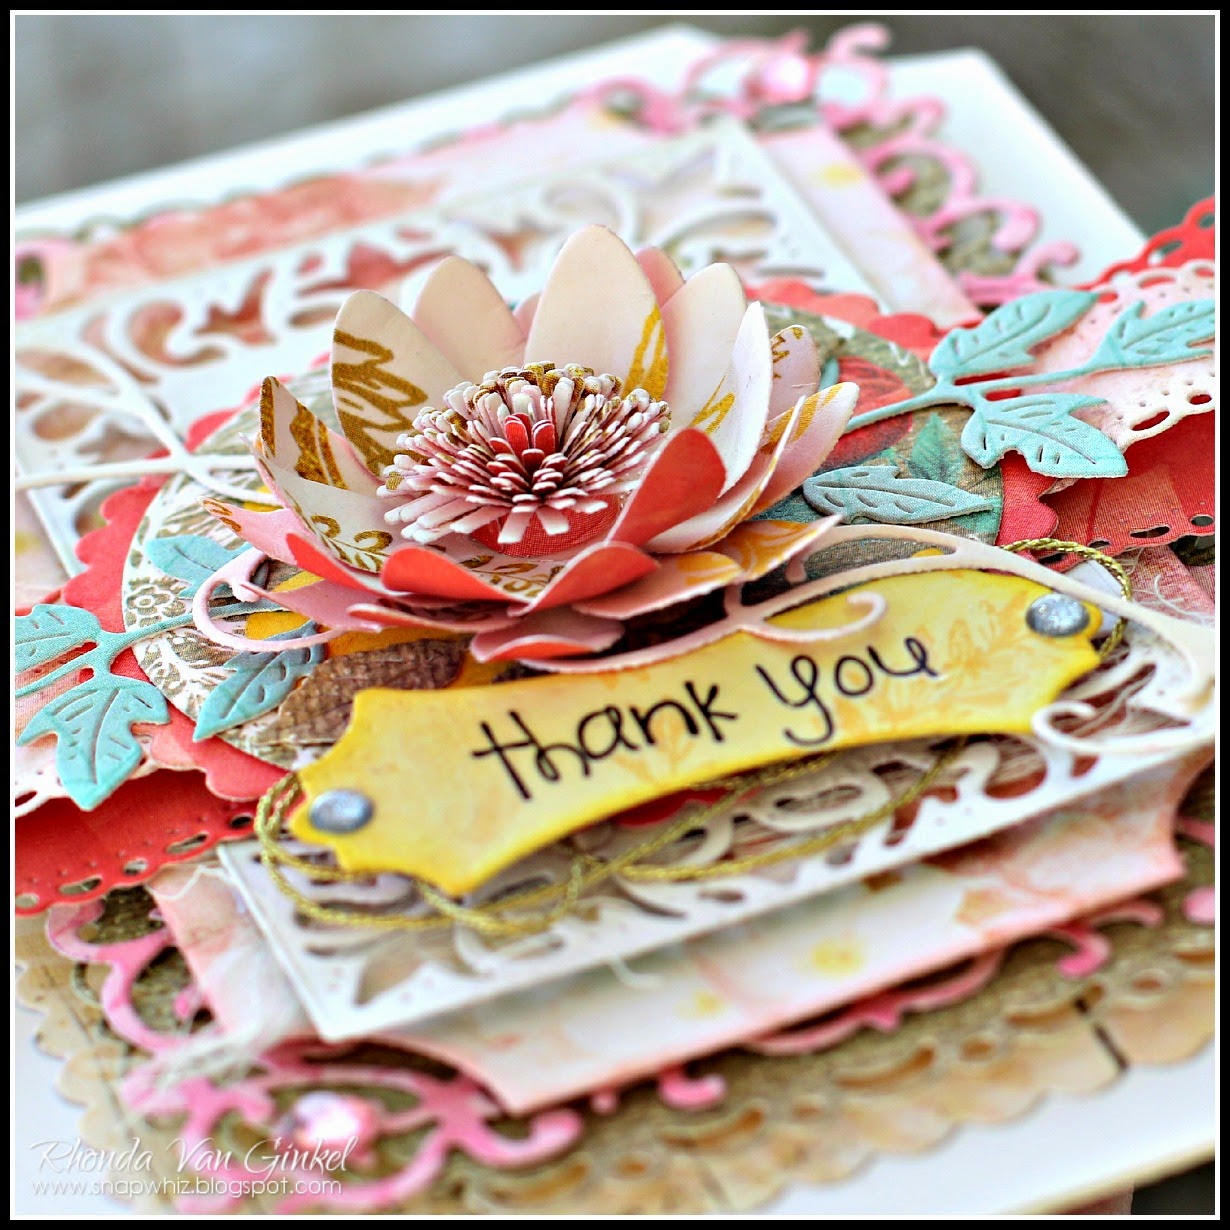
I selected the theme of "Give Thanks" for my card as I am extremely thankful for the opportunity to be a part of this amazing Design Team for over two terms. These dies are so very pretty, I just love using them!

"Give Thanks" (A2 Card)

I used a white card base and layered the Lord and Commons on first. Next I stitched it down in the inside border.  After that I cut a Horizon Coved Rectangle Boutique Stacker in medium and layered the Mirror Mirror Doily Frame on top. 


I cut an Oval Classic Stacker from vellum and layered it on top of the Mirror Mirror Doily Frame, then a cut using Chicken Wire and layered between the Oval center layer on top.


I added the Princess Tree, then the Cherry Blossom, Sweet Christine and Darling Daisy florals next, mixed in with the Sentiment Frame #2. The Ivy Strip and Flourish Leaves were added behind the florals. A few gems helped finish the card.


Cheery Lynn Designs Dies Used:
Mirror Mirror Doily Frame - DL286
Add A Flourish - B456
Cherry Blossom - B129
Darling Daisies - A196
Sweet Christine - B434
Flourish Leaf Strip - B178
Ivy Strip - B304
Princess Tree - B180
Oval Classic Stackers LG - XL-7
Chicken Wire - FRM144
Sentiment Frame #2 - B190

Please be sure to join our challenge this week, the theme is "Anything Goes", so get creative! You could win a $20 gift certificate just for playing along.

I wanted to take a moment to say thank you to Cheery Lynn Designs for having me and to you for all of the kind comments you leave. I have enjoyed every moment being a part of this wonderful team and company!

Thanks so much for stopping on over today!
~ Rhonda

Thursday, March 19, 2015

Nature Themed Dies with Rhonda

3:30 AM 7 Comments
Greetings and happy Thursday to you! It's Rhonda here today to host the blog for you.

For today's project I mixed a few of our nature themed dies (Happy Halloween Twiggy Wreath, Cattails and Reeds and Quill and Ink Pot) together with our pretty Lilith Edger and Dutch Daisy boutique stacker frames to mix things up a little bit. I think it takes on a soft and romantic feel.


I started with a base white A2 cardstock background, then added the Dutch Daisy Boutique Stacker Frame to it. Next, I cut a Cardmaker's Rectangle Scalloped, then used the Lilith Doily Edger on one side. Next, I cut the Happy Halloween Twiggy Wreath and the Horizon Fishtail Banners.


The medium Horizon Fishtail Banner is a bit long for the card, so I cut a little bit from the middle and adhered behind my pink Scalloped Rectangle and Edger cut layer. I cut the Coved Rectangle and adhered behind the pink Scalloped Rectangle. 


I used the Quills and tucked them under the banners, then the Princess Tree was layered as well and tacked down with the flowers arranged on top.  Here you can see the dimension of the Sweet Williams and Darling Daisies. The Tiny Fanciful Flourishes are tucked in under either side of the flowers.

Cheery Lynn Designs Dies Used:
Quill and Ink Pot - B369
Cattails and Reeds - B389
Princess Tree - B180
Happy Halloween Twiggy Wreath - B469 
Darling Daisies - A196
Ivy Strip - B304 
Horizon Fishtail Banners - DL278
Dutch Daisy Boutique Stacker A2 Frame - DL293
Tags 4 - B263
Sweet Williams Strip - B307
Tiny Fanciful Flourish - B387 
Coved Rectangle Classic Stacker - XL-10 
Lilith Doily Edger - B404
Card Maker Rectangle Scalloped - CM2 

Please join us this week for our new challenge, Celebrate! You can win a gift certificate to the online Cheery Lynn Designs store just for playing along!

Thanks so much for stopping on over to the blog today, have a super week!
~ Rhonda

Thursday, March 12, 2015

Lattice and Trellis with Rhonda

3:30 AM 4 Comments
Happy Thursday to you, it's Rhonda here today to host the blog and share a project.

Cheery Lynn has some gorgeous frame dies and I particularly like the Lattice background. I also really love the Trellis die, it always adds a bit of charm to your project.


I started with a white cardstock A2 base, then cut the Lattice Frame from light kraft cardstock and adhered. Next I cut the Polynesian Sails Oval in a pretty blue, then attached. The next layers are the Horizon Oval Boutique Stacker (medium) followed by an Oval Scalloped LG Stacker.

The Trellis was cut from kraft cardstock, as well as two different frames from the Sentiment Frame #2 set which I added a rub-on sentiment to. The top sentiment frame is adhered with foam dimensional dots so the Add A Flourish and foliage could be tucked in.    


The florals were arranged and a few smaller flowers were added from the Tiny Flower Kit. Some gems in a variety of colors finished the card along with a tiny bow.

Cheery Lynn Designs Dies Used:

Be sure to join us in our Easter challenge this week, you can find all of the details here. You could win a $20 gift certificate just for playing along. You can't win if you don't play!

Thanks so much for stopping on over today! 

Thursday, March 5, 2015

Springtime Mix of Layered Doilies

3:30 AM 5 Comments
Greetings and happy Thursday to you!  It's Rhonda here today to host the blog for you.

I have a creation today inspired by our current challenge theme of Doilies. The color scheme here is a nod toward Spring. I've also featured one of our pretty flower dies, the Black Eyed Susan Strip.

"Thank You"
Coved Rectangle Card for Cheery Lynn Designs by Rhonda Van Ginkel

The base of my card was created using the Coved Rectangle Silver Stacker on the fold of my paper. By placing the fold of my paper just inside of the die, it created my base card shape.

Coved Rectangle Card for Cheery Lynn Designs by Rhonda Van Ginkel

The next layers are the Coved Rectangle Scalloped - LG in a woodgrain paper, followed by the Horizon Boutique Coved Rectangle which is attached with foam dimensional. On top of that, I placed the Alpine Flourish Doily in pink followed by the Coved Rectangle Classic which was also attached with foam dimensionals.

The next layer is cut from the Card Maker Rectangle Classic, with the Dutch Daisy Boutique Stacker cut from the interior. On top of this you find the two layers of Horizon Fishtail Banners nested under the Scalloped Circle and Circle Classic dies.

Coved Rectangle Card for Cheery Lynn Designs by Rhonda Van Ginkel

The flower here is the Black Eyed Susan Strip and for the leaves, I chose the Flourish Leaf Strip as well as a few leaves from the Tea Rose Medium. The Sentiment Frame #1 and Add A Flourish along with a few gems completed the card. I adhered a bit of gold string under the sentiment as well.

Cheery Lynn Designs Dies Used:
Coved Rectangle Classic - Silver Stackers - L-10
Horizon Coved Rectangle Boutique Stacker Frames - DL251
Dutch Daisy Boutique Stacker A2 Frame (set of 4) - DL293

Please be sure to join us this week for our challenge - "Doilies"!  You could win a $20 gift certificate just for playing along!!!

Thanks so much for stopping on over for a visit today.

Thursday, February 26, 2015

Layered Doily Dies with Rhonda

3:30 AM 1 Comments
Happy Thursday crafty friends!  It's Rhonda here today to host the blog for you. My project today is a square card.

"Hello" (5x5 card)

I love the pretty layers of our doily dies and how they add such a delicate touch to your project. Here I'm showcasing a few of our newer dies, the Royal Scandinavian Doily and the Florence Filigree Doily. The steps that I used to create this card are:
  • To start I used a 5x5 card base in white card stock. 
  • Next I added the square scalloped layer.
  • This was followed by the Royal Scandinavian Doily in light pink card stock. 
  • Then I added the Florence Filigree Doily with foam adhesive for dimension. 
  • I cut a layer using the Horizon Circle Boutique Stacker medium die.
  • The Bird Cage was added on top.


  • Cut the Daisy Strip, misted lightly with water, shaped and formed the layers and adhered.
  • Add the Princess Tree and arrange under the Daisy.
  • Hummingbird was cut next, then cut the wing a second time and attach to behind the bird. Ink edges and attach with foam adhesive for dimension.
  • Final step is to cut the smallest Horizon Fishtail Banner and trim to fit. Add sentiment by stamping or using a rub-on. Shape and attach by tucking under the Daisy.
  • Finishing touches were to add a pearl for an eye on the Hummingbird and gems in the corners of the Royal Scandinavian Doily.

Cheery Lynn Designs Dies Used:

Please be sure to join us this week for our challenge, the theme is "Anything Goes".  You can find all of the details right here.

Thanks so much for stopping on over to the blog today!

Thursday, February 19, 2015

I Like You with Rhonda Van Ginkel

3:30 AM 2 Comments
Thursday greetings to you and welcome to the blog today!  It's Rhonda here to share a project with you.

Right now where I live, we are in the midst of a super sub zero arctic deep freeze. To brighten my spirits I decided to create a card with some cheerful colors and a hint of Spring to it.

"I Like You" (A2 Card)

I recently received a few new dies, one of which is the Dutch Doily Rectangle Frame and I wanted to use it. I layered it on top of a pretty cards tock base that had a floral design in the bottom right corner.

Next, I pierced the scallop interior holes in the Doily Frame for texture. I cut the Alpine Doily Flourish from a scrap piece of vellum and layered it in the middle of the frame.


Next, I cut several varieties of florals using the Sunflower, Embellishments #3, Sweet Williams Strip, Dandelions and Tea Rose Medium. I also cut a pair of Wheat Heads. I mixed up my Sunflower layers for fun. The Sweet Williams Strip florals were lightly misted, scrunched up and inked, then glued together.


I layered in the Bird on a Branch and then completed the card with a few crystals and pearls along with the sentiment frame at the top. A tiny bit of gold string added a little texture to the floral composition.

I hope you liked my card today!

Cheery Lynn Designs Dies Used:
Dutch Doily Rectangle Frame - DL130
Alpine Flourish Doily - (Set of 2) - DL282
Bird On A Branch - A167
Wheat Heads (Set of 2) - B388
Dandelion (Set of 2) - B453
Rose Leaf Strip - B241
Sweet Williams Strip - B307
Sunflower - DL121
Embellishments #3 - B265
Tea Rose Medium - B436
Sentiment Frame #1 - B189

Please join us for our challenge this week here on the blog, the theme is "Shaped Cards" and you can check out all of the details here.  You can win a $20 gift certificate to the online store just for playing along!

We also have a Design Team Call going on.  If you haven't had a chance to see the details, you can find all about it right here.

Have a super day and a creative week!
~ Rhonda

Thursday, February 12, 2015

Clean and Simple Valentine with Rhonda

3:30 AM 1 Comments
Greetings and welcome, it's Rhonda here today to host the blog for you.

I have card to share that is more clean and simple today.  I wanted to play along with our all new challenge "Tickled Pink", so I paired my pink sweetheart frame with a black square cardstock base.


I added a square scalloped LG stacker to the back of the card to frame it. The center square to back my sweetheart frame was cut from my square classic LG stackers. I shaped the Heart and Arrow and adhered with foam dimensionals for interest.

Cheery Lynn Designs Dies Used:
Heart and Arrow - B530
Sweetheart Frame - FRM127
Square Scalloped LG Stackers - XL2
Square Classic LG Stackers - XL1
XOXOXO - B375

Thanks so much for stopping on over today, be sure to play along with our Tickled Pink challenge this week if you have some time. You can win a $20 gift certificate just for playing along!

Have a wonderful week!
~ Rhonda

Thursday, February 5, 2015

Something Blue For You with Rhonda

3:30 AM 9 Comments
Welcome to the blog, and happy Thursday to you!  It's Rhonda here today to share my project with you for this week.

I really wanted to play along with our challenge theme for this week, "Add A Flourish", because the beautiful flourishes were how I fell in love with Cheery Lynn Designs dies. They are so elegant and add the perfect finishing touch to your projects.

 
For my project today, I used our Step Card die, the Alpine Flourish Doily as a layer element, topped with the Mirror Mirror Doily Frame. To frame in the design, I used the Southern Charm Valance on the bottom. It reminded me of a garden gate feel. 

 
I layered in a few various elements to mix things up, some cheesecloth, then Quills, Dandelions, the Medium Tea Rose and Small Tea Rose along with the Shasta Daisy to create the floral cluster. A Sentiment Frame #1 is used to anchor the sentiment flair.

Cheery Lynn Designs Dies Used:
Step Card - B348
Quill and Ink Pot - B369
Tropical Flourish - B127
Mirror Mirror Doily Frame - DL286
Southern Charm Valance - B454
Alpine Flourish Doily (Set of 2) - DL282
Rose Leaf Strip - B241
Tea Rose Small - B435
Tea Rose Medium - B436
Shasta Daisy - B310
Expandable Tiny Borders - B215
Dandelions (Set of 2) - B453
Sentiment Frame #1 - B189

Thank you so much for stopping on over today!  Please join us this week for our new challenge, "Add a Flourish". You could win a $20 gift certificate to shop at the Cheery Lynn Designs online store just for playing along.

We also have an active Design Team Call right now.  Please check out all of the details here! This is an amazing team to be a part of!

~ Rhonda

Monday, January 26, 2015

Vintage Themed Card with Rhonda

3:30 AM 4 Comments
Monday greetings to you!  It's Rhonda here today to host the blog for you.

I have a vintage themed card to share with you today as it's one of my favorite style of card. There are several layers of our stackers as you can see, from our A2 Frames in Classic and Scalloped to the Coved Rectangles in Classic and Scalloped.


The Alpine Flourish Doily was the perfect size to layer into the design here. You can also hopefully see the subtle hint of snowflakes which are cut from vellum here.


Since the vintage image I've used includes thread spools in it, I used a tiny wooden one I had found in my local craft store. It is wrapped with a cut from one of our Tiny Expandable Borders and secured with glue.  I then used it with a stick pin for an embellishment with my florals.


Details of the floral cluster.


I finished the interior of my card simply with our new Dutch Daisy Boutique Stacker, then cut it again using the A2 Frames Rectangular Scalloped die to create the border. The Thank You #2 was added as the final step. 

Cheery Lynn Designs Dies Used:
A2 Frames Rectangular Scalloped (Set of 7) - CM6
Coved Rectangle Scalloped LG - XL-11
Snowflakes - C146

Please be sure to join in this weeks challenge "Anything Goes!"!  It's always really fun and just so inspirational to see all of your creativity!!! You could be the lucky winner of a $20 gift certificate just for playing along too!

Thanks so much for stopping on over to the blog today.  Have a fabulous week!

Monday, January 19, 2015

Masculine Valentine with Rhonda

3:30 AM 5 Comments
Happy Monday to you!  It's Rhonda here today to host the blog and share my project with you.

I thought it would be fun to play along with our challenge theme for this week "Sweethearts - (Add a Heart)" and created a masculine themed valentine card.

"XO" (A2 Sized Card)

I started with the Dutch Daisy Boutique Stacker cut from white cardstock, then used the A2 Frames Rectangular Scalloped cut from kraft card stock for my next layer. Then, I used the A2 Frames Rectangular Classic and cut it from white cardstock to alternate my color scheme.


Using the rectangle cut, I then cut the pretty intricate Dutch Daisy Boutique Stacker by adhering the die to the center with some Washi Tape. You can see the result below.


For my center cluster, I cut one Celtic Heart from kraft card stock, then using a pencil, lightly outlined the shape on white card stock. I trimmed and backed the design with white card stock, then adhered with foam dimensional adhesive.

Next, the smaller of the Two of Hearts was cut from kraft card stock and adhered with dimensional adhesive as well. I thought it would be pretty to cut one of the delicate Arrows and tuck it into the top heart.

I added the ribbon and branches to the top, then finished by adding pearls to the corners and to the heart along with my XO sentiment.

Cheery Lynn Designs Dies Used:
Dutch Daisy Boutique Stacker A2 Frame - DL293
Arrows (5 Dies) - B467
Celtic Heart - B144
Two of Hearts - DL128
Pine Branches - B146
A2 Frames Rectangular Classic (Set of 7) - CM5
A2 Frames Rectangular Scalloped (Set of 7) - CM6
XOXOXO - B375

I hope you are inspired to play along with us for our new challenge - Sweethearts! You could win a $20 gift certificate to our online store just for playing along! 

Thanks so much for stopping on over - have a super week!
~ Rhonda

Monday, January 12, 2015

Happy Easter Card with Rhonda

3:30 AM 9 Comments
Greetings and Happy Monday to you!  It's Rhonda here today to host the blog and share a project with a few of our new release dies.

My project today is a spring themed Happy Easter Card (A2 size).  This card is a tent fold which I cut from some patterned paper. To begin, I trimmed the card (11" long x 4.25" wide), then folded in half.


Once I had the base prepared, I used the striped pattern section on the left to feature the Dutch Daisy Border Set #1 and cut the design vertically about 1/2" in from the left. I then cut a liner (10.75" long x 4" wide) for the inside of the card from a pretty blue and adhered on the inside.

The Grass Border was cut a few times and I attached a simple line border to anchor the basket. The extra cut was cut apart to provide some basket filler for behind the Easter Bunny.

The Spring Basket was cut, then I traced the bottom portion of the basket to create my blue liner in the basket.

I cut two sentiments from contrasting colored papers and adhered them a bit offset to create a shadow. 


The Easter Bunny was cut from white cardstock, the edges inked with Antique Linen Distress Ink and some papers added to the back of the egg for interest and a few gems to brighten up his eyes. I also added a bit of vellum behind his foot for interest.

To finish the card I added one of our Pretty Pretty Bows in a vibrant color.  

Cheery Lynn Designs Dies Used:
Happy Easter - B529 (New Release)
Easter Bunny - B525 (New Release)
Dutch Daisy Border Set #1 - B521 (Set of 3) - (New Release)
Spring Basket 1 - DL214
Grass Border - B126
Pretty Pretty Bows - B422

Please join us this week for our all new challenge "Snowflakes". You could win a lovely prize just for playing along! We are also looking for some Designers - both Guest and Regular Design Team, so check out the post for more information.

Thank you for stopping on over today!
~ Rhonda

Monday, January 5, 2015

Dream a Little Dream with Rhonda

3:30 AM 1 Comments
Happy Monday to you!  It's Rhonda here today to host the blog for you.

Today's card features the Dream Catchers #1 die which I think is so intricate and pretty.  I thought it would be fun to showcase it as a focal point.


To begin, I started with Fiona's Magic Mirror Frame for my base layer, then the Swedish Spring Oval, topped with the Circle Horizon Boutique stacker, then the Dream Catchers #1.


I cut the Dancing Snow Flurries from white cardstock and then trimmed it apart to tuck in on the top and bottom of the card.

Cheery Lynn Designs Dies Used:
Fiona's Magic Mirror - FRM140 
Swedish Spring Oval Frame - FRM135
Dream Catchers #1 - B317
Horizon Circle Boutique Stacker Frames - DL272
Dancing Snow Flurries - B486

Thanks so much for stopping on over today for a visit!  Please be sure to join us this week for our new challenge,  "Winter Whites".

You could be the lucky winner of a $20 shopping credit to shop in the Cheery Lynn Designs online store just for playing along.  You can't win if you don't play, so let's see your lovely creations.

Have a fantastic week!
~ Rhonda

Monday, September 29, 2014

Happy Holidays Tag with Rhonda

3:30 AM 3 Comments
Happy Monday to you, it's Rhonda here today to host the blog.

I have a little holiday tag inspiration for you today featuring one of the newer release dies, the Happy Holidays Hanger.

For fun I used a bit of non traditional holiday color scheme.

I used the Scalloped Rectangle die to create my tag base. Next I added the Horizon Coved Rectangle, cut it apart and layered the Swedish Spring Oval Frame in a horizontal position.


You'll see some delicate snowflakes cut from vellum and accented with tiny bling. The Happy Holidays Hanger sentiment in a bright color and the Pretty Pretty Bow finish the design along with some seam binding ribbon and hemp bow.

Cheery Lynn Designs Dies Used:

Please join us this week for our all new challenge - Lace (real or faux).  You could win a $20 gift certificate to the Cheery Lynn Designs online store just for playing along!  You can't win if you don't play, so let's see those entries!!!

Thanks so much for stopping on over today.  Have a fantastic week!

p.s.  I did want to mention that I am going to be taking a short break, but will be back soon.  Thanks so much!

Monday, September 22, 2014

All About Flowers with Rhonda

3:30 AM 3 Comments
Happy Monday to all of our Cheery Lynn Designs crafty friends! It's Rhonda here today to host the blog for you. If you're new to Cheery Lynn Designs, welcome!

Have you seen the new challenge theme for this week? It's all about Die Cut Flowers! I wanted to feature some of my favorite floral dies on my card this week.

"Always" (A2 Vertical Card)

My card features our Dandelions, Tea Rose Small, Tea Rose Medium and Sweet Christine flowers. The anchor of my design is the Ankara Lace Doily with Angel Wing. 


I used a bit of Diamond Stickles on the Dandelion tips for interest.  Some cheesecloth and a raffia bow were final touches along with the Add A Flourish that I tucked between my Sentiment Tag 2.


A few little pearl accents complete my card.

Cheery Lynn Designs Dies Used:
Dandelions (Set of 2) - B453
Sweet Christine - B434
Tea Rose Small - B435
Tea Rose Medium - B436
Ankara Lace Doily with Angel Wing - DL232
Ankara Lace Border - B332
Sentiment Tag 2 - B425
Tags 4 - B263
Horizon Fishtail Banners - DL278
Add A Flourish - B456
Card Maker Rectangle Classic - CM-1
Fancy Corner Cuts 4 - B431
Ivy Strip - B304

We would love to see your Die Cut Flower creations too!  Why not play along with this week's challenge?  You can check out all of the details here and be in the running to win a yummy prize.

Thanks so much for stopping on over today, have a fabulous week!
~ Rhonda

Monday, September 15, 2014

Patriotic Page with Rhonda

3:30 AM 3 Comments
Greetings and welcome to the Cheery Lynn Designs blog!  It's Rhonda here today to host the blog.

I made a patriotic page today featuring a photo of Mt. Rushmore that I took when we were on vacation this summer. There was something so patriotic and majestic about seeing the monument in person.


I started with an 8x8 piece of white cardstock and used Fancy Corners #4 on the corners. Next, I used the Scalloped Rectangle and aligned it to cut a 7x7" square. (This is one of the Reflections Boutique dies.) At the top I used a Victorian Romance Flourish as a hanger type of element in between my layers. Lace Heart Square is next.


I had some pieces left from my project last week, so you will see the Foliage Embossed white cardstock and French Lattice on top, tucked under the Southern Charm Valance on the right.


To anchor my photo I used the Polynesian Sails Oval, then layered a medium Horizon Oval Boutique Stacker with foam squares. The photo is then attached with foam squares. This gives me a lot of area to layer my cuts. On the bottom you'll see a snip of Sophia's Heart Border, another piece left over from a previous project. 

Layered on the right are the Quills and a Wheat cluster, topped with the Star and Birds of Earth and Sky. To the left of that is a Branch. There are Cloud cuts layered under the photo and one attached with foam squares. 

Cheery Lynn Designs Dies Used:
Fancy Corner Cuts #4 - B431
Scalloped Rectangle - DL199
Lace Square Heart - DL189
Polynesian Sails Oval - DL153
Clouds and Rain - B320
Stars (Set of 3) (Utility) - QF120
Horizon Oval Boutique Stacker Frames - DL252
French Lattice Small - FRM132
Foliage Embossing Plate - E127
Victorian Romance Flourish - DL151
Sophia's Heart Border - B333
Wheat Heads (Set of 2) - B388
Quill and Ink Pot - B369
Southern Charm Valance - B454
Birds of Earth and Sky - B349
Branch (Set of 2) - B466

Please join us this week for our all new challenge "Things with Wings".  You could win a gift certificate for $20 to the online store just for playing along! You can't win if you don't play. 

Thanks much for stopping on over to the blog today.  It's always a pleasure to see you visit and read your lovely comments.
~ Rhonda

Monday, September 8, 2014

Missing You with Rhonda Van Ginkel

3:30 AM 4 Comments
Monday greetings to you, it's Rhonda here today to host the blog for you.

I have a "Missing You" sentiment card to share with you today.  My card was created using a variety of our pretty dies. One thing that I really love to do is mix and match our dies.

"Missing You" (A2 sized card)

I started by cutting the medium Horizon Square Boutique Stacker, then scored and folded it.  I adhered to the back. Next, I layered under on the front the French Lattice Small and on top of it, half of a Kiwi Spirit Doily. 


I cut the Southern Charm Valance from cardboard of a cereal box, then added a coat of gesso. It was adhered with some glossy accents on the lines and vines.  I left the right center side open so I could layer in my Sentiment Tag 2 and Horizon Fishtail Banner.

I've shaped my Horizon Fishtail Banner to add a bit of dimension and charm. My Tea Rose flower was first embossed using the Foliage Embossing Plate, then cut, shaped and inked lightly. I tucked in the Mini Fanciful Flourish and added the petite florals from Embellishments 3 to add a bit of a delicate touch. Pearl centers finished the flower along with a few little stick pins.

Cheery Lynn Designs Dies Used:

Please join us this week for our fabulous new challenge "All About Texture"!  You could win a $20 gift certificate to the Cheery Lynn Designs store just for playing along!

Thanks so much for stopping on over to the blog today.  Have a fabulous week!

Monday, September 1, 2014

Romantic Criss Cross with Rhonda

3:30 AM 7 Comments
Happy first day of September to you.  It's Rhonda here today to host the blog.

I have a criss cross style card to share with you today. This style of card is fun to create as you get a decorative envelope and another sweet little card to go inside.


Once I assembled my base piece, I used our Card Maker Rectangle Classic to cut my pieces for the front. I then used the Lilith Edger Doily die on my angle.  You see the Anastasia Border peeking out on the sides and bottom.


The Fiona's Magic Mirror fit perfectly inside to create the base for my card. The other layers were used with Card Maker Rectangle classic and scalloped. The little tags were layered and tucked in to create a little tab to help pull the card out.


I've used a variety of flowers here for interest and texture along with the Rose Leaf Strip and Flourish Leaf Strip.  I hope you liked my creation today, it was really fun to create this card.

If you would like to make one of these cards, I will share the link on my blog.

Cheery Lynn Designs Dies Used:
Card Maker Rectangle Classic - CM-1

Please join us this week for our all new challenge, "Hearts A Glow".  You could win a $20 gift certificate just for playing along!

Thanks for stopping on over to the blog today.  Have a wonderful week!
~ Rhonda 

Copyright Statement


All content, including designs, pictures and words are the exclusive property of the author of each blog post. Information shared here is for inspiration only and may not be copied for publication, competition or profit. Thank you for your cooperation.

SOCIAL MEDIA 2


Follow Us @jointhemakersmovement


All content, including designs, pictures and words are the exclusive property of the author of each blog post.
Information shared here is for inspiration only and may not be copied for publication, competition or profit. Thank you for your cooperation.