Showing posts with label tag. Show all posts

Tuesday, December 26, 2017

Feliz Navidad with Jenny Alia

3:30 AM 0 Comments

Good morning!  I made a number of gift tags this Christmas.  This was quick to construct but with the colors and gorgeous font of the Feliz Navidad die, it dresses up simple gifts perfectly.  The holly is part of the same die set and with a little bending of the edges of the leaves the leaves really spring to life.  I popped the circle up using foam adhesive for extra dimension and added snowflakes and red pearls for holly berries.  


Cheery Lynn Dies

Thank you for stopping by the blog today.  Happy New Year!
Hugs, Jenny

Sunday, September 3, 2017

Mixed Media Create Dreams Tag by Amy Voorthuis

3:30 AM 1 Comments
Good morning lovely fans.
Oh boy, can you create your own dreams! You can if you just believe in yourself. This tag was created using all products from every design team I work for with a spotlight on Cheery Lynn Designs of course. I totally went overboard using mixed media products and I had so much fun making this tag.

The amazing film strip die I used here I got in one of my last allotments and it was on my wish list since it got released....so glad I finally got it.  

Create Dreams Tag: 


First I got out a piece of white cardstock and cut it in a tag shape. Then I added some black gesso, clear crackle paste and teal acrylic paint and layered those on top of each other after drying them first. When all was dried I placed a stencil and added some granite paste to my tag. Then I cut out all the dies I was going to use {only three this time} and placed them on my tag how I liked.
  On the centers of my flowers I used some metal embellishments and I finished my work by adding some sprays and sequins.  Oh, and not to forget I also made stitch like stripes on my title to make it pop a little more.  


Thank you so much for visiting the blog today!
I hope you enjoyed my post and I have inspired you to use your Cheery Lynn Designs dies. You could also visit my blog at Amy's Pretty Papers for more inspiration.
Have a wonderful and sunny day!

Tuesday, June 13, 2017

Thank You Beautiful Tag by Amy Voorthuis

2:30 AM 1 Comments
Goodmorning Cheery Lynn Fans.
Today I am sharing another tag with you all. I am totally hooked on those at the moment! This time I used three Maja Design collections to make my tag.  The green shades are from both "Vintage Autumn Basics"& "Summertime" collections and the rest of the card is made with my favorite "Nyhavn" collection. It's kind of an Autumn card I think because I used berries and other Autumn elements like cones and a lot of leaf dies. 

Thank You Beautiful: 
I just really love all the leaf dies Cheery Lynn Designs offers and I used a whole bunch of them on my tag. They are great for layering and to use in your flower clusters. For this tag I cut out the wreaths, both the Halloween and the Joy to the World and layered them on top of each other for dimension.  Then underneath I added another paper sheet from the "Nyhavn"collection and lifted it with foam tape. 

Then I added some white berries and twigs on the right side of my tag for fill along with layers of leaves and flowers at the end. The center of my flower is not handmade but I am going to make them in the near future myself. Lately I am also really loving to add flairs to my work especially the flair from Cuts2luv they are amazing to work with and they have great designs too. 
Cheery Lynn Design dies used:

Thank you so much for visiting the blog today!
I hope you enjoyed my post and I have inspired you to use your Cheery Lynn Designs dies.
Have a wonderful and lovely week!

Saturday, February 4, 2017

Mixed Media Create Tag by Amy Voorthuis

3:30 AM 8 Comments
Good morning lovelies. 
Today I would like to share something totally different than I normally do!
This time I made a mixed media tag using the pretty steampunk dies that Cheery Lynn Designs offers.  I cut out all the dies with thin cardboard and placed them on my gessod tag which I first pasted a gear stencil on. Then I sprayed some peacock shimmer spray on my tag. 

Create Art: 
 Later on I placed the word create on the bottom of my tag and colored it with different paints then I placed some word stickers above the word to make it more like I wanted it to be. 


Cheery Lynn Design dies used:

Thank you so much for visiting the blog today!
I hope you enjoyed my post and I have inspired you to use your Cheery Lynn Designs dies.
Have a lovely weekend.....

Friday, July 29, 2016

2016 Fall & Winter Holiday Release - Part 2 Halloween Catoween Tag by Ginny Nemchak

3:00 AM 13 Comments


Hey there Paper Peeps! Ginny here dropping in to share a fabby project I created with the new release dies!

I had lots of fun with this tag....and you know I love cats so it's just purr-fect for me lol. I started with a simple layered base 4 x 6 of black cardstock with festive and fun Halloween paper attached with chipboard spacers. I've also notched the corners.
I super love this Whimsical Halloween Cat 4 piece Set.  I wanted to layer this cute kitty over patterned papers so I added a French Pastry Doily and cut a small circle in more neutral pattern to display him. I also used foam spacers to build it up off the surface. 
There's a bit of coordinating bling in the background along with some fabby matching ribbon and to make this arrangement perfect I added Feathers cut from the background paper and embellished with a bit of Stickles.
Rather than using the entire sentiment from the die set I elected to just use the Cat-O-Ween part and created a bit of a banner curled to add dimension and  attached with tiny wooden clothespins.  I gave this cool cat a little bling for his bow tie to coordinate with the larger blingy accents in the background. Last but not least I wrapped a bit of twine around the bottom of the tag.
 ~Cheery Lynn Designs Supplies~

And don't forget that for the next four days when you buy any two of the fall and winter new release dies (Winter, Christmas and Halloween) you will get a free Sweet Candy Cane die.  
Okay that's all for me. Wishing you all a happy and productive day with lots of time to be creative : ) G

Wednesday, March 25, 2015

A FLORAL TAG BY ANITA KEJRIWAL

3:30 AM 9 Comments
Hello to everyone!!!!
Happy Wednesday to all !!! Before I begin with my work, I want to tell you that this will be my last post for Cheery Lynn designs. It has been  a happy journey at the Cheery Lynn blog. I got to know so many new friends and the oppurtunity to create lovely projects with the CLD dies. The love and appreciation that I got here cannot be measured in words. So please keep visiting my blog and continue to shower me with your good words.
Now , here as my last project, I have made a tag for you, adorned with flowers. These are mainly cornflowers and I love these blue blooms. With them are lots of pink shasta daisy buds.  I have shaded the corn flower petals with copics. The base of doily gives it a delicate effect. The complete list is given below. Do leave a comment and let me know how you like it.


The list of dies

Build a Flower #2  B 187
Shasta Daisy-B310
Flourish leaf strip B178
English tea party doily DL 101
Lords and commons doily set of 2
paper is from Prima
stamps- Justrite

The new challenge at the Cheery Lynn design blog is Anything Goes. So do send in your entries.
Once more I bid goodbye. Wishing you  all loads of happiness. And thanks for everything.


Wednesday, January 21, 2015

A SWEETHEART TAG BY ANITA KEJRIWAL

3:30 AM 4 Comments

Hello dear friends !!!!!
It's Anita here with my weekly wednesday post and keeping in tune with the season, I have shared here a very romantic valentine tag made with the new release dies. I simply loved these as they are so perfect for the valentine projects.I have arranged my die cuts together and have placed the Francesca lace border at the bottom  to give it a little lacy effect. Red is so much a colour of the valentine so I chose that for my project. 
Cheery Lynn has also has word dies like Hello here, that makes all projects complete without the need to hunt for sentiment stamps. 
So do have a look!!!


List of  Dies used

Be my valentine heart B531
Heart and Arrow
Hello set of 2-- B346
Francesca-B159

Have you checked the new challenge at the blog....Its says  SWEETHEARTS...so do send in your entries. And there is a wonderful prize for this. So get going. Share your sweet heart projects with us. Till then ... happy crafting.

Tuesday, December 30, 2014

Love Tag

3:30 AM 4 Comments


Happy Tuesday everyone! leslierahye here sharing a valentine tag. I began by diecutting the snowflake mesh border out of acetate to use as a template. I spray-misted with opaque white over the top of kraft card to create the "texture" on the background. Next I stamped a grid pattern over the kraft tag and distressed and inked the edges with pink.]

For the ruffle on the bottom of the tag, I adhered a liquid glue to the back of the kraft tag and attached my crumpled Ankara Lace Border to the edge. A bit of Ankara Lace also peeks out of the side of the tag where the kraft  is ripped.

To finish off the tag, the snowflake doily was layered with the Two of Hearts and some scrolling bling. Love and You were cut and added to the bottom of the tag.

  Cheery Lynn Dies used
*****
Remember there is still time to join the new challenge!!! Challenge #165 is Thank You There is a chance to win a $20 shopping spree at Cheery Lynn Designs. Thank you for stopping by today!

Wednesday, November 19, 2014

A CHRISTMAS TAG AND ENHANCE YOUR DIE CUTS-A STEP BY STEP TUTORIAL.

3:30 AM 7 Comments
Hello Everyone,
I am back again with my weekly Wednesday post and today I bring to you a step by step tutorial on how to add that extra wow factor to your die cuts.
This is a picture heavy post as I have tried to show you each and every step. If I have missed anything on the way , please feel free to ask me.
 Please follow the instructions with each picture.
The list of supplies is given at the end of the post.

 These are the die cuts that we will need. I cut my die cuts in white so that I can colour and alter their look the way I want.

                       Cut the sides of the Fiona's magic mirror die cut with your scissors as shown.


 Place the daisy lace frame on the cut tag and carefully mark out the edges to cut and fit the tag we have cut earlier.

This is how it should look after  it has been trimmed. 


Now trim off that tree part from the die cut.


and using the glue, stick all the three die cuts together to give a thick look to your sentiment. This way it looks like a chipboard die cut.


Then apply versa mark on the die cut and cover it with gold embossing powder and apply heat with a heat gun .

        We get a really glittered and thick embellishment like this.


Do the same thing with snow flakes die cut and use glittered embossing powder now.


Color the ornaments with copic colours 

colour the leaves and flowers with distress inks and then spritz it with water. Dry with your heat gun . This gives a very nice sparkle to the flowers and leaves.


                               Apply foam dots at the back of the pieces that has to be popped up.


                         This is how the finished tags look like after all the elements have been placed.


Note the sparkled effect on the die cuts. I have applied a thin layer of clear glitter with my wink of stella clear glitter pen.

List of Supplies used
Distress inks-Worn Lipstick, Peeled Paint, Fired brick and forest moss
Versamark embossing pad
Embossing powders-Rangers Enchanted Gold and Holographic glitter
Ribbon and pearl from stash

I hope you liked this. Do leave your feedback. And the challenge this week is also to MAKE A TAG !!!
So do participate to win a yummy prize.
See you next week... Goodbye!!!!


Monday, September 29, 2014

Happy Holidays Tag with Rhonda

3:30 AM 3 Comments
Happy Monday to you, it's Rhonda here today to host the blog.

I have a little holiday tag inspiration for you today featuring one of the newer release dies, the Happy Holidays Hanger.

For fun I used a bit of non traditional holiday color scheme.

I used the Scalloped Rectangle die to create my tag base. Next I added the Horizon Coved Rectangle, cut it apart and layered the Swedish Spring Oval Frame in a horizontal position.


You'll see some delicate snowflakes cut from vellum and accented with tiny bling. The Happy Holidays Hanger sentiment in a bright color and the Pretty Pretty Bow finish the design along with some seam binding ribbon and hemp bow.

Cheery Lynn Designs Dies Used:

Please join us this week for our all new challenge - Lace (real or faux).  You could win a $20 gift certificate to the Cheery Lynn Designs online store just for playing along!  You can't win if you don't play, so let's see those entries!!!

Thanks so much for stopping on over today.  Have a fantastic week!

p.s.  I did want to mention that I am going to be taking a short break, but will be back soon.  Thanks so much!

Tuesday, September 9, 2014

Spooky Fall Tag

3:30 AM 3 Comments

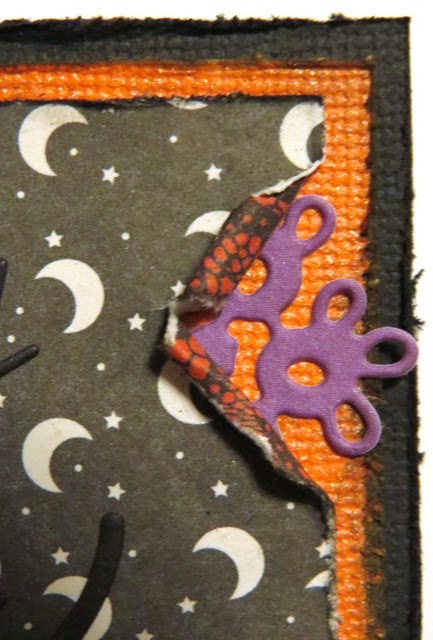
 Happy Tuesday everyone! leslierahye here with a Spooky Fall Tag using the Birch Tree with little animals--it has a fantastic owl. My tag is layered with a decorative paper, an orange matte that reveals a piece of lace, and a piece of embossed stone-colored paper. 
I distressed the edges of the layers and chalked with pan pastel. Silver metallic pan pastel over the black iron fence and earthy brown pan pastel over the birch tree enhance the card. Small bats flutter through the trees complete the look.

*****

Remember there is still time to join the new challenge!!! Challenge #149 is All about Texture There is a chance to win a $20 shopping spree at Cheery Lynn Designs. Thank you for stopping by today!

Copyright Statement


All content, including designs, pictures and words are the exclusive property of the author of each blog post. Information shared here is for inspiration only and may not be copied for publication, competition or profit. Thank you for your cooperation.

SOCIAL MEDIA 2


Follow Us @jointhemakersmovement


All content, including designs, pictures and words are the exclusive property of the author of each blog post.
Information shared here is for inspiration only and may not be copied for publication, competition or profit. Thank you for your cooperation.