Showing posts with label Sweet Williams. Show all posts

Monday, March 20, 2017

Spring Flowers with Maggi

3:30 AM 5 Comments

Hi there Cheery Lynn fans!  Maggi here with a spring treat for you today.  After those awful storms that roared through parts of the US, we need some spring!  My project today is a large (6.5" x 12") thickboard Etcetera tag.  Let me tell you, I had more fun with this project than anything I've done in a while!

I wanted to showcase some of the pretty flowers you can make with Cherry Lynn dies AND I wanted to play with my new Distress Oxide inks and Alchemy Metallique Wax.  This is the result!  I started out with a stencil and white masking paste to create the textured quadrefoil design you see.  After that completely dried, I started playing around with the Oxides.  To achieve the effect you see here, I used little finger tip sponges and sponged on different colors of ink and then I lightly misted the ink; enough so the oxidation process was initiated but light enough so that the colors did not pool.  After that was dry, I applied aged brass all around the sides of the tag as well as random swipes over the tag.
The piece in the center is metal and came from a tin bucket that I altered a while ago.  I knew I'd use it sometime!  I've used two Cheery Lynn die-cuts underneath the center piece.  On the bottom is a Horizon Coved Rectangle Boutique Stacker Frame and on top of that is a Celtic Oval Boutique Stacker Frames.  I used some Stampendous aged teal embossing powder around the edges of the oval die-cut.
I inked all the flowers and leaves with Oxide Ink to get that soft faded look.  For the blue flowers and leaves, I used an ink color that was similar to the color of the cardstock.  For the orangish flowers, I started with yellow cardstock and applied both fossilized amber and spiced marmalade inks, again only lightly misting.  The orange flowers are made with the Sweet Williams Dies and the blue, with the Floral Bouquet Kit 8 Piece Die Set.

I used Flourish #14 2 Piece Die Set and Flourish #4 Die  to diecut the leaves and greenery.  

This large flower was made with the Stacker Flower 5 Die  and I used the  Small- Heart Lollipop Fringe Cutie Die to make the flower's center.  I painted and ink a tiny canvas and mounted it and the flower onto the tag.

Instead of a traditional bow at the top, I opted to use a piece that I molded using air dry clay and a Baroque mold.  After it dried, I applied Alchemy Metallique aged brass wax as a coloring agent.  The small piece at the bottom near the largest flower was made the same way.

Cheery Lynn Designs dies used:


Other Supplies:
Tim Holtz Etcetera medium tag
Distress Oxide Ink
Prima Art Alchemy Metallique Aged Brass Wax
Prima IOD Baroque 3 mold
Air Dry Clay
Stampendous Aged Teal embossing enamel
Yellow, green, blue cardstock
3" square canvas
Prima Art Alchemy Opal Magic Violet Gold acrylic paint

Thanks for joining me on the Cheery Lynn blog today!
Maggi Harding

Monday, December 19, 2016

Maggi with a Christmas Layout!

3:30 AM 0 Comments
My furbabies are my favorite subjects for layouts and this one is of my sweet Tisha when she was still a puppy at 6 months old.  I used Graphic 45's St Nicholas papers to create layers and layers.

I love using diecuts for layers, and behind my photo I've used Celtic Oval Boutique Stacker Frames Die  and behind that, Horizon Coved Rectangle Boutique Stacker Frames Die.  One of my favorite dies this Christmas creating season has been the Holly Corner Die - B184.  I've used it under my flowers and around my photo.  

I made 3 different flowers for my layout.  This one is made with the Black Eyed Susan Strip 5 Piece Die Set - B338.  That's a great die because you cut 4 flower layers all at once.  Then give them a little dimension by shaping the paper, then stack the layers and you have a pretty dimensional flower.


This flower is made with Judy's Blooms Die - C184.   This set comes with two different sized blooms and I used both to layer up this flower.  The sparkle was achieved with a silver Wink of Stella pen.  I also like to add a little color to my leaves and I often use Lindy's mists for that purpose.  I use the dabber caps on my mists and just dab on a bit of color.

 I used the Wreath Strip 7 Piece Die Set - B216 to add some pine boughs to my clusters. I just tucked the wreath pieces, that I colored with Lindy's Frosty Forest Green, around the flowers.

One more flower to share with you today!  These I made with the Sweet Williams Die Set - D137.  This set also comes with two sizes of blooms and I used both sizes.  I put two large blooms on the bottom and then two of the smaller on top.  I shaped these simple by inserting a petal in my tweezers and giving it a twist.  That's a fast and simple way to give flowers some dimension.  The shine on these blooms comes from a red Wink of Stella pen.

Cheery Lynn Designs Dies Used:

Thanks for stopping by the Cheery Lynn Designs blog today!  We appreciate your visit.

Wishing you the very best this holiday season,
Maggi


Tuesday, January 19, 2016

Baby Boy/Girl Card by Amy Voorthuis

3:24 AM 6 Comments
Hi lovelies, 
It's been two weeks since my last post due to some health issues thank you so much Bonnie for filling in for me. Today I would like to show you two cards, one for a baby boy and one for a baby girl. For these cards I used the pretty "Vintage Baby"collection by Maja Design. 
Since this weeks challenge  is about "Sweethearts"
I thought I would use the new release die
B675 - Sweetheart Candy.  It's such a adorable die to work with.

Baby Boy: 

Baby Girl: 

Cheery Lynn Designs dies used: 

Thank you so much for visiting the blog today we always love you comments. 
If you love the Cheery Lynn Designs dies I used, you could always enter our weekly challenge to win a $20 shopping spree. This weeks challenge is #220 - "Sweethearts" there are some amazing entries already enjoy creating and good luck! 

Tuesday, October 27, 2015

My Special Day Memory Book by Amy Voorthuis

3:30 AM 4 Comments
Good morning to you all.
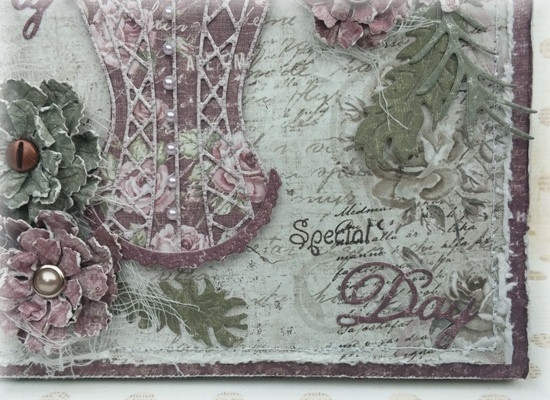
With the new October release, Cheery Lynn Designs came out with some amazing "Memory Book"dies in different sizes which I really love. Not that I am a great mini album maker but it makes it so much easier to start one. So today I'd like to show one I made it will hold my wedding pictures when I finish the inside as well. 

My Special Day: 
Last week I showed you a layout I made of little me. I just went along and used that paper line again on this memory book. In the future I'd like to make one for my husband too with different colors and more masculine of course. On the inside I have seven sheets to use and put my pictures on so that's going to be a challenge for me not using so many pictures one project hehe. 


Cheery Lynn Design dies used: 

I hope you like my memory book. Thank you so much for visiting the blog today. 
If you love the dies Cheery Lynn offers you could always enter this weeks "Anything Goes" challenge #208, because you could win a $20 shopping spree at the store. I can't wait to see your work.  

Love

Tuesday, October 20, 2015

"Vintage Me" 8x8 Layout by Amy Voorthuis

3:30 AM 3 Comments
Hi Lovelies, 
It's me Amy and I am back again to join this amazing design team as the "Tuesday"girl hihihi. Today I would like to show you a layout I made, of me when I was just a little cute girl. It's back in 1981 when I was just a three years old. My mom always settled me on the window-ledge with a apple so I could wait for my dad to come home. 

Vintage Me: 
For this layout I used the pretty "Vintage Autumn Basics"collection by Maja Design. 
I really love the thickness of these papers especially for making my own flowers like I did here. 
Another thing what's amazing is that the layout's I make for Cheery Lynn Designs are smaller then the ones I normally do. 

First I stared by cutting out all the flower petals on my new Big Shot ;-) then I whetted them just with some water. After that I wrinkle them all and squeeze them firmly in my hands to blow dry them after a couple of minutes. Then I layered them to make these flowers.   
On this layout I also pasted, sprayed and inked like I did on my last layout for the Black & Orange challenge. When I got my amazing DT package this week I just had to use these cute feathers as leaves they make a great finish on your flower clusters don't you think?
Cheery Lynn Design dies used: 

I hope you all like the layout I made as much as I loved making it. Thank you so much for you visit today. If you love the dies Cheery Lynn offers you could always enter the challenge, because you could win a $20 shopping spree at the store. I can't wait to see your work.  

Love


Friday, October 16, 2015

Best Teacher Ever with Corina Finley

4:13 AM 1 Comments

Hello Crafters!

I hope every one checked out the New Release over on the Cheery Lynn Designs Website! There is an assortment of great new dies for you to create with.

My card for today's post features a New Release die set called the Best Teacher Ever. It comes as a set of 2 - the apple which has the Best Teacher Ever cut from it and the little cute Worm!


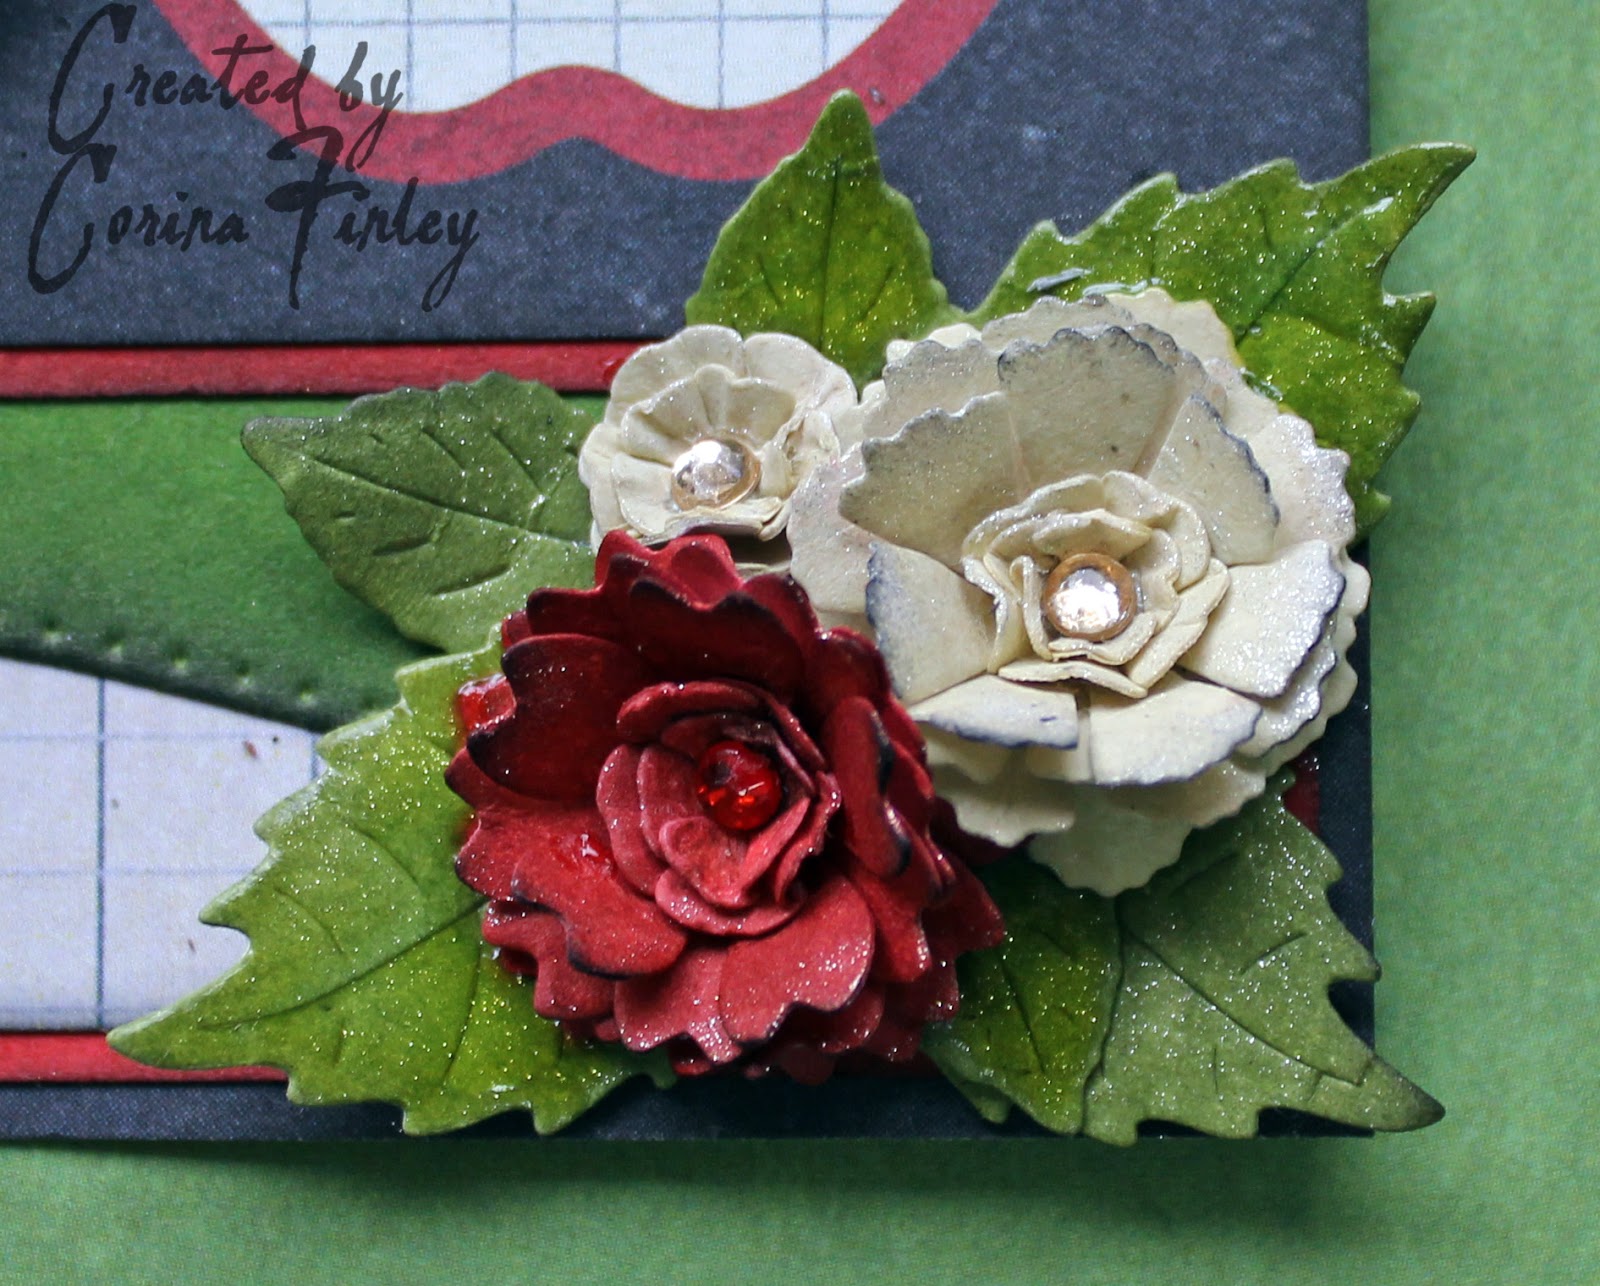
Here is a close up of the Apple. I cut it from white cardstock and inked with Distress Ink. I layered it on top of black cardstock and used clear embellish liquid over the words to give a glossy look. I also added a touch of glitter. For the leaf & stem, I used Distress Inks also and added Glossy Accents.


While I was colouring (inking) the worm, my son was calling him Fred! So for Fred the Worm, I cut him from white cardstock, inked with Distress inks and used a glitter pen over. I added a small piece of white cardstock behind his eyes and used a black glaze pen for his eyes. 


My flowers are created from the Sweet Christine, and the Sweet Williams Strip. I added the leaves from the Tea Rose Medium die and three from the Rose Leaf Strip.

Die used:

Best Teacher Ever (Set of 2) - B652


I hope you will play along in our weekly Cheery Lynn Designs ChallengeYou could win a $20 shopping spree at the online Cheery Lynn Designs store.

Thanks for joining me today!

Take care,
Corina Finley

Live, Laugh & Create!

Thursday, June 11, 2015

Enjoy with Jenny Alia

3:30 AM 1 Comments

Hi, Happy Thursday!  It's Jenny posting today.  I began this card by looking through my design papers.  I wanted a soft looking card but then added the blue accents because it seemed to need more contrast.

I started by layering the background onto a blue 5.5" card.  I cut the cream layer a little smaller and glued the green design paper layer on top which was cut with the largest French Flair Stacker.  I then layered cream paper cut with the Royal Scandinavian Doily, blue paper cut with a smaller French Flair Stacker and then topped them with the Royal Scandinavian Tag #1 and the word Enjoy.  All three of the top layers were adhered using foam adhesive.


The Ivy Corner Flourish was cut out of blue paper.   The flowers were created by cutting the Sweet Williams die out of a shimmery cream card stock. The edges were inked with broken china distress ink and they were crumpled and stacked.  The flower centers and little flowers on the ivy are from the Embellishment #2 die and then pearls were added.

Cheery Lynn Dies

Thanks for visiting and make sure to check out the Creative Corners challenge for a chance to win a $20 voucher to the Cheery Lynn shop.  

Hugs, Jenny

Tuesday, June 9, 2015

Be Brave, Take Risks by Karen Maldonado

3:30 AM 2 Comments

Happy Tuesday Cheery Lynn friends!  I have a beautiful A2 card to share with you!
I started by cutting out the largest A2 Frames Rectangle Scalloped  die, 
and then placed the Card Maker Rectangle Classic die right on top.  
This formed the based of my card.
I added some yellow pearls to the corners of the card.


Then, I took the Alpine Flourish Doilyand die cut it using some yellow paper.
I die cut one of the other Card Maker Rectangle Classic dies and placed on top.
This layer was placed onto the based of my card using some pop-dots!

Next, I made two yellow flowers using the Sweet Williams die, 
and I used the Flourish Leaf Strip and placed them under the flowers.

I added some colorful pearl swirls.  Then, using one of the
 Circle Classic Small Silver Stackers, I made the sentiment and added to the card.


List of Cheery Lynn Dies used:


I'll be back next week!  I look forward to checking out all the entries 
for this week's challenge!  Hope you play along for a chance 
at winning a $20 shopping spree to the Cheery Lynn Designs on-line store!

Have a fabulous day!

Wednesday, July 9, 2014

CARNATIONS FOR YOU...BY ANITA KEJRIWAL

3:30 AM 4 Comments
Hello to all !!!
I hope the festive season is bringing loads of happiness in everyone's life. It is all rainy and cloudy here and the dark weather is really taking a toll on my mood. Apart from this, a severe backache is troubling me since a week. Nevertheless !!! nothing can stop us from crafting !!!! So here I'm with my wednesday weekly post. And its all shabby chic with flowers... Carnations!!!! All the dies are from the Cheery Lynn store...that houses the most beautiful dies.The background has been dry embossed in the Ebosser. I have also used this machine to cut all my dies.
So just feast your eyes on these delicate blossoms.


            Sweet Williams -D137
               Fanciful Flourish B -117
                Build a flower 2   B-187
                  XM Scalloped oval XM-8
    ribbon from stash
       stamp from Justrite
     Paper from stash
                                                            Inks-victorian velvet, shabby shutters and walnut stain
                                                 Flowers are coloured with copic marker E 02

The current challenge is all about STITCHING!!!! So do take part to win exciting prizes.
I hope you liked my card. Do say a few words and thanks for giving me a minute.


Saturday, February 15, 2014

The day after.....Valentine card with Amy

3:30 AM 5 Comments
Hi everyone,
It's Amy here with you today!
Our son has his first real crush on a girl in his school so he asked me "mommy do you want to make a Valentine card for me to give her"?
And so I did he secretly placed it on her desk (without his name on it)....I saw her big grin and that was so cool to make someone happy with what I've created.

Love
(will you be my valentine?)

Cheery Lynn Designs dies used:

I hope you all enjoyed looking at my card and I would love for you to visit my blog very time soon!
I will have a little treat for you ????
You still have some time to enter our weekly challenge 119 Frame It
Good Luck and have a wonderful weekend ;-))

Love 


Wednesday, January 15, 2014

Little Wishes {Spring Layout}

7:30 AM 8 Comments
 
Hi there!  It's me Gabrielle here with you all again today to share my second project for the month with you as Cheery Lynn's guest designer!  I had a lot of fun using the Clock w/Angel Wings die last week in a steampunk design.  But I thought it would be cool to show how versatile this die is for other designs as well.  In my l/o above I changed up the look of the clock a little by adding some flower accents to the middle of the clock design, playing up a more feminine design for the page.

 
I used the Sweet Williams die to make the the cream color flowers in the center of the clock.  I created a flower bud for the center using a couple of the smallest cuts from this flower die and then layered a few of the next sizes up (giving them a little water misting and a wrinkle) for the other layers.
 
I made a heart embellishment for the page using the Celtic heart die on white cardstock and then with a pencil marked out the heart design on some patterned paper from Maja Design to create an underlayer for the heart.

 
I often like to create a counter balance on my page design, for this page I put a lattice design in the top left corner.  I used the Lattice 2 die and gave it a random angle cut to appear like broken lattice.  I then finished the design with more of the Sweet Williams blooms and using portions of the Ivy Corner Flourish dies.
 
 
TIP:  I wanted to attach my lattice so that it stands away from the page a bit, but felt that adhesive foam dots can be a little tricky to apply to finer cuts and might be a little to thick.  So I used some 3D paint like Perfect Pearls to the back of the die cut piece.  When dry, I added some adhesive to the dried perfect pearls and stuck it to my page.  This gave my lattice just enough 3D effect that I was going for.
 
 
Cheery Lynn Dies used for this project:
 
I hope you enjoyed my project for today!  I look forward to sharing some more fun projects with you all in the weeks to come! xo
 

Copyright Statement


All content, including designs, pictures and words are the exclusive property of the author of each blog post. Information shared here is for inspiration only and may not be copied for publication, competition or profit. Thank you for your cooperation.

SOCIAL MEDIA 2


Follow Us @jointhemakersmovement


All content, including designs, pictures and words are the exclusive property of the author of each blog post.
Information shared here is for inspiration only and may not be copied for publication, competition or profit. Thank you for your cooperation.