Showing posts with label tutorials. Show all posts

Thursday, January 22, 2015

Happy Valentine's Day and Sweet William Flower Tutorial

3:30 AM 10 Comments
Hi friends.  Bonnie here from Make Time to Craft.  Today I have a pretty Valentine's Day heart shaped card for you featuring some fantastic dies from Cheery Lynn Designs.


The Heart to Heart Lacy Doily is one of my favorites!!  Lots of different sizes included with this set and the design is fantastic.  I cut my card base with the largest solid heart die.  Remember to position the top fold so it just sits a bit below the cut lines on each side to maintain a top fold for the card.  I also trimmed the bottom flat a bit so the card would stand for photos. 


After adding some different colors and sizes of the lacy heart doily along with the sentiment, I embellished with several Sweet William flowers in different sizes.  Love these flowers!  The beautiful double-loop, double-layer bow was made with hot pink delicate stitched satin from Really Reasonable Ribbon on my Bow-it-All V2.0 Tool.


For all the details on how I created my Sweet William flowers for this card, please view my video below.


If you enjoyed this video, please click on the YouTube icon (below right on the video screen above) and subscribe to my YouTube channel because I'll have some more Cheery Lynn designs flower making tutorials coming up in the upcoming months.

Cheery Lynn Designs Dies used:
Build a Flower Emb #2  B188 (for green flower bases)

I hope you will all play along with the Cheery Lynn Designs Challenge #168 - Sweethearts theme.  One lucky winner will receive a $20 gift certificate to Cheery Lynn Designs.

Thanks so much for stopping by today.  For more information on this card and some other great creations using Cheery Lynn Designs Dies, hop over and visit my Make Time to Craft Blog.  Be sure to leave a comment before you go.  I'd love to hear from you.

Thursday, October 31, 2013

Felt and spices with Irina Gerschuk

3:32 AM 3 Comments
Hi my dear friends!
It's Irina Gerschuk with you today.
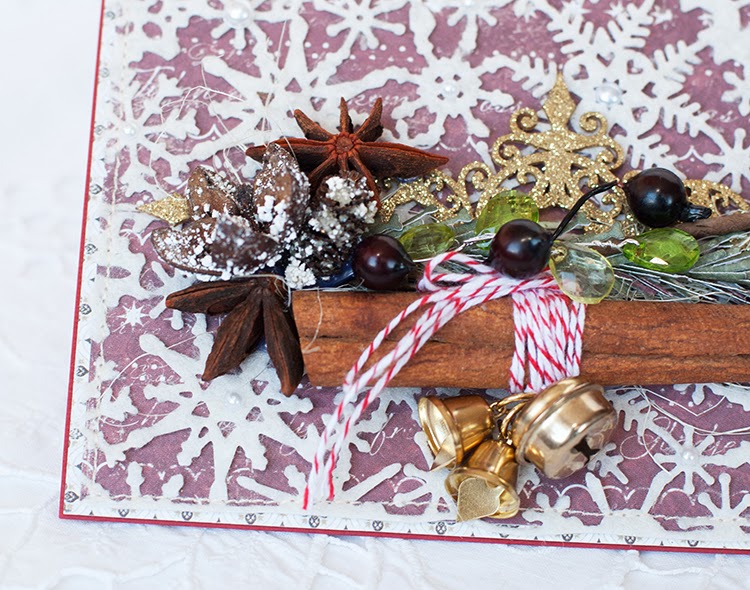
And I'd like to share with you my new Cristmas card.
 I created my background with felt and Snowflake Mesh Border. I used Metal Adaptor Plate - it makes die-cutting from fabric and felt so easily!
 After the background was ready I created a New Year Tree branch with the Small Heart Lollipop Fringe Cutie.
In case you've missed my last post, here is a video-tutorial on how to create this branch. It's really easy and adds such a cute zest to the project:
Products used:
- Small Heart Lollipop Fringe Cutie - B391;
- Snowflake Mesh Border - B372;
- Metal Adaptor Plate - S114.

And please come and join our new challenge - the theme is so interesting and the prize is lovely)))

Thanks for stopping by!
Have a nice day!
Irina

Thursday, October 17, 2013

Light Vintage with Irina Gerschuk + video tutorial

3:30 AM 6 Comments
Hi my dear friends!
It's Irina Gerschuk with you today.
And I'm super excited to share with you my new project. It's an all-occasion card in a light vintage style.
 I used lots of Cheery Lynn Designs dies to create it, some of them - from the new release (and I just love them!!!)
As I do almost everytime I started to create the card from the flower composition. I love to play with flowers - choose colors and pick up flourishes for them))
 Then I added some doilies and a border (as for me this border is a "must have" for any scrapper - such a cute detail and so mady ways to use it!!!)
 To achieve the perfect shape of the clock I used the smallest die from  the Lace Circle set.

I also prepared a small video-tutorial on how to create such flowers as in this card


Dies used to create the card:
- B387 Tiny Fanciful Flourish
- DL265 Candy Hearts Doily
- Medium Rose - B154
- Tiffany Border - B137
- B155 Large Rose
- B178 Flourish Leaf Stripe
- Olive Branches - B147
- Horizon Rectangle Boutique Stacker Frames - DL270
- French Pastry Doily - DL102
- Lace Circle - DL188


And don't miss our new challenge - the theme is so versatile, and the price is yummy)))))

Thank you for stopping by!
Have a lovely day!
Irina

Tuesday, August 20, 2013

Faux Ruffles Tutorial

3:30 AM 3 Comments
Today I have a quick little tutorial to share with you for making faux fabric ruffles.  


Step One: Cut card stock with a border die of your choice.  I used the Anastasia Border B136. 


Step Two: Spritz water on the front and back of your paper and let it soak in for a minute.


Step Three: Pinch and gather your paper along the top, letting the bottom ruffle out.  You could use tweezers or a piercer, but I find it’s just as easy with my fingers. 


Step Four: Slightly pull out to the desired look and let the paper dry completely.  If you want to speed up the drying time you can use a heat gun.  


Here is an example of the ruffle applied to a project.  Check back Friday for the finished project and to see how I used the faux fabric ribbon.  


Hugs, Lori 

Tuesday, July 9, 2013

Blast from the Past with Flowers

3:30 AM 2 Comments
Today we are doing something a little different, we are having a blast from the past. Cheery Lynn has been so blessed with our design team members throughout the years we thought over the next few Tuesdays we would take a look back at some much loved projects/ tutorials.

Our highlight today is flowers.  Cheery Lynn is known for our exceptional flower dies...be sure you didn't miss any of these flower tutorials from the past as they are sure to inspire.

Sandie Edwards wowed us with this beautiful tutorial on Lily's.  Click here to see the whole tutorial.


Or see how Kianel turned our corners into an exception flower with this tutorial .  Click Here.


Finally we have Debbie Sherman who shared with us how to create a stunning Peony.  Click Here to see how to make this show stopping flower.  


We hope these tutorials/ flowers have inspired you to create some masterpieces of your own and hopefully shared something that you might have missed from the past. 


Copyright Statement


All content, including designs, pictures and words are the exclusive property of the author of each blog post. Information shared here is for inspiration only and may not be copied for publication, competition or profit. Thank you for your cooperation.

SOCIAL MEDIA 2


Follow Us @jointhemakersmovement


All content, including designs, pictures and words are the exclusive property of the author of each blog post.
Information shared here is for inspiration only and may not be copied for publication, competition or profit. Thank you for your cooperation.