Hi friends. Bonnie here today from Make Time to Craft sharing a pretty birthday card I created with some fabulous dies from Cheery Lynn Designs.
 I am just in LOVE with these fabulous new 3D Pop Up dies. Today I'm featuring the 'Party' pop up.

Cheery Lynn Designs dies used:
B932 - Pop Up Party Word
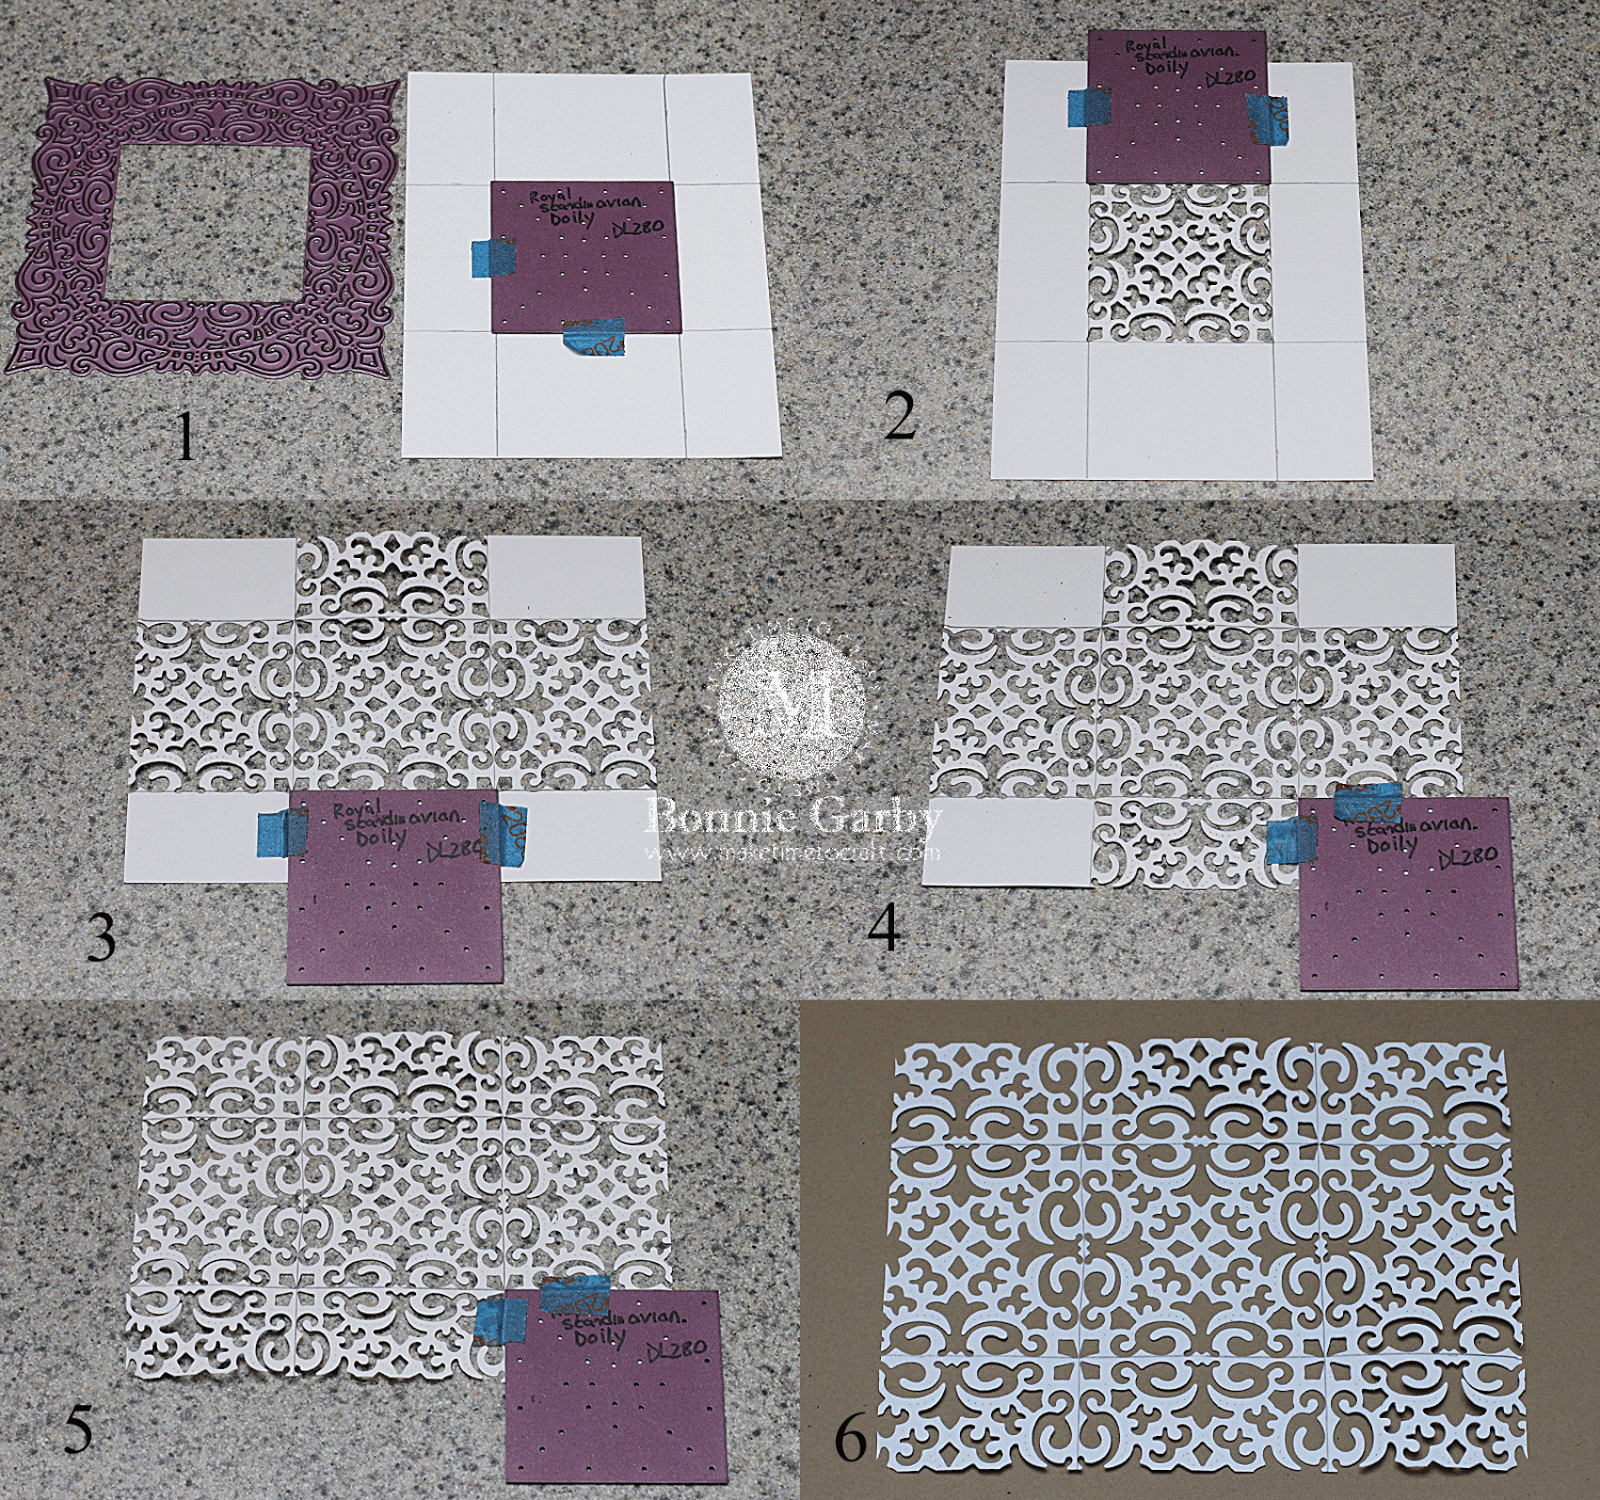
FRM118 - Daisy Lace Frame
M7 Oval Classic Small
XM7 Oval
 My card was topped off with a pretty bi-color bow created on my Bow-it-All tool using ribbons from the February Ribbon Club Assortment from Really Reasonable Ribbon. The center of the bow is adorned with a pretty heart shape pearl embellishment.


Folding Single Step Pop Up Die Elements using 3D Pop Up Dies from Cheery Lynn Designs
To view this video on YouTube, please click HERE.
Cheery Lynn Designs dies used:
B932 - Pop Up Party Word
FRM118 - Daisy Lace Frame
M7 Oval Classic Small
XM7 Oval


Thanks so much for stopping by today. Happy crafting!