Showing posts with label Fancy Reindeer. Show all posts

Sunday, January 21, 2018

Let it Snow by Jenny Alia

3:30 AM 0 Comments

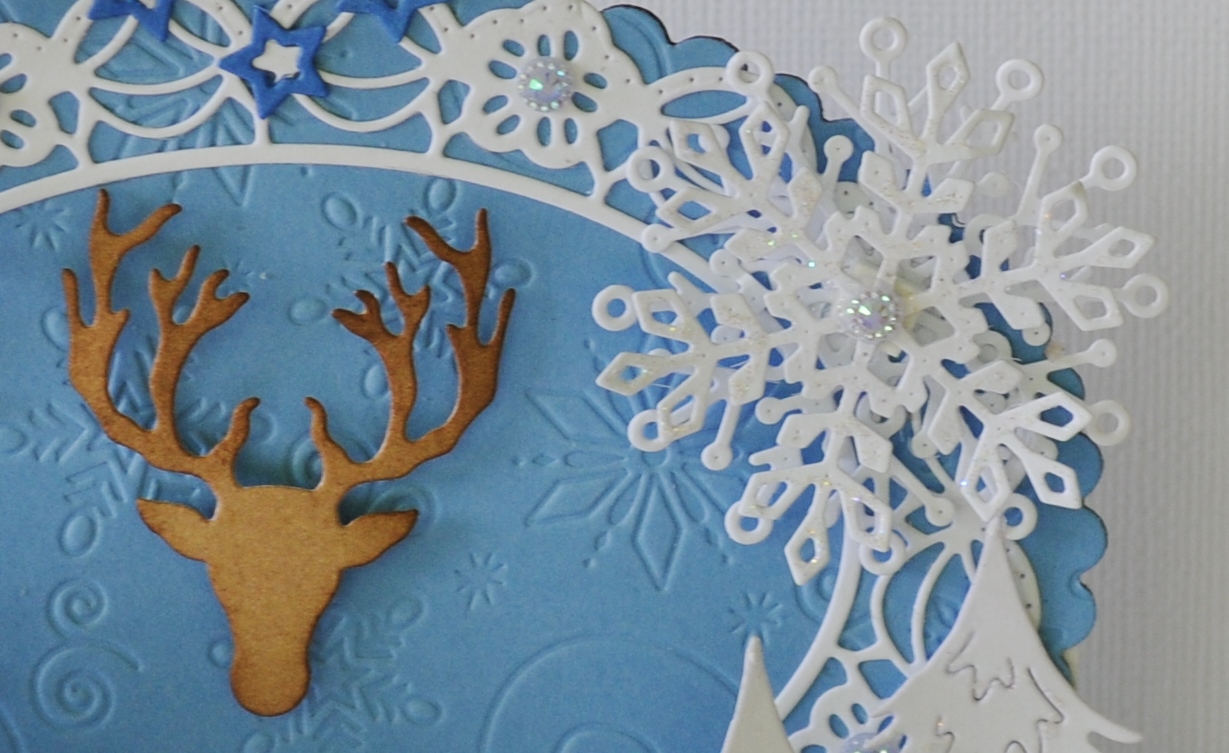
 Hello!  It's Jenny here hosting the blog today.  I've been wanting to make a distress background to use with this Aspen Forest die for a while and I finally got my supplies out to play.  


 This is similar to another card I made before the holidays but by changing the deer die, colors and details, although it has the same basic layout, it looks very different.  I used silver embossing powder on the Let It Snow die cut to help it stand out.  The Fancy Reindeer was colored with two of the darkest blues I used on the background.  


Cheery Lynn Dies

Thanks for stopping by the blog today!  If you didn't get a chance to join in the latest Cheery Lynn Blog hop make sure to check it out to see the new release Pop-up dies in action.

Friday, December 29, 2017

Fancy Reindeer card with Cheryl Walker

1:30 AM 1 Comments
Hello Crafty friends ,and happy Friday to you all!
I hope you had a very Merry Christmas, and got to spend it with your family and friends. This is my last Christmassy card for 2017, gonna miss making them, as I always enjoy making Christmas cards every year.


So for my card today I chose to use Cheery Lynn's Fancy Reindeer, Tree from the Camping set, and holly & berries from the Christmas Bell set, all listed below with links. Love how they all work together on my card. On the tree I colored with copics, and then added some stickles. All die cuts were colored using copic markers, love the look they give to my card.


Cheery Lynn Supplies Used:
B779 Camping Set (Tree)
B843 Fancy Reindeer
B846 Christmas Bell (Holly & Berries)
DL314 Quadrafoil Square Doily
Best Glue Ever
Big Sister Die cutting machine

Thank you for looking and have a wonderful weekend! Hope you all have a Happy New Year!
Hugs to all,
Cheryl

Tuesday, December 12, 2017

Merry Christmas Wreath by Debbie Brownmiller

3:30 AM 0 Comments
A warm hello to you.  It is Debbie from Debbie's Time out with you today.


I wanted to create a card a bit more on the masculine side today. I did a lot of inking and distressing on the base.  I then cut a stitched oval shape from the Oval Stitch and Cut tool .


I layered the Merry Christmas Pine  Partridge Sentiment  onto the oval. From the Fancy Reindeer  set I choose to use the jumping reindeer and the reindeer head to layer onto the card. This reindeer set has several dies in the set with beautiful detail as you can see. I layered a couple of holly leaves from the Holly Leaves  set. I finished them off with some glittery berries.  What a great masculine card using this reindeer set from Cheery Lynn Designs.

Thank You for visiting the blog today and for the comments you leave.
Have a crafty day my friends.

Dies Used
Merry Christmas Pine  Partridge Sentiment Die - B377
Fancy Reindeer 7 Piece Die Set - B843
Oval Stitch and Cut tool - LG Silver Stitch tool 6 Piece Die Set - LSC7
Holly Leaves 6 Piece Die Set - B183

Tuesday, November 14, 2017

Joy to the World by Julie Lavalette

3:30 AM 0 Comments

Hi Cheery Lynn Fans it's JULIE here today. Gosh I can't believe how fast we are now approaching the end of the year and it will soon be Thanksgiving Day for all our American friends. So today my card is inspired by this celebration.


I started by distressing my 2 layers of Maja Design papers at the edges and layered onto my card. I cut out my wreath in 3 shades of paper from the same pad, cutting 2 of my wreaths so they would stretch out a little larger than the base one. The cut was hidden by my drop shadowed reindeer.


My large sunflower was coloured with Copic Pens and Micro Beads added into the centre. The smaller sunflowers I added Flowersoft into the centres and also touches onto the wreath. My berries were coloured with Copic and 2 layers of Glossy accents added letting them dry between coats. Finishing with arranging my bouquet onto my card.

Cheery Lynn Dies Used:

Thanks so much for stopping by today.

Crafty Hugs, 

Julie x

Sunday, November 12, 2017

Joy To The World by Debbie Brownmiller

3:30 AM 1 Comments

A warm Hello to you. It's Debbie back with you from Debbie's Time Out. Today I would like to share with you a way of using the Aspen Forest  frame as a embossing folder.
For the base of the card I used the Aspen Forest  on foil paper. To emboss it instead of cutting it I placed a rubber embossing mat on top of the paper and it embosses instead of cutting. I then just added metal embossing powders  in copper, silver and gold and heat set them. I then added a bit of black ink to tone it down. What a beautifully embossed background this die made.
Here I layered the deer from the Fancy Reindeer set. The Joy To The World sentiment is one of the dies from the Joy to the World Wreath set. A piece of ribbon was layered along the bottom. This was a quick and simple  card for anyone wanting quick cards to give to that special person. I hope I have encouraged you to play with some of your dies to emboss with as well as cut with.

Thank You for visiting the blog today and for the comments you leave. They are always appreciated.

Dies Used
Aspen Forest A2 Card - 2 -Piece FRM157
Fancy Reindeer 7 Piece Die Set - B843
Joy to the World Wreath 3 Piece Die Set - B481

Friday, December 16, 2016

Joy to the World with Jenny Alia

3:30 AM 1 Comments

 Hello friends!  It's that time of year again and for the first time this season there was snow on the ground this morning where I live in NY.  I planned to make a Christmas tag, but the result ended up being snowier than I'd expected. 


I began with a tag from my stash.  I glued Bo Bunny paper to the tag and then cut the edges.  The purple strip at the bottom is a coordinating paper from the same pack.  Joy to The World was cut using the same purple design paper.  The smallest snowflake from Snowflake Set 2 was cut with another design from the pad.  I wanted the Fancy Reindeer to stand out so he was cut out of metallic paper.  The edges of the large Snowflake Delight 2 were lightly colored with distress ink. I positioned the different elements and glued everything down, sprinkling rhinestones around the snowflakes and wiping on a glittery paste on the sides to resemble a dusting of snow.


Cheery Lynn Dies

I want to wish everyone a very Happy Holidays and don't forget to join in the latest Red & Green Challenge for a chance to win a $20 gift certificate to Cheery Lynn Designs!

Monday, November 14, 2016

Happy Winter by Julie Lavalette

3:30 AM 8 Comments

Hi everyone, hope you had a lovely weekend. It's JULIE here today and I'm sharing some inspiration with my Festive Winter card, so let me share my tips on this card with you.


I started by mounting a couple of Stacker Layers together to form the frame of my card adding Stickles around it. My Icicles I also added a little Stickles onto the white cardstock and let it dry. Once dry I used Iced Spruce Distress Ink at the tips of my Icicles and finished with a layer of Glossy Accents for an icy look.


My sentiment and snowflake were heat embossed with two shades of Silver embossing powder. 


The Fir trees are die cut from the versatile Camping Set, I also shaded with Iced Spruce and I ran a glue pen along the embossed areas and added an extra fine glitter for added sparkle.


My reindeer were also shaded with Distress Inks adding some sparkle onto them in the same way I did my trees. I do love how you can add the extra sparkle onto the embossed areas.


To finish my card I used a Snow Writer Pen adding onto my trees and as a layer of snow on the ground. Whilst still wet I added some clear Glass Glitter for extra sparkle.

Thanks for stopping by today and good luck to everyone entering our Bi-Weekly challenge.

Crafty Hugs, 

Julie x
Cheery Lynn Dies Used-

Wednesday, October 5, 2016

Enjoy the Magic of the Season with Bonnie Garby

3:30 AM 1 Comments
Hi friends.  Bonnie here today from Make Time to Craft.  October is here, so it's time to get started with your holiday cards and Cheery Lynn Designs has lots of great holiday dies to help you along,
The die set I used today is the new Fancy Reindeer Set.  This is a really fun set to build a scene with.  I cut the reindeer once in brown and then I cut the antler part in ivory and layered it on.  I inked the reindeer around the edges with brown ink to create a little dimension.  The hills were created by tearing some cardstock in shades of green and layering it.  I then added the fence and grass from the set.
Cheery Lynn dies used:
My card base is 5-1/2" x 5-1/2".  I created some texture by using torn mulberry paper in between some of the layers.  
The card is topped of with a fun bi-color double-loop bow with ribbon from Really Reasonable Ribbon.
Thanks so much for stopping by today. Don't forget, we have a great Anything Goes themed challenge going on. We'd love to have you enter for a chance to win a $20 gift certificate to Cheery Lynn Designs.

~ Bonnie ~

Tuesday, September 20, 2016

Modern Reindeer Mixed Media Card By Ginny Nemchak

3:00 AM 1 Comments

Hey there Peeps. Ginny  here dropping in to share a very modern inspired and mixed media Christmas greeting card. I created this card with just white and black cardstock and lots of inks and die cuts and stamps and embossing supplies. This card is an A2 size with like elebenty hundred dies.


~Cheery Lynn Designs Dies Used~
Okay that's all for me. Wishing all of you a happy and productive day with lots of time to be creative : ) G


Monday, July 25, 2016

2016 Fall & Winter Holiday Release Part 1 - Winter & Christmas with Debbie Brownmiller

3:30 AM 15 Comments


A warm hello to you. It's Debbie from Debbie's Time Out hosting the blog today.


Cheery Lynn Designs has just release some wonderful new Christmas dies. I am featuring this new Fancy Reindeer 7 Piece Die Set  which is one of them . They are so nicely detailed.


My base is a Bendi Fold which really enables you to get a lot of layers and dimension. I layered the Oval - Scalloped LG Stackers Nesting Dies and Polynesian Sails Oval and added it to the top of the card for more shape and background. I embossed all the card pieces  with the Snowflake Flurries  before assembling it.


Here you can see all the detail on the Fancy Reindeer . I layered the Icicles Border along the curved part of the card. The trees are from the Camping Die Set . They make awesome winter/ Christmas trees too. The Happy Winter sentiment is from the new Winter Holiday Word 6 Piece Die Set. I cut up one of the  Dancing Snow Flurries into pieces and layered it here and there.


The reindeer head was layered to the center of the oval piece. And the Snowflake Set 2 where layered together and layered onto the top.

I invite you now to come join our current Christmas in July challenge for you chance to win a $20.00 store certificate. I would love to see your creations.

Thanks for visiting today.  Be sure to leave a comment today and every day between July 22nd and August 3rd.  One lucky person that leaves a comment on the selected day will win a $20 gift certificate to Cheery Lynn Designs.  Have a crafty day.
             
 Debbie
Dies Used

Copyright Statement


All content, including designs, pictures and words are the exclusive property of the author of each blog post. Information shared here is for inspiration only and may not be copied for publication, competition or profit. Thank you for your cooperation.

SOCIAL MEDIA 2


Follow Us @jointhemakersmovement


All content, including designs, pictures and words are the exclusive property of the author of each blog post.
Information shared here is for inspiration only and may not be copied for publication, competition or profit. Thank you for your cooperation.