Showing posts with label Nautical Wheeler Doily. Show all posts

Tuesday, April 3, 2018

Floral Arrangement

3:30 AM 1 Comments
A warm Hello to you.  It's Debbie hosting the blog today from Debbie's Time Out . Today I am going to share a card with you using some beautiful flowers and greenery from Cheery Lynn Designs..


For the base I matted a purple patterned paper with black cardstock. I cut one of the Nautical Wheeler Doily. The doily cuts out in two pieces. So I layered the large one onto the base first and then tucked the smaller one in behind on the top corner. This gave me a pretty base to layer my flowers and greenery onto.


I cut and layered some greenery onto the doily from the Fern Leaf,  Branch 2  and Olive Branches sets. The big center flower was created using the Daisy Strip . The smaller flowers were cut from the Tea Rose small and the Tea Rose Medium. All flowers were colored and then sprayed with water and shaped with a stylus. Some pearls and prills were added to the center of the flowers.


On the inside of the card  I used the Pop Up Best Wishes. These pop up cards are fun and easy to make. 

Thanks so much for visiting the blog today. I hope you find some time today to craft, create and relax. Have a crafty day my friends.

Dies Used
Pop Up Best Wishes Word - 1 Piece Die Set - B935
Nautical Wheeler Doily Die - DL180
Fern Leaf Die - B666
Branch 2 Piece Die Set - B466
Olive Branches 2 Piece Die Set - B147
Daisy Strip 6 Piece Die Set - B259
Tea Rose small- 6 Piece Die Set - B435
Tea Rose Medium - 6 Piece Die Set - B436

Saturday, August 13, 2016

Live Laugh Love By Debbie Brownmiller

3:30 AM 2 Comments
A warm Hello to you. It's Debbie from Debbie's Time Out hosting the blog today. I am featuring Cheery Lynn Designs beautiful Gardenias today.


I have used the Nautical Wheeler Doily  and Lattice Valance Border  for my base. These both make for an elegant card, especially on the dark background.


For the gardenias, I inked only the centers of the petals and then spritzed them. The dies I used for them are the Gardenia Strip  and  Small Gardenia .  I shaped them with a stylus and then assembled them. I tucked in a few leaves from the Rose Leaf Strip .


The Live Laugh Love is one of my favorite sentiments. I inked here and there with purple and blue but also leaving some of the white for highlights.

I invite you now to come join the Bi-weekly  challenge
@ http://cheerylynndesigns.blogspot.ca/search/label/challenge for your chance to win a $20.00 shopping spree. I would love to see what you create.

Thanks for visiting the blog and for all the comments you leave. I really appreciate them.
                                                                        Have a crafty day.
                                                                            Debbie

Dies Used
Nautical Wheeler Doily - DL180
Lattice Valance Border - B406
Gardenia Strip - B339
Small Gardenia - B433
Rose Leaf Strip - B241
Live Laugh Love - B564

Tuesday, June 14, 2016

Birthday Wishes by Debbie Brownmiller

3:30 AM 4 Comments
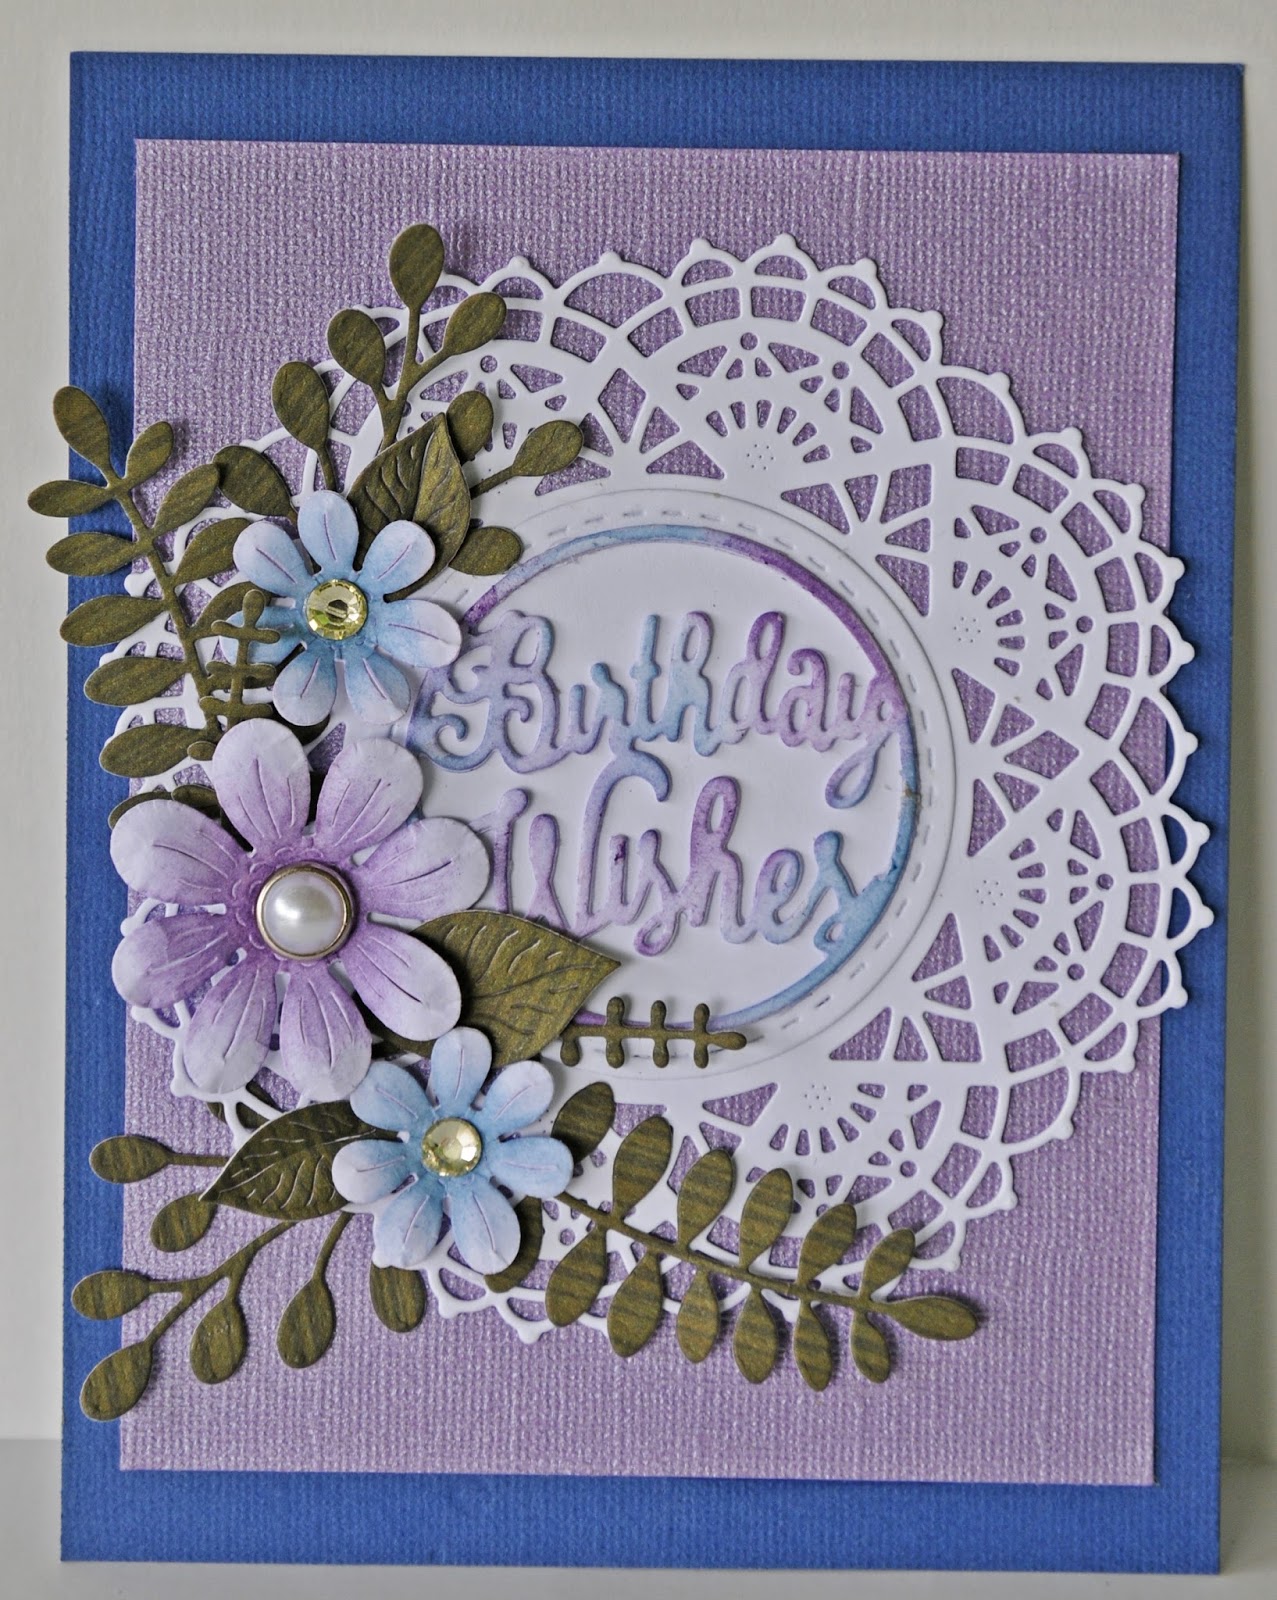
Hi.  It's Debbie with you today from Debbie's Time Out. Today I am featuring two dies sets from the May release and I am loving them. They are the Birthday Wishes Circle Die  and Floral Bouquet Kit Die Set .


I started with the Nautical Wheeler Doily  as my base to build on. I layered the Birthday Wishes  onto the Circle Stitch and Cut Tool  .


Now look at this flower arrangement created using only one die set. It is the Floral Bouquet Kit Die Set   and it is amazing as you can see.

I invite you to come play along in the Cheery Lynn Designs Challenge at http://cheerylynndesigns.blogspot.ca/search/label/challenge. You will have a chance to win a $20.00 shopping spree. I would love to see your creations.

Thanks for visiting the blog today and have a crafty week.

Dies Used
Birthday Wishes Circle Die - B783
Circle Stitch and Cut Tool - LG Silver Stitch Tool - LSC-4
 Floral Bouquet Kit Die Set - B777
Nautical Wheeler Doily - DL180

Saturday, April 30, 2016

Vintage Corset by Julie Lavalette

3:30 AM 4 Comments

Hi everyone, it's JULIE here today hosting. I am sharing a card with you this week with quite a lot of techniques on it. So let me take you through all my stages.


Layering my die cut corners behind my layer of card gives a different look to our corner dies.


I used my stitched rectangle as a guideline, counting the stitches, to die cut out my patterned strip evenly, holding down with a little tape. I worked from the outside on both sides towards the centre. This way I new my card would have even spacing.


I measured in between my gaps and added strips of paper with foam tape which I tattered at the edges. My centre strip was ever so slightly wider than the rest so I balanced this by adding my cream Anastasia border.


I cut my Nautical Wheeler doily in half and offset onto my stamped image which had also been tattered at the edges and a scattering of Frantage added.


My corset was cut out 3 times in different patterned paper and reinserted in to the negative spaces. I curved the edges at the top and bottom to give my corset a 3D effect adding my angel wing lace finishings and a few sparkly gems.


Adding some splashes of paint and some shabby flowers to finish. 


Thanks so much for stopping by today and I hope you get a chance to join in our Current Challenge which is Mothers Day. We all look forward to seeing your beautiful entries.

Cheery Lynn Dies Used:


Crafty Hugs,


Julie x

Thursday, August 20, 2015

Nautical Tag by Jenny Alia

3:30 AM 1 Comments


Hello!  Jenny here with you today with my take on this week's Doilies Challenge.  I love this Nautical Doily.  It's always a show stopper on cards.  I decided to go with a nautical theme and my tag evolved from there.  

I began by cutting an oval from the Oval Classic Silver Stackers.  I sponged distress ink on the background and left the die cut in the die so I'd get a white edge.  I then distressed the outer edge with some brown distress ink.  

I cut the Sand Dollars and Starfish and colored them with distress ink as well.  It's difficult to see but the Ships Anchor was actually covered in silver embossing powder and is metallic.  The Ship's Compass (one of my favorite dies) is so detailed.  It didn't need much to embellish it but I again colored it with distress ink.


To top everything off I used a seahorse left over from another project.  It's one of the three dies in the Seahorse Family.  Like the sand dollars and starfish he was originally cut with kraft card stock but was colored with blue, green and brown distress inks.  To  finish I cut a hole with a hole punch and tied twine to the top. 

Cheery Lynn Designs Dies

Thanks for visiting and make sure to join the Doilies Challenge for a chance to win $20 towards shopping at Cheery Lynn Designs!

Copyright Statement


All content, including designs, pictures and words are the exclusive property of the author of each blog post. Information shared here is for inspiration only and may not be copied for publication, competition or profit. Thank you for your cooperation.

SOCIAL MEDIA 2


Follow Us @jointhemakersmovement


All content, including designs, pictures and words are the exclusive property of the author of each blog post.
Information shared here is for inspiration only and may not be copied for publication, competition or profit. Thank you for your cooperation.