Showing posts with label Chrysanthemum. Show all posts

Saturday, August 26, 2017

Hello by Jenny Alia

3:30 AM 1 Comments

Hi friends!  Today I'm sharing a card I created after looking through my bin of leftover die cuts.  I've been doing some cleaning and I thought the best way to clean out is to use saved items.  The Wagon WheelChrysanthemum flowers and Dutch Daisy Border  were all previously cut and colored.  I cut the Ivy Strip out of patterned card stock.


The Hello is from the Bohemian Word Die Set .  I tend to use this set a lot, I just love the large hello and the font is both elegant and modern.  I cut the word twice to get the white shadow.  The center of the wagon wheel is a metal brad.  Last I added the butterfly because I thought the corner of the card looked a little too bare.

Cheery Lynn Dies 

I hope you enjoyed my card and thank you for stopping by the blog today.  Make sure to check back on the 28th to join in the Cheery Lynn Blog hop to check out all the new Fall & Winter dies!

Thursday, July 6, 2017

Birthday Wishes by Jenny Alia

3:30 AM 0 Comments

Hi friends!  It's Jenny here today sharing a birthday card.  Blue is one of my favorite colors and I thought I'd even match the Chrysanthemums.  The patterned card stock is double sided so I played around turning elements over to get the patterns to look best.  I really liked how the Chrysanthemums look cut from the matching patterned paper.  This is a small flower die set but it's a perfect size for cards and packs a big punch.


I used the Birthday Wishes Circle and cut a circle from the Circle Stitch and Cut Tool to add behind.  I really like the extra detailing the stitching adds on the circle.  The two larger Pierced Banners were cut using coordinating paper from the same pack.

Cheery Lynn Dies

Thanks for stopping by the blog today!  
Hugs,  Jenny

Thursday, January 12, 2017

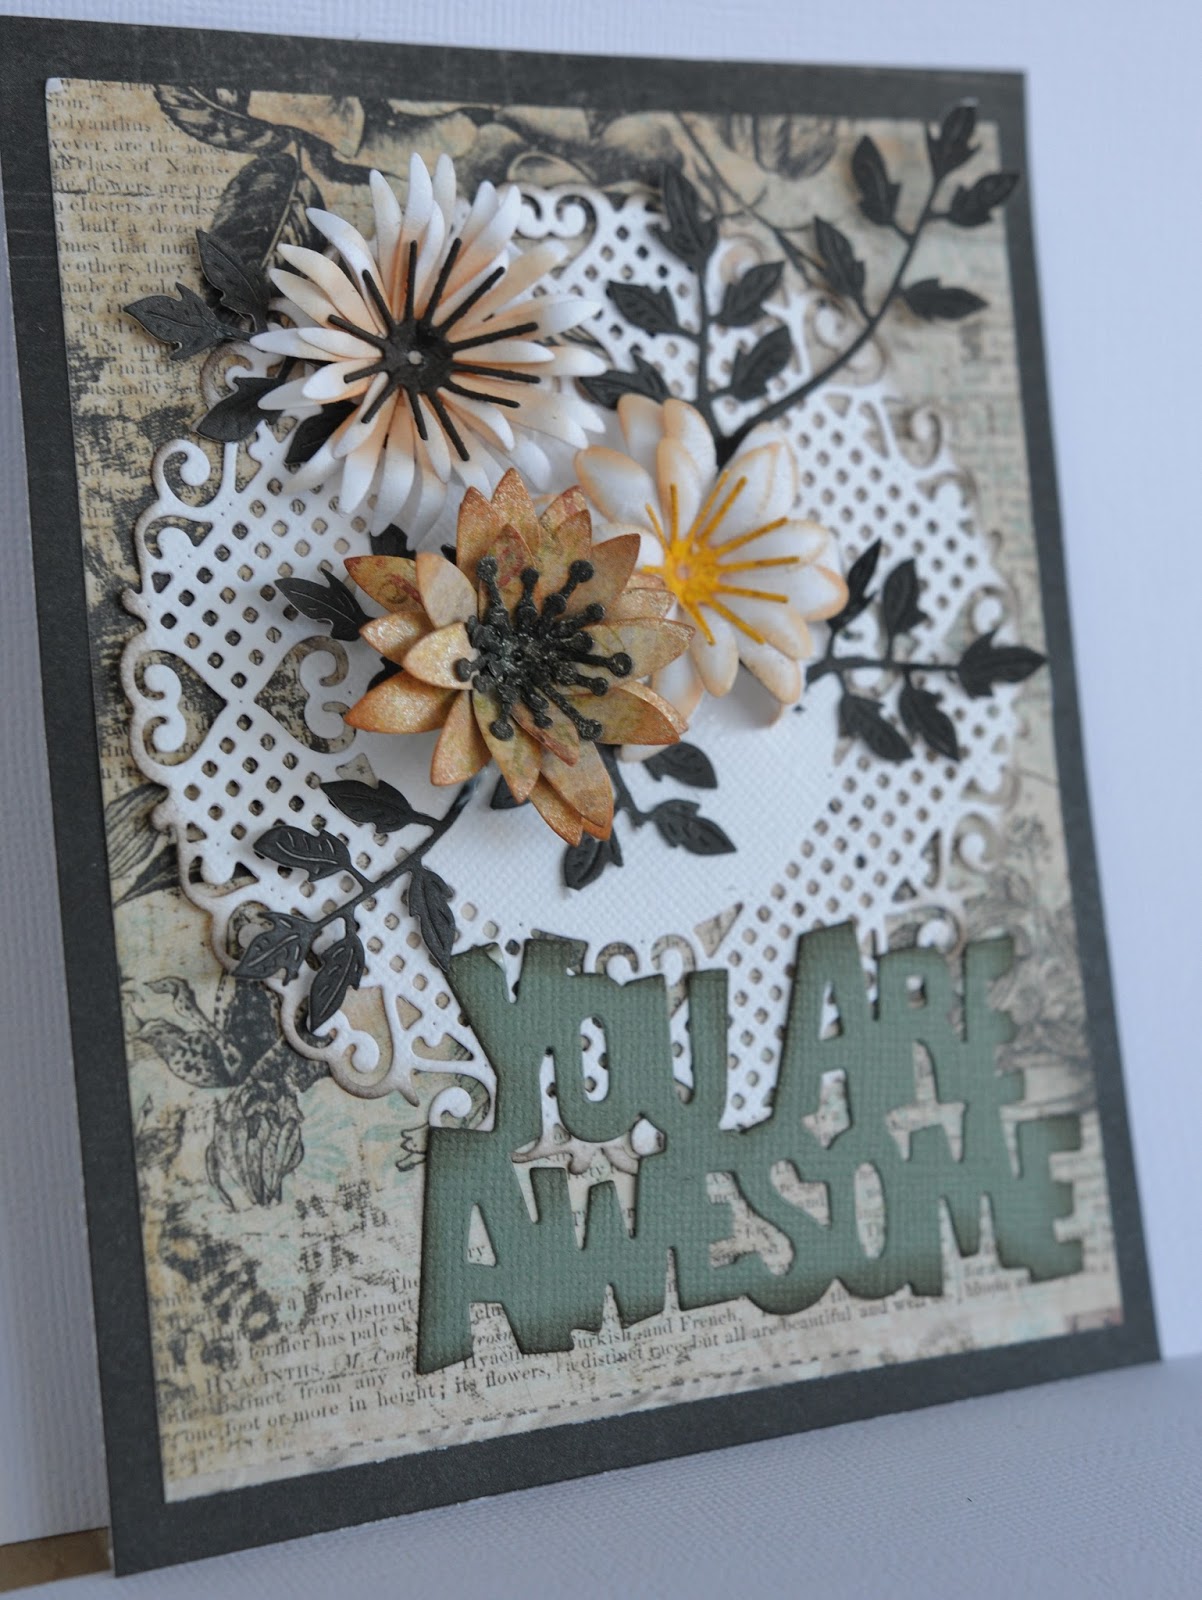
You Are Awesome by Debbie Brownmiller

3:30 AM 4 Comments
Hi everyone.
Debbie here from Debbie's Time Out. Today I am going to share a card with you featuring  some of Cheery Lynn Designs flowers. Flowers are always a good way to give your card some added dimension.


I started with a pretty pattern paper matted in black.  I layered the Lords & Commons Doily  in the center of the card to build on.


The pretty flowers were created using the Black Eyed Susan Strip , Chrysanthemum Strip , Cuties 4 and Build a Flower #1 . The Branch were used for filler behind the flowers.


The sentiment "Whimsical You Are Awesome" was layered on the bottom. This it a great sentiment and easy to place because it is all one piece. I hope I have inspired you too make a special card for a special person. Have a crafty week my friends.

Dies Used
Lords & Commons Doily 2 Piece Die Set - DL283
Branch 2 Piece Die Set - B466
Whimsical "You Are Awesome" Die - B806
Black Eyed Susan Strip 5 Piece Die Set - B338
Build a Flower #1 19 Piece Die Set - B181
Chrysanthemum Strip 6 Piece Die Set - B311
Cuties 4 Die - B156


Sunday, June 26, 2016

Lollipop Card Tutorial by Julie Lavalette

3:30 AM 5 Comments

Hi fellow crafters, it's JULIE here today. This week I am sharing a tutorial on my Lollipop card and I hope it inspires you to make one with all the gorgeous doily dies we have here at Cheery Lynn Designs.


I decided to make my Lollipop card a 3D design and concertina my doily, so I started by cutting out 5 doilies and shading with some ink at the edges. You will notice in the photo I cut half way into my doilies and scored down the sections to fold.


I then glued all my doilies together to form my rosette shape, gluing on to co-ordinating Angel Wing. The diameter of my rosette shape measures approx 5.5 inches and approx 3/4 inches in depth.  


Next I added several layers of foam tape to the centre so my topper would have stability when I glued in place.


My topper in place as seen here.


I cut out another Angel Wing Doily decorating it to complement the front and drop shadowed my Thank You sentiment to make it pop.


I held my straw in place on my decorated back panel with some extra strong tape.


I used a fast drying glue to adhere the front to the back, holding in place until it gripped.
My Flourish was embossed with a Shabby Pale Green shade. Adding on my flowers and leaves.


My paper tassels were made by recycling bead ends from an old necklace and using my Cutie Fringe die strip.


Finishing off with some small flowers and pearls.

Cheery Lynn Dies Used :


Good luck to everyone who is entering our current challenge Pretty in Purple.

Crafty Hugs,
Julie x


Thursday, June 16, 2016

Hello by Julie Lavalette

3:30 AM 2 Comments

Hi Everyone, it's JULIE here today. Thanks so much to everyone who left comments on my card for blog hop day, it was great reading them all. If you have not seen the new Whimsical Delights do check them out HERE, they are adorable and you still have time to join in the blog hop for a chance to win a $20 shopping spree HERE.


My card today is a clean and simple design for 'me', using this fab Old Telephone set. I find this style of card much harder to do than adding lots of layers and details. As you can see I cut it out in Gold and Black Cardstock and layered it up.


For my Chrysanthemums, I added Micro Beads into the centres, adding onto my card.


I finished off by adding my corners and touches of bling with Black Gems.

Cheery Lynn Dies Used :
Thanks for stopping by today and good luck to all entering our fortnightly challenge and current blog hop.

Happy Crafting, 
Julie x

Saturday, April 30, 2016

Vintage Corset by Julie Lavalette

3:30 AM 4 Comments

Hi everyone, it's JULIE here today hosting. I am sharing a card with you this week with quite a lot of techniques on it. So let me take you through all my stages.


Layering my die cut corners behind my layer of card gives a different look to our corner dies.


I used my stitched rectangle as a guideline, counting the stitches, to die cut out my patterned strip evenly, holding down with a little tape. I worked from the outside on both sides towards the centre. This way I new my card would have even spacing.


I measured in between my gaps and added strips of paper with foam tape which I tattered at the edges. My centre strip was ever so slightly wider than the rest so I balanced this by adding my cream Anastasia border.


I cut my Nautical Wheeler doily in half and offset onto my stamped image which had also been tattered at the edges and a scattering of Frantage added.


My corset was cut out 3 times in different patterned paper and reinserted in to the negative spaces. I curved the edges at the top and bottom to give my corset a 3D effect adding my angel wing lace finishings and a few sparkly gems.


Adding some splashes of paint and some shabby flowers to finish. 


Thanks so much for stopping by today and I hope you get a chance to join in our Current Challenge which is Mothers Day. We all look forward to seeing your beautiful entries.

Cheery Lynn Dies Used:


Crafty Hugs,


Julie x

Thursday, March 10, 2016

Now is the Right Time Card with Corina Finley

3:30 AM 0 Comments

Hello!

Hope you are having a great week and have had some time to be creative! I wanted to share with you a card that I created using a stamp set that I purchased awhile ago but did not get a chance to play with!
I stamped my image on watercolour paper with VersaFine Onyx Black Ink and embossed with Super Fine Black embossing powder. Heat set and used Ink sprays to colour the panel and one matte. I cut two mattes from black cardstock using the Rectangle Stitch and Cut die. I layered the four together and used one die from the Deutschland Border Set to add detail.


For my floral arrangement, I used two floral dies from the CRAFTY-ANN Collection.
Flower and Chrysanthemum were both inked with vintage photo distress ink, added a flower center to each and dipped the tips of the centers in black glitter. I also cut the medium Tea Rose flower, foliage and flourish accents from white cardstock and inked.


I wanted to add focal interest to the top left corner, so I decided to add a couple of tags, flourish accents and a small flower for more detail and layers. Used copper mini brads to attach my sentiment and added some small black rhinestones.


Dies Used:

I hope you will play along in our Cheery Lynn Designs ChallengeYou could win a $20 shopping spree at the online Cheery Lynn Designs store.

Thanks for joining me today!

Take care,

Live, Laugh & Create!

Friday, October 9, 2015

Wish Card with Corina Finley

3:30 AM 0 Comments

Hello! Corina here with you today hosting the Cheery Lynn Designs blog. My card that I will be sharing this week has a soft vintage colour palette and I used an assortment of "new to me" flowers dies!

The card cover is cut from a light pattern paper with the Card Cover Maker #1 die and inked with browns & blues. I added the edge of the largest A2 Frames Rectangular Scalloped die behind the cover so the left and right edges only show.


Above is a up-close picture of the floral arrangement which includes ChrysanthemumFlower and 
Bell Flower die. The greenery is a mixture of Flourish #6Flourish Leaf and the Ivy Strip.


I used two die cuts from the Nesting Doll Tags #3 set and layered the Wish Sentiment from the

Make a Wish Phrase die. Finished the card off by adding a few flat back pearls in brown and blue to the flower centers and embellishment on the card cover.


Dies Used:

I hope you will play along in our weekly Cheery Lynn Designs Challenge. You could win a $20 shopping spree at the online Cheery Lynn Designs store.

Thanks for joining me today!

Take care,
Corina Finley

Live, Laugh & Create!

Saturday, February 14, 2015

Forever Yours by Julie Lavalette

3:30 AM 7 Comments

Happy Valentines Day to everyone, it's Julie here today and I am sharing with you a very Ornate Vintage Style Valentines card using lots of layers, dies and a coordinating pack of papers.


In this photograph you will see how my layers started on my card. I tattered some edges and added Distress Ink for an aged look along with a little Muslin tucked around my layers, also adding a few pearls around my clock.


My main flower, stamens were added into the centre along with a little Gesso to the edges of the petals. My Chrysanthemums were folded in half, offset, glued in place and the petals ruffled. Leaves were rubbed at the edges with a little Distress and a wooden heart added.


My heart I paper pieced back in the centre with a different shade of paper and Pearls added. The word Forever was layered twice for depth.


I colour tinted my image and added it on to the Alpine Flourish frame.


Finishing off my card by adding Pearl swirls and a delicate butterfly.


Hope you have a fabulous weekend and good luck to everyone entering our Weekly Challenge.

Cheery Lynn Dies Used :


Julie x

Saturday, April 19, 2014

Thistle Embellishment Tutorial by Julie Lavalette

3:30 AM 4 Comments

Happy Easter to Everyone. It's Julie Lavalette here today hosting the blog and I can’t believe how fast this month is going in as Guest Designer. I love sharing my crafty ideas with you all and today I thought I would show you how to make a Thistle from Embellishment#1, when I first saw this die I thought it would make a perfect Thistle. Isn't it wonderful how we can all look at a die and see something different in it.

I noticed wooden breadboards in our local Bargain Shop and just thought this was begging to be altered. After giving it a Shabby paint effect I cut out the Chicken Wire Frame from white cardstock and then pressed some areas into my embossing ink and used silver embossing powder on to it to give a metallic effect. With the areas left not embossed I dragged the paper through some distress stain to give it a rusty effect.


Now for the magic of Cheery Lynn dies - to make My Thistle.

Step 1 – Paint a cocktail stick green.


Step 2 – Using Embellishment#1 and cardstock, cut out 6 large & 2 medium in purple/lillac and 1 large & 1 medium in green and emboss all pieces in the centre so the paper curls up.


Step 3 -  Glue medium green one onto base of large one and then glue both onto cocktail stick. Gradually gluing and layering on other pieces until you have 3 large left. With these ones crush at the base and glue together. Let the glue dry


Step 4 – Now we want to join the 2 pieces together. Onto the crushed piece that is not on your stick, you want to place glue at the base and a third of the way up this piece.  Now place into the centre of the stick and gather all the paper up and hold together until the glue grips. Try to be patient at this stage until your glue has thoroughly dried.


Step 5 – Start to curl your edges with tweezers on you green parts and the medium die layer of purple you had placed in. This all helps give texture.

Step 6 – You now want to ruffle the top part of your Thistle so placing a couple of fingers around the middle to support it, bend your papers back and forward.

Step 7 – Cut out green cardstock using your flourish leaf strip and glue a few leaves into place. The  B216 Wreath Strip would also look fab as leaves on this.


Well I hope you all managed to follow my tutorial and have fun making a Thistle. As you can see this die is fantastically versatile, as if you look at my small purple flowers they are made from the same die and they also look great in the centre of larger flowers.


        Cheery Lynn Dies Used :


Hope you all have a creative weekend and I’ll see you next week Saturday for my final Guest spot.


Julie x


Copyright Statement


All content, including designs, pictures and words are the exclusive property of the author of each blog post. Information shared here is for inspiration only and may not be copied for publication, competition or profit. Thank you for your cooperation.

SOCIAL MEDIA 2


Follow Us @jointhemakersmovement


All content, including designs, pictures and words are the exclusive property of the author of each blog post.
Information shared here is for inspiration only and may not be copied for publication, competition or profit. Thank you for your cooperation.
