Wednesday, October 5, 2011

Stacker Flower dies

3:30 AM 3 Comments
I decided to play with my new Cheery Lynn Designs Stacker Flower dies.  There are 5 different flower dies and a matching leaf die.  And to make your dies go further, you can use the new Scalloped Window Stackers dies to make nesting sizes of flowers.  For tutorials on how to use these dies, visit Cheery Lynn Designs.


I made a total of 3 flowers but only used 2 on my card.  I curled the edges of the flowers to give them more dimension.  The paper is all from Jillibean Soup.  I also used my Scallop French Flair XL Stacker die and it's matching Silver Stacker dies.  The frame is the new Scandinavian Hearts.  I also added some swirls using my Fanciful Flourish die.  Finished size is 6" square.

Tuesday, October 4, 2011

Memory Book...

3:30 AM 11 Comments
Hello everyone, its Sandie here from Australia. I'm very excited to be here doing my first blog post for Cheery Lynn Designs, as part of their Design Team.  I opted to create a "Memory Album" using a variety of Cheery Lynn Designs dies, which certainly complimented the beautiful Australian designed papers by Megs Garden.

This was certainly an enjoyable project to complete – using a assortment of dies, and various paper mediums, including chipboard, to bring the album to life!
Album front cover includes  Exotic ButterflySmall &  Fanciful Flourish.
On each page presented there are various hidden journaling areas, pockets, photo areas, and so much more. Sadly, I cannot photograph all, as this post would be too graphic intensive.

The 2nd page includes: (New Release)  Polynesian Sails Oval (insert) & Exotic butterfly mini


4th page: French Pasty Doily.

Throughout the album I have used a mixture of different mediums on each of the Cheery Lynn Design die cuts – Glimmer Mist, Stickles, Distress Inks, and Lumiere Paints.   
5th page: Colonial Lamp Post, Victorian Picket Fence, Screen Door w/CatGrass Border & Darling Daisies.

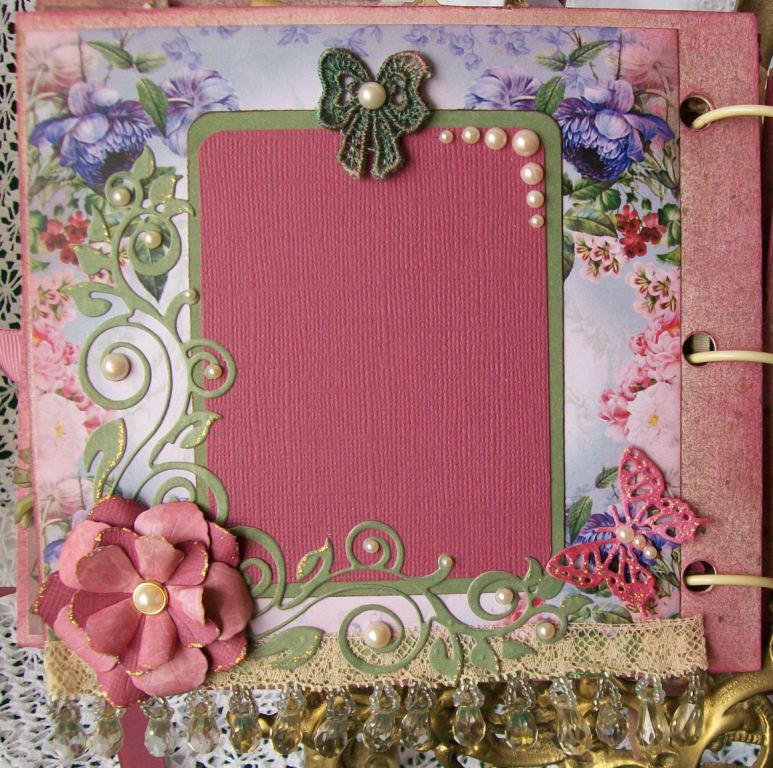
6th page: Judy’s Blooms, Exotic Butterfly Mini & New Release Lace Rose and Flourishes.
 
To create the flowers, I cut several of Judy’s Blooms and curled each petal before layering together for a realistic appearance.


I hope everyone has a brilliant and creative week...
Sandie

Monday, October 3, 2011

My First Cheery Lynn Designs Project

3:30 AM 9 Comments
Good Morning Everybody, Donna here with my first post for Cheery Lynn Designs.Today is the first of many creations I'll be showing you, using the fabulous dies from Cheery Lynn Designs, and with Halloween coming up, I've created this lantern.

I was Christmas shopping and spotted a little red tin lantern in the shop, and the idea came to me to create a Halloween lantern (my mind works in mysterious ways 
(Christmas = Halloween ? ).......so the first die I reached for to create the windows was the
 Lattice Frame 2, I  then built my lantern based around that die. I created a few prototypes to begin with, just to make sure everything fit nicely together and with a few small adjustments here and there.......this is what I came up with.
Two panels have the Lattice Frame 2 with acetate, so you can see inside, and two panels are also using the Lattice Frame 2 but with images in front of them. 
Here you can see the little battery operated tea light inside.....gives off a lovely eerie glow.
I've used the Lattice Frame 2 with acetate behind it and then the Frame again to hold the acetate in place. The lantern was created using HEAVY card mount as I didn't have any black card and it was very difficult to cut, but it's very nice and sturdy. The black spider was a glow in the dark plastic spider that I colored black using a permanent marker The lovely fringe on the lid was created using the Anastacia Border. And the base was created using the Border Carnivale.
The super cute bats are the Cheery Lynn Die " Going Batty" and the spider web is one I printed out and then used a Sakura pen on it to enhance it. I really wished I had used the new Spider web die that Cheery Lynn has out now.........ah there is always next year.
A view of the other side showing the Lattice 2 Frame used as the background behind my images.
The lantern itself sits on a base that is attached, but the lid is removable to be able to put in my battery operated tea light.
I hope this has inspired you to create your own lantern or other Halloween projects.
To create this project I used the following dies
Lattice 2 Frame
Border Carnivale
Anastasia Border
Going Batty

Thanks for looking
~hugs~
Donna

Sunday, October 2, 2011

First DT post; Flowers for you

3:30 AM 9 Comments

Hello!
I'm so nervous! This is my first post as a design team member for Cheery Lynn Designs.. so excited, hope you like my first card!  On my card I have used a stamp from Fizzy Moon and colored it with the copic markers. Design papers are from a dutch store called Action.  I have used the beautiful Judy's bloom flowers in the corner of the image.. they are really awesome.. the leaves in the right corner is also in this set.  On the left corner I have used little leaves from the Dimensional Small Leaves set.  I also used the gorgeous butterfly from the Exotic Butterflies Small Set and the Border Carnivale die I cut it out 2 times and have put some ribbon with a bow between them.


Here you can see the gorgeous butterfly from the Exotic Butterflies Small Set


And here the amazing Border Carnivale die, look at all the details!!
Well I hope you like my first card!!
Hugs,
Marley

Saturday, October 1, 2011

Fanciful Fall

3:30 AM 8 Comments
Hello!!! Jodi here with you today!
I am absolutely honored to be designing for Cheery Lynn Designs!!! Cheery Lynn Dies are BEAUTIFUL and cut amazingly well!!I am so excited to share with you my first official reveal!

When a person thinks of the flourish and flowers dies we typically think of spring and summer flowers. I wanted to show that they also look great in fall colors!


To create the flower, I used the newly released Stacker Flower #5 cutting 3 pieces, then used the Scalloped Window stackers to create the various sizes. I cut the leaf in orange/orange core’dinations cardstock and sanded to add to the fall look.
I added some fall leaves …aren’t the acorns cute too! The leaf and acorn dies emboss as well as cut adding more life to the dies. I cut the acorns from brown/kraft core’dinations cardstock and then sanded…look how well they emboss! The flourish is cut from the brown/kraft core’dinations cardstock as well. Sticking with the fall theme, I cut the ferns with an orangish/redish pattern paper then added a bit of distress inks for more color. The details on the dragonfly are amazing as well!


Notice the lacy edges?! Yes! That is a die as well! That is the newly released gorgeous Border Carnivale die. The details are incredible!
Dies used are:

Here I used the Fanciful Flourish die, and Exotic Butterfly mini to bring life to the flowers. Don’t you just love the details of the doily die?! It is one of my all time favorites!!!


Dies used:

Have a super day!!

Copyright Statement


All content, including designs, pictures and words are the exclusive property of the author of each blog post. Information shared here is for inspiration only and may not be copied for publication, competition or profit. Thank you for your cooperation.

SOCIAL MEDIA 2


Follow Us @jointhemakersmovement


All content, including designs, pictures and words are the exclusive property of the author of each blog post.
Information shared here is for inspiration only and may not be copied for publication, competition or profit. Thank you for your cooperation.