Showing posts with label Mini Fanciful Flourish. Show all posts

Tuesday, March 27, 2018

Best Wishes Pop Up Card by Julie Lavalette

3:30 AM 0 Comments

Hello Cheery Lynn fans, it’s JULIE here today and I am sharing some Vintage inspiration with our Dies and a new Pop Up one today.


My card measures approximately 6x6 inches and uses pretty Maja Design papers. You will see my paper layers have been tattered at the edges adding a pretty Stacker frame between my layers. I also added a Doily between my torn layers and foam strips to my torn layers to give more dimension to my card.


My flowers were inked at the edges and shaped on my Embossing mat with a gem added to the centres and flourishes paper pieced around my card.


I also cut down a flower to fit on the corner adding a little Silicone Glue between the 2 layers, I love how pretty this effect looks.


My Best Wishes sentiment was layered onto my card adding another layer of patterned paper inked at the edges and flower petals in the corners all to compliment the outside of my card.


Cheery Lynn Dies Used:


Thanks for stopping by and wishing you a creative week.
Julie x

Saturday, March 24, 2018

Flower Pop Up by Debbie Brownmiller

3:30 AM 0 Comments
A warm hello to you. It's Debbie from Debbie's Time Out hosting the blog today. 


Today I am featuring the Pop Up Flowers.


I used a flower patterned paper for the front of the card and matted it with green and white cardstock. I layered the Clock to the right side of the card. I cut some flowers blooms from the Pop Up Flowers. I colored and shaped them. I layered the Fanciful Flourish and the Mini Fanciful Flourish in a couple of  places and then layered the flowers onto the flourishes.


Here is a photo of the inside of the card showing the Pop Up Flowers. A piece of matching paper was layered to the inside. This is one of my favorite pop up dies from the collection. Cheery Lynn Designs does have a nice selection of pop up dies to choose from. I hope I have inspired to  try creating with the pop up dies. They really do make people smile. 

Thanks You for visiting the blog today and for the comments you leave. 

Have a wonderful craft day my friends. 

Dies Used
Pop Up Flowers - 1 Piece Die Set - B936
Mini Fanciful Flourish Die - B117S
Fanciful Flourish Die - B117
Clock (Steampunk Series) 4 Piece Die Set - B357

Saturday, July 11, 2015

Rainy Day Friends by Julie Lavalette

3:30 AM 3 Comments

Hi Everyone, It's Julie here hosting the blog today. With an abundance of beautiful colours everywhere from Summer flowers I found myself inspired to make a brightly coloured card.


I used my Cuties Strip around the edge of my frame, layering on my doily and stamped sentiment with Silicone Glue. My Butterflies were layered 3 times using a smaller one in the centre and adding some gems.


My flowers were made using 3 layers of paper, shaped on my embossing mat and a few Pearl Stamens added to the centres.

Cheery Lynn Dies Used:


Thanks for stopping by today and good luck to everyone entering our Weekly Challenge where you could win yourself a $20 spending spree here at the Cheery Lynn Designs On-Line shop .


Julie x

Tuesday, June 23, 2015

Blessings by Karen Maldonado

3:30 AM 1 Comments

Hi there Cheery Lynn friends!  It's Karen here today sharing a shabby
'blessings' card that can be used for several occassions!

To start, I layered, from bottom to top. the  French Pastry Doily
and Circle Classic Silver Stacker.  Then, I took the 
Circle Classic Small Silver Stacker and placed on top of the 
French Flair Little Stacker, and then die cut both pieces at the same time.
This creates an open center, so you can see the background paper
that I used on the bigger Circle Classic Stacker.

Then, I made two flowers using the Black Eyed Susan Strip
along with the leaves from the Frangipani with Leaves die set.  
To the center of each flower, I used the Embellishment #1 set and then
added a shiny and sparkly rhinestone center to each distressed flower!

and die cut one of each and placed behind the flowers.  I distress inked
some crinkly ribbon to match the card colors and finished the card by
distressing the edges!


Cheery Lynn dies used:


Make sure you join this week's "Anything Goes" challenge
for your chance at winning a $20 shopping spree

Have a beautiful day & I will see ya next week!

Hugs,
Karen

Saturday, April 4, 2015

Happy Easter by Julie Lavalette

3:30 AM 4 Comments

Happy Easter weekend to everyone. It's Julie here hosting the blog today and I have made an Easter card with some of our dies from the January release, using them also as a stencil. Let me talk you through my card.


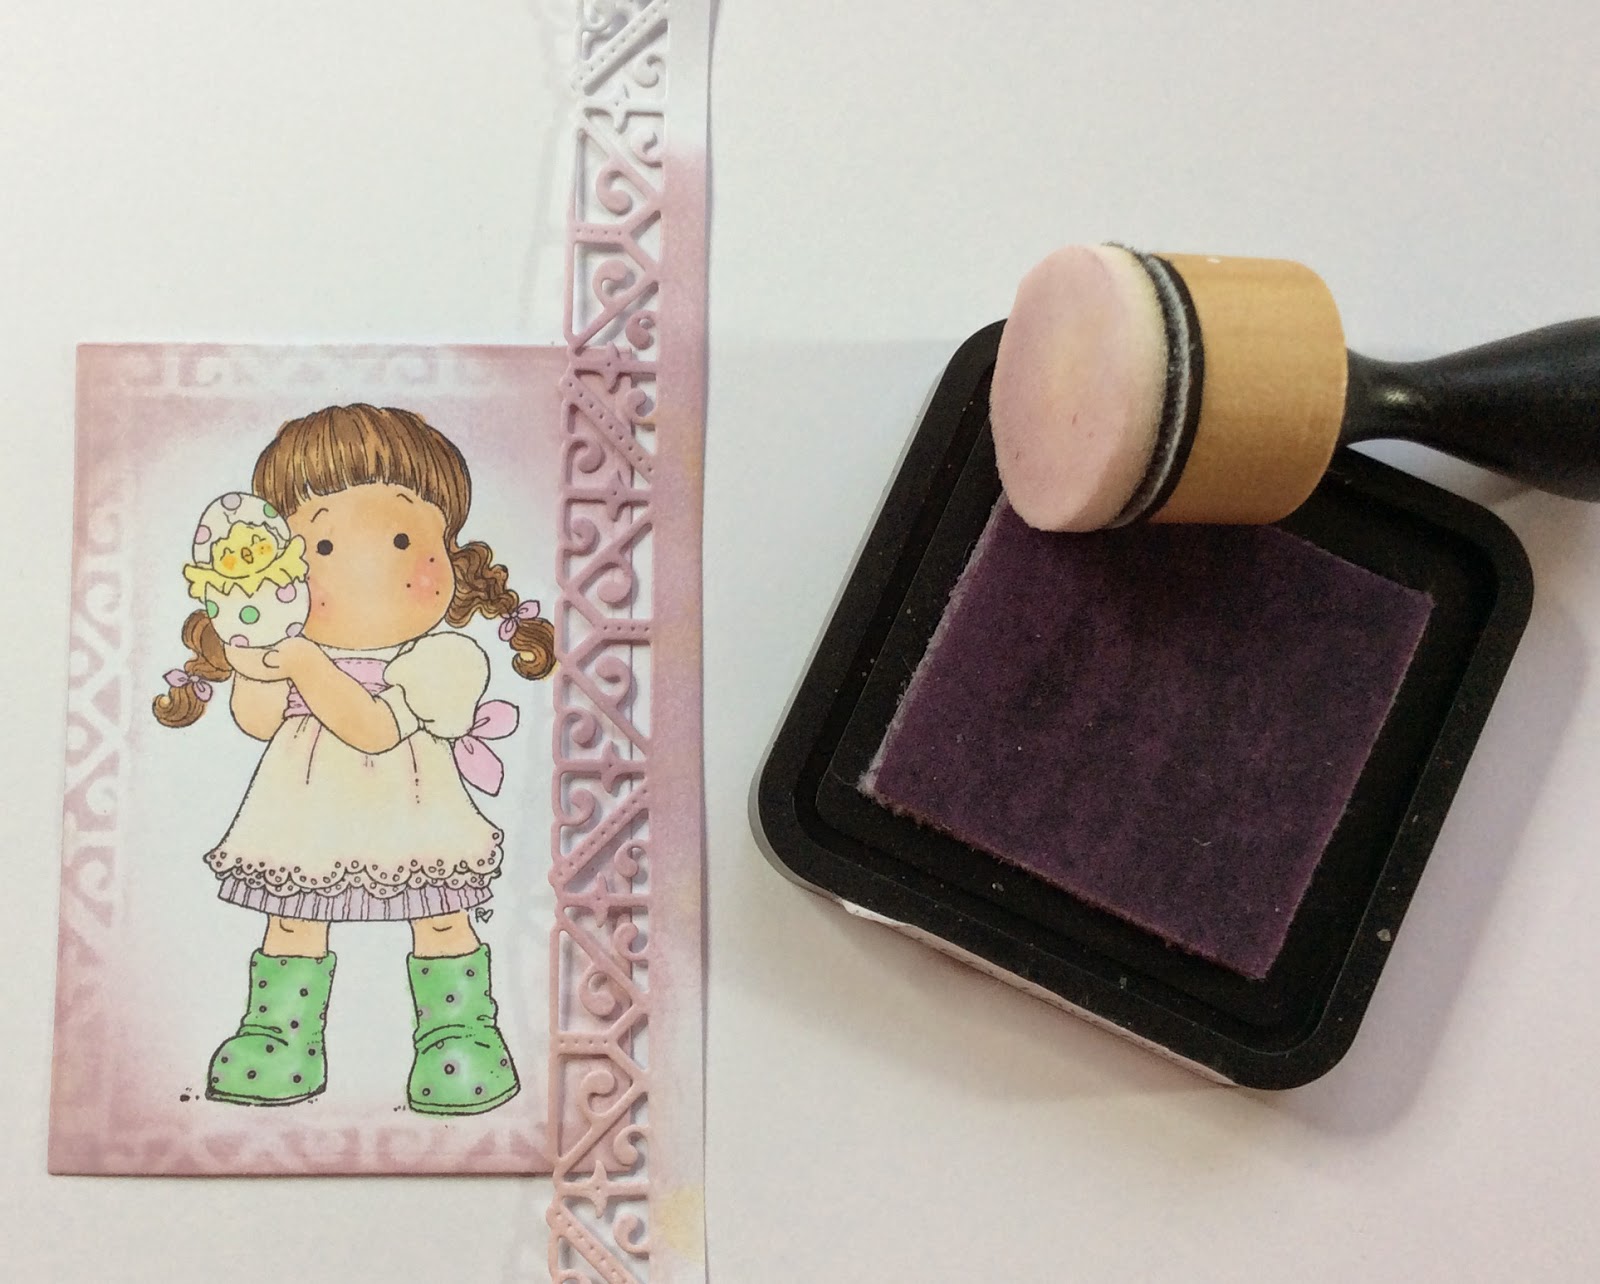
I stamped my image and coloured with Copic pens. I then die cut out my Deutschland Border in heavy cardstock and used as a stencil, shading Milled Lavender on to my image and I distressed the edges with my distress tool. Layering on to coloured cardstock. 


I cut my Doily in half, offsetting on the underside. 


I used 2 of the Border Strips to the edge of my card, adding a little texture paste through a stencil on to my patterned paper.


I placed my flourishes on, paper piecing in a few extra swirls. Don't worry about your joins as your flowers will hide them.


Finally adding my roses which had been shaded with Copic pens.


A closer look at the centre mounted, notice how the stenciling around Tilda compliments the Doily and Border strip.


Cheery Lynn dies used :


Thanks for stopping by today and good luck to everyone entering our Weekly Challenge with the chance of winning a $20 spending spree here at Cheery Lynn Designs.

See you all next week.


Julie x

Friday, February 6, 2015

Laughter Card with Corina Finley

3:41 AM 5 Comments

Hello!

Corina here, hosting the blog for you today - Happy Friday!

For this weeks card, I wanted to create another background using Cheery Lynn Designs Embossing Plates and the technique that I shared in last weeks post.

I decided to use the Wood Grain Embossing plate and three Distress Inks: Gathered Twig, Walnut Stain and Vintage Photo. The difference in value and shades of brown, allows you to see all the amazing detail that this Embossing Plate has.


I cut out two of the Old Barn Board and glued them together. I stamped my sentiment with Versamark and used fine Black detail embossing powder. I trimmed two of the small hinges for brackets so I could hang my sign with twine.


For my Floral arrangement, I created two Daisy Flowers using the Daisy Strip. I decided to colour the flowers with alcohol markers for vibrancy and then added a little flocking to the inside of my flowers for pollen. I used an assortment of leaves and branches for my greenery in a few different green and tan shades.


Please take a look at my last weeks post regarding creating a Watercolour Embossed Background!

Dies used:

Old Barn Board (3 Dies) - B439


I hope you will play along in our weekly Cheery Lynn Designs Challenge 170 - Add a FlourishYou could win a $20 shopping spree at the online Cheery Lynn Design Store.

Thanks for joining me today!

Take care,

Corina Finley
Live, Laugh & Create

Saturday, November 22, 2014

Especially for You - Tag by Julie Lavalette

3:30 AM 5 Comments
Click to Enlarge

Hi Everyone, It's Julie here hosting the blog today. I decided to join in the fun of the challenge this week and make a tag. I had full intentions of it being Festive in style, but it was such a horrible day outside I decided to think of summer days.


I cut a piece of Cardstock into a tag shape measuring 3.5 by 8 inches. I mounted my pink striped paper onto it which was distressed at the edges with my distress tool, to give a shabby feel.  I cut out my Deco Border in pink and white paper and offset one in front of the other to give added dimension.


I cut sections of my Snowflake Doily and placed on my tag for interest and texture. Next layering my fanciful flourishes on top.


My flowers were cut out in white card. I dabbed a little distress into the middle area of the flowers for shading and added flower soft for texture into the centres to finish them.


My speech bubble is from the Latest Release. The die is called Say What and has many shaped bubbles which are so much fun to use. I stamped a sentiment onto it and added distress ink around the edges.


My doll stamp was coloured with Copics and her dress was stamped on patterned paper and layered up. Finally adding a ribbon and some bling for finishing touches.

Hope you manage to join in one of our Weekly Challenges. You could win a $20 shopping spree to spend here at Cheery Lynn Designs.

Cheery Lynn Dies Used:


Hope you have a lovely creative weekend,

Julie x


Friday, October 10, 2014

Happy Thanksgiving Flower Card

3:30 AM 6 Comments

Happy Thanksgiving Everyone!

Corina here with you today and I am celebrating Thanksgiving this weekend! The statutory Holiday of Thanksgiving in Canada is on the second Monday of October.

Also very importantly - it is my Birthday tomorrow! I plan to have the day filled with things I love - Family, Food, Crafting, and CAKE!


Here is a Flower close-up with the Wheat and Baby's Breath. I choose to use an orange colour palette for Fall and for a festive look.

I used the Mexican Tile and as I was using it, I kept thinking that the pattern reminded me of poinsettias. I will have to create another Copy-Cat Card closer to Christmas using the poinsettias!


 Dies used:

Shasta Daisy - B310


I hope you will play along in our weekly Challenge 153 - Halloween You could win a $20 shopping spree at the online Cheery Lynn Designs store!

Thanks for joining me today!

Take care,
Corina Finley

Live, Laugh & Create!

Saturday, October 4, 2014

Nice Little Things by Julie Lavalette

3:30 AM 3 Comments

Click to Enlarge

Hi Everyone, It's Julie here hosting the blog today. With winter now just around the corner here in Scotland, I have started to feed our Garden Birds once again. This card is inspired by them and the Summer flowers that are now all disappearing.

Let me show you previous layers again on this card to make it easier to understand how I made it.


You will see I layered my French Flair Doily stackers rotating the following layer to a diamond shape and I paper pieced in my Snowflake Doily at the back.


I shaded my leaves,birds and birdbath with distress inks and my flowers were coloured with Copics.


I stamped my verse, added a little distress and accent stamping to soften the sharpness of the white card.

Good Luck to everyone entering our weekly challenge and I'll see you all next Saturday.

Cheery Lynn dies used:

Happy Crafting,


Julie x

Monday, September 8, 2014

Missing You with Rhonda Van Ginkel

3:30 AM 4 Comments
Monday greetings to you, it's Rhonda here today to host the blog for you.

I have a "Missing You" sentiment card to share with you today.  My card was created using a variety of our pretty dies. One thing that I really love to do is mix and match our dies.

"Missing You" (A2 sized card)

I started by cutting the medium Horizon Square Boutique Stacker, then scored and folded it.  I adhered to the back. Next, I layered under on the front the French Lattice Small and on top of it, half of a Kiwi Spirit Doily. 


I cut the Southern Charm Valance from cardboard of a cereal box, then added a coat of gesso. It was adhered with some glossy accents on the lines and vines.  I left the right center side open so I could layer in my Sentiment Tag 2 and Horizon Fishtail Banner.

I've shaped my Horizon Fishtail Banner to add a bit of dimension and charm. My Tea Rose flower was first embossed using the Foliage Embossing Plate, then cut, shaped and inked lightly. I tucked in the Mini Fanciful Flourish and added the petite florals from Embellishments 3 to add a bit of a delicate touch. Pearl centers finished the flower along with a few little stick pins.

Cheery Lynn Designs Dies Used:

Please join us this week for our fabulous new challenge "All About Texture"!  You could win a $20 gift certificate to the Cheery Lynn Designs store just for playing along!

Thanks so much for stopping on over to the blog today.  Have a fabulous week!

Saturday, July 12, 2014

Stitching Time by Julie Lavalette

3:30 AM 4 Comments

Hello Everyone,

It's Julie here hosting the blog today. I have a small sewing machine I bought in a sale a few years ago and it lies neglected in my craft room so this week's challenge was the perfect inspiration I needed to use it.


I love the Tiny French Pastry Doily die and it's versatility of using complete, to compliment the other sizes it comes in or cutting it into sections. On this card I cut it out in black card to accent on layers of my card and also in brown card to use as photo corners on my topper.


My flower has been made by cutting out an old lint bandage with the Gardenia strip, I then sprayed my petals with some water and coloured with distress stain. Scrunched the material and dried with my heat gun. Once dry I unravelled them and layered a few together with a couple of stitches and a little lace.


My zig zag is made by cutting out the Expandable Tiny Borders in Kraft paper. I put a little faux stitching in the centre before spraying with a little water to scrunch it up for texture and only put a little glue in some areas so it didn't lie flat on the card. I stitched some lace into the layers using my machine. Adding on my other embellishments and die cuts to finish.

I'll be back on Tuesday next week to share the post with my other Teamies as we showcase the exciting New Release at Cheery Lynn Designs.

Cheery Lynn dies used:

 Good luck to everyone entering our Weekly Challenge and I'd love if you have time to leave me a comment.

Julie x

Saturday, July 5, 2014

I can see a Rainbow by Julie Lavalette

3:30 AM 5 Comments

Hello everyone, it's Julie here hosting the blog today. Hope you are managing to get some sunshine wherever you are in the world. In Scotland it has been sunshine and showers this week and we had the most beautiful rainbow early on in the week which gave me inspiration for my card and although bright colours are really outwith my comfort zone, I always think it is good to challenge ourselves in trying something new.


I cut out my doily in several shades of the rainbow and then cut each doily in half. I next glued them together in a graduated style that would fit my DL sized card. Once placed on my card I cut out a doily in white card stock and stamped my sentiment onto it before placing onto the middle of my card.


My flower was made using the Shasta Daisy die. On the top layer I placed a little glue on the outside edges of my petals and curled them around with my tweezers and held down until the glue gripped, finally adding a piece of bling into the centre. My butterfly was also cut in bright shades to compliment my rainbow.

Cheery Lynn Dies used :

Thanks for your continued comments I love reading them. Good Luck to everyone entering our Weekly Challenge this week and I will see you all next Saturday.

Julie x


Friday, June 27, 2014

Cherish Card by Corina Finley

3:30 AM 5 Comments


Hello! Corina here with you today on this last Friday of June - Time flies when you are creating!

This week I thought I would play with the Black Eyed Susan Strip flower die. This strip die has 4 flower layers - I used only two layers to create this flower. The Die also has a centre for the Black Eyed Susan which I did not use for this flower today.


I inked each with blue ink and then misted both layers with water. I gave the water a few seconds to soak in and then I twisted each petal (pinching the tips) in the same direction. I allowed them to dry and sprayed with homemade glimmer mist.


I then layered one on top of the other and added a pearl brad. I love the look of this flower - so whimsical! I hope you try to make one and let me know how it turns out!

Dies used:
Flourish Leaf Strip - B178
Fanciful Flourish - B117
Victorian Romance Flourish - DL151
Mini Fanciful Flourish - B117S
Olive Branches - B147
Black Eyed Susan Strip - B338
Chicken Wire - FRM144
Fiona’s Magic Mirror - FRM140
Cherish (Set of 2) - B415

I hope you will play along in our weekly Challenge 138 - Wonderful Weddings. You could win a $20 shopping spree at the online Cheery Lynn Designs store!
 
Thanks for joining me today!
 
Take care,
 
Live, Laugh & Create!

Copyright Statement


All content, including designs, pictures and words are the exclusive property of the author of each blog post. Information shared here is for inspiration only and may not be copied for publication, competition or profit. Thank you for your cooperation.

SOCIAL MEDIA 2


Follow Us @jointhemakersmovement


All content, including designs, pictures and words are the exclusive property of the author of each blog post.
Information shared here is for inspiration only and may not be copied for publication, competition or profit. Thank you for your cooperation.