Showing posts with label Miniature Rose. Show all posts

Friday, June 1, 2018

Cherish with Lisa Blastick

3:30 AM 0 Comments

Hi Welcome back to another quick, clean and simple card using Cheery Lynn Designs die cuts. I was feeling the need to use greens today because it reminds me of nature and it is very calming to me.  


The base of the card is 5 x 6 inches. I added 3 sets of the leaves and two sets of the miniature rose for the flowers. The circle is the smallest of the stitched circles and the cherish is the larger of the 2. 


I added some green pearls and it is ready to go! 


B415 Cherish Clearance

Thanks for stopping by today! 
Have a great day! 
Hugs Lisa 

Tuesday, August 1, 2017

Bird Cage Tea Light With Lisa Blastick

3:30 AM 0 Comments

Hi! Welcome back with a new project using Cheery Lynn Designs. I wanted to make a 3D Bird Cage Tea Light using the new "decorative bird cage"  It is really very beautiful with amazing details. I die cut out the bird cage 4 times and glued it together. The little door opens up too.


I used "miniature roses" and one of my favorite "flourish #13" on the sides and on top. 


I added one bird from "bird bath" but you could add as many as you like. The tea light fits perfectly in the center. Great for wedding, baby shower or any special occasion.  


Two more roses on top...I tied the tops together with pink ribbon. 


Thanks for stopping by today!
Hope you enjoyed!
Hugs Lisa 

Wednesday, January 11, 2017

Valentine Shaker Card with Lisa Blastick

3:30 AM 4 Comments

Hi! How is everyone's New Year going? Well, this past weekend I've been busy with my household being ill from that icky flu going around. Me, I felt a little icky one day, but I've been loading up with vitamins and lots of sleep to avoid it...so far so good!  Meanwhile, I was a little behind in making some cards for a bit. I was able to quickly make this fun Valentine card for the next holiday for Cheery Lynn Designs. 


I used some soft creams, kraft and pinks for the colors. The "heart shaker" is the focus of the card. I added "miniature roses" in 3 different pinks along the edge with pink sequins in the center of the heart. The sentiment was stamped in brown ink and fussy cut the flag edges. 


Behind the heart is the lovely "french pastry doily" with real lace behind it. It was leftover lace from my daughter's wedding innovations that I made over 6 months ago. Inside the shaker I used some pink sequins. 


Thanks for stopping by today! 
Hope you enjoyed! 
Have a great day
Hugs Lisa 

Wednesday, August 24, 2016

A Friend is Someone Who Knows the Song in Your Heart with Bonnie Garby

9:13 AM 0 Comments
Hi friends.  Bonnie here today for Christina.  I'm sharing a card with a somewhat simple design today and using some of my flower stash.  I hope you'll forgive me that the colors in the rose are not an exact match to the rest of the paper.  They seemed much closer in color before the card was assembled....
I've been on a kick trying to use up some of my beautiful artist paper stash and the lovely light blue mulberry paper in the background of this card is another example. 

The gorgeous roses were made using the three sizes of rose die offered by Cheery Lynn Designs.  The roses are my absolute favorite flower dies.  I cut the petals in two different colors, inked the turquoise petals with an old script stamp for some texture and inked the edges.  I shaped the petal with a foam pad and stylus and the handle of an old paint brush and assembled.


Cheery Lynn Dies used:

The sentiment is a stamp from Quietfire Design and the bow is made with two colors of blue Delicate Stitched Satin Ribbon from Really Reasonable Ribbon. 
Thanks so much for stopping by today. Don't forget, we have a great Doilies themed challenge going on. We'd love to have you enter for a chance to win a $20 gift certificate to Cheery Lynn Designs.

~ Bonnie ~

Thursday, June 30, 2016

Kraft Doily Card by Ginny Nemchak

3:00 AM 1 Comments

Hey there Peeps! Ginny here to share a card I created inspired by the Cheery Lynn Designs Large Sunflower Doily. I cut it out with Kraft paper and new instantly that it would look fabulous layered with creamy whites paper patterns.  To anchor the warmer color of the doily I used a Kraft card base cut 5 1/2 x 5 1/2 inches. To add texture and depth I used the Tonic Distressing Tool to tatter the edges  and spacers between the layers.
 This arrangement of flowers has the Gardenia Strip and Small Gardenia Strip as well as the Miniature Rose, Dandelions, and Flourish #14. I've added a gorgeous ribbon bow, tag and vintage button to coordinate with the flowers.
I cut additional pieces from the Kraft paper to add bulk and fill in the flowers.  Bending the leaves gives them dimension. I used only 2 layers of the Miniature Roses with a pearl in the center to fill in the edges of the display.
Horizon Fishtail Banners and Square Frame elements are stacked up and secured with spacers for a delicate look. I finished this card off with  pearly accents, a simple loopy twine bow and coordinating wooden clothespin.
This card has a definitely country chic appeal.

Cheery Lynn Designs Dies Used 

Okay that's all for me. Wishing all of you a happy and productive day with lots of time to be creative : ) G

Sunday, April 3, 2016

Wonderful Friend by Jenny Alia

3:30 AM 1 Comments
Hi, it's Jenny back today sharing a friendship card.  I was inspired by the 3D Daisy Flower die.  After I cut, colored the rolled the 3D flowers with my quilling tool, I thought I'd make purple flowers to complement them.  Once I cut and colored the miniature roses and the larger Sweet Williams flower with spray mists, I realized that the flower colors complemented a piece of Prima patterned card stock in my stash.
I cut the card stock, distressed the edges, glued it to a white 5.5" square card and then added the Princess Garden window on top before arranging my flowers and adding the words Wonderful Friend.

Cheery Lynn Dies

Thanks for looking and make sure to join in the current Cheery Lynn Challenge for a chance to win a $20 gift card to Cheery Lynn Designs!

Wednesday, October 21, 2015

Paris with Lisa Blastick

3:30 AM 3 Comments

Hi everyone! Its Lisa back this week sharing some more new release dies with you from Cherry Lynn Designs. Ok, I have to tell you that as soon as I saw the "Paris Eiffel Tower" I knew I had to get it for a card to make for my sister! She's LOVES Paris and I can see making this card with so many fun shabby chic and vintage looking projects. Now for the AMAZING new "Royal Scandinavian Boutique".  I layered them over each other with patterned papers in between. There is a bit of black cardstock using "A2 Scalloped Rectangle Frame" I thought it gave it a super nice touch.


The three flowers were made using, one "Medium Rose" and two "Miniature Roses" I distressed the inside with distressing inks and added vintage pearls in the centers. I also added several tiny pearls on the title and the "Eiffel Tower". The cute tiny leaves are called "Flourish #13" They are the perfect size to blend in with the tiny roses. The card was inspired by this week's challenge "Vintage". I love vintage and shabby chic, Its my favorite kind of card to make. 


I tend to add papers in the inside of my cards, but not usually more dies...However, I thought this was a perfect card to add the "Bon Appetit" die insiide. I found the sentiment on the computer and played around with an english-french translator...It reads, "Please join us for dinner tonight".  I die cut out another part of the "Royal Scandinavian Boutique" and printed it. Lastly, I had this tiny Eiffel tower stamp and I fussy cut it out.


Cheery Lynn Designs Dies Used:


Thanks for stopping by today and be sure to check out more of the new release dies from our fabulous DT. Also be sure to join our challenge for your chance to win $20 from the Cheery Lynn Designs Store. 
Have a great day! 
Hugs, Lisa

Saturday, October 3, 2015

Forever Friends by Julie Lavalette

3:30 AM 3 Comments

Hi Cheery Lynn friends, it's JULIE here today. This week I thought I would showcase the versatility of our Stacker dies and how by turning them round and cutting in to the die cut shapes with another stacker you are able to achieve lots of different shapes.


You will see on these photos how I cut out my shapes and inserted in to each other for my base layer.


This photo shows my next layers and how I turned the same stacker as on the first layer around 90 degrees to give a different look.


My Butterfly was heat embossed and a pearl added.


My roses were cut out in White Cardstock and shaded with 2 colours of Distress Ink.


My words were double layered for a shadow effect and the "S" was taken from my word set Happy Christmas. Finally adding some pearls, Stickles and a Leaf Flourish to finish.

Cheery Lynn Dies Used-


Thanks for stopping by today and good luck to everyone entering our Weekly Challenge.


Julie x

Friday, June 5, 2015

Thank You Doily Card with Corina Finley

3:30 AM 3 Comments

Hello Crafty Friends!

I am back with you this week to share a Thank you card I have created using the Nautical Wheeler Doily as my inspiration. I wanted to create this card with a lot of depth and layers. I love how the colours worked together and how my flowers and Dandelions die mimics the background pattern paper.


I cut my base from dark gray cardstock, die cut the Horizon Square Boutique Stacker Frame from light gray cardstock and layered my pattern paper on top. I then heat embossed the Nautical Wheeler Doily with embossing powder. I used the doily as a guide to trim away the center piece from the pattern paper, so that I could stamp my sentiment on the cardstock layer underneath.

My flowers were cut from white cardstock, leaves from the Rose and Leaves die set in dark gray cardstock and the Add a Flourish from light gray. I added the Dandelions in a rich marigold colour for a touch of boldness and Rhinestones for shine!


Above you can see a close up of the center and stamped Thank You sentiment. This card could have easily been turned into a shaker card by just adding acetate to the sentiment opening and sequins!

Dies used:
Nautical Wheeler Doily - DL180

Dandelions (Set of 2) - B453


I hope you will play along in our weekly Cheery Lynn Designs Challenge 187 - Red, White and Blue. You could win a $20 shopping spree at the online Cheery Lynn Design Store.

Thanks for joining me today!

Take care,
Live, Laugh & Create 

Wednesday, May 13, 2015

Woof! Congratulations On Your New Puppy! With Lisa Blastick

3:30 AM 3 Comments

Hi, Its Lisa back today sharing with you a new card using lots of the "Pet Pack" and "Meow & Woof! Diecuts from Cheery Lynn Designs. My inspiration came from my colleague who loves pink and has a little princess girl dog. The pierced banner along the side in pink I placed the "Woof" layered once in black and then diecut out again in white giving it a bit of a shadow. I also cut out the doghouse in pink and just the top of the doghouse in black and layered it together. A placed a pink Miniature Rose in the center just above the door opening. It is perfect for a girl doghouse. :)


Lots of layering of distressed pink and black papers. Then I placed the Fleur De Lis Doily in white for a bit more lacey and girly look. The paw prints are the smaller diecuts in white and I punched out a pink circle then glued it together. The dog bones are the 2 smallest ones and I added one to the top of the banner and one along the side of the doghouse. 


The sentiment was printed on my computer and then diecut with the dog bowl in pink cardstock. I diecut the center of the dog bowl in white, cut it out and placed it on top. Both paw prints and the center of the the dog bowl have 3D lacquer for a little shiny glaze. The poodle was printed from my computer and I added lots of pearls and pop dots throughout the card. 


Cheery Lynn Designs Used:


Thanks for stopping by today! 
Be sure to check out this week's challenge "Roses" 
for your chance to win $20 at the Cheery Lynn Designs Store
Have a great day! 
Hugs, Lisa

Saturday, April 4, 2015

Happy Easter by Julie Lavalette

3:30 AM 4 Comments

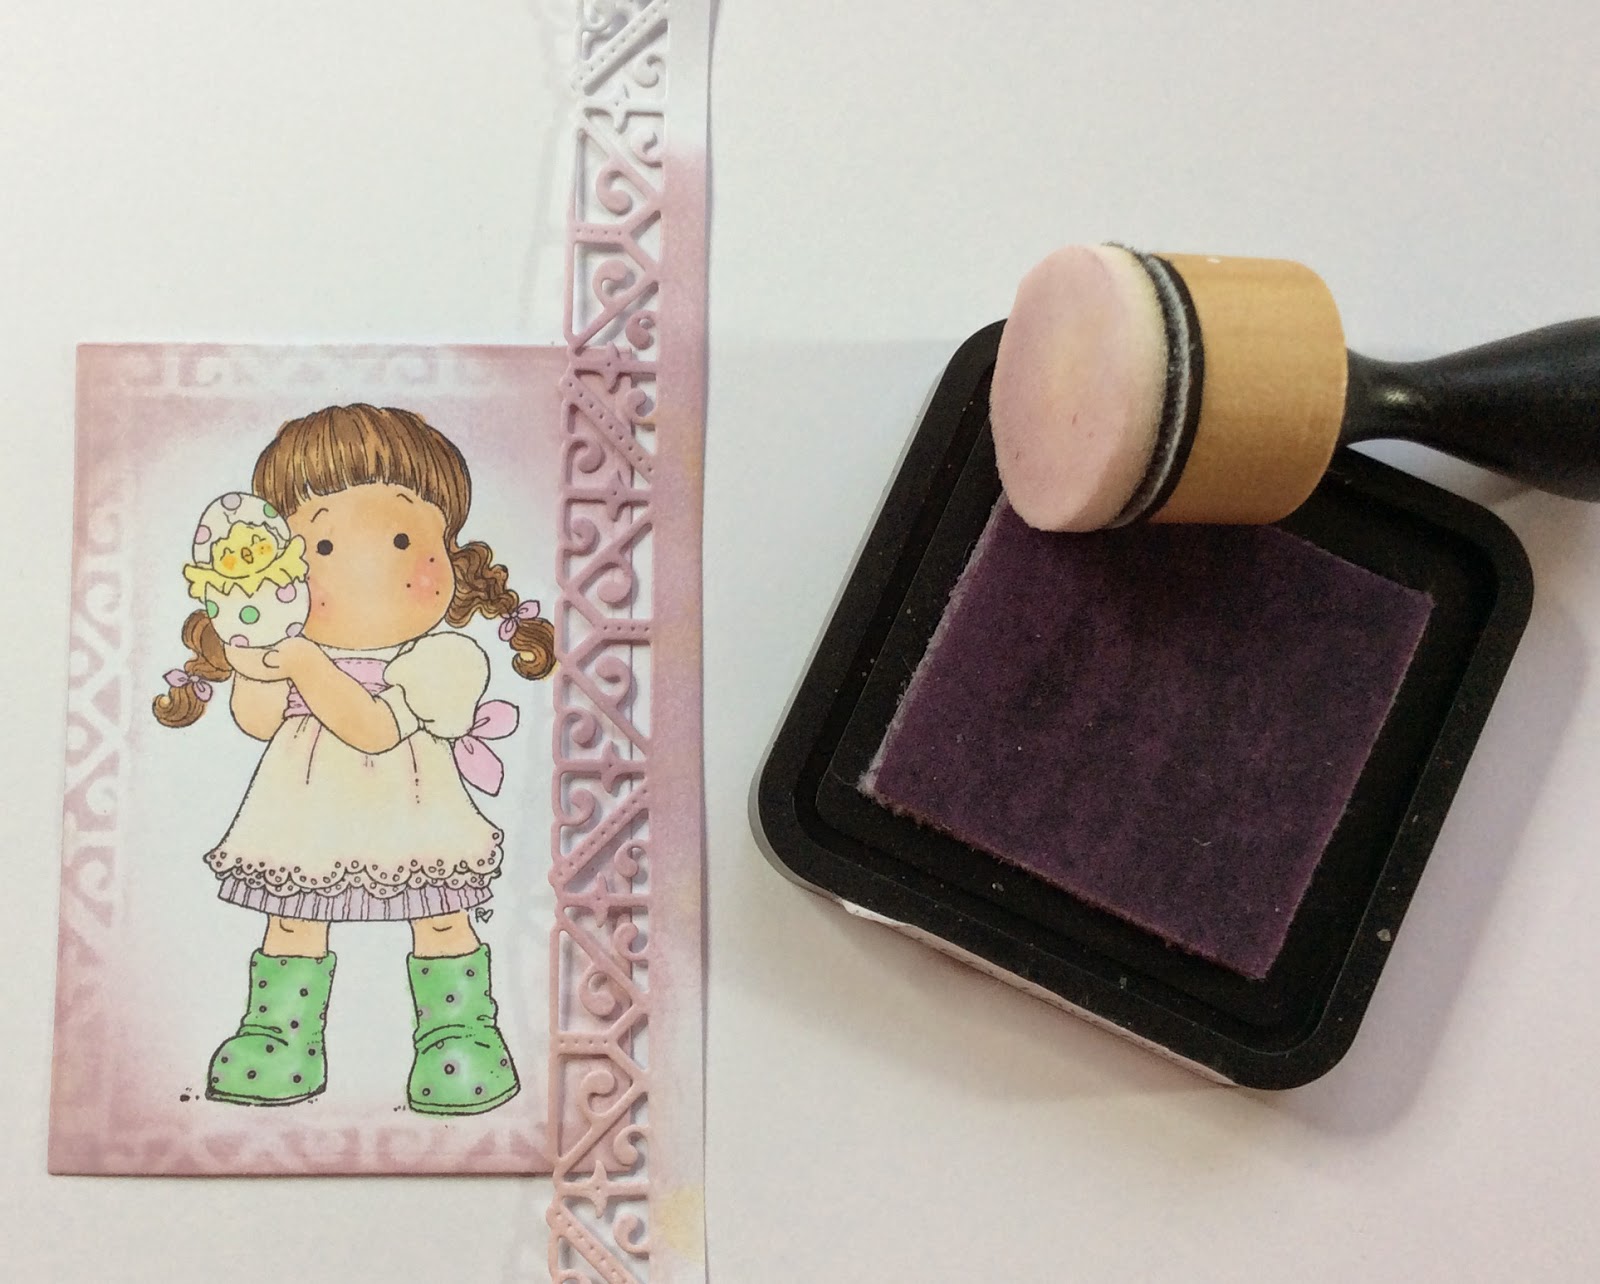
Happy Easter weekend to everyone. It's Julie here hosting the blog today and I have made an Easter card with some of our dies from the January release, using them also as a stencil. Let me talk you through my card.


I stamped my image and coloured with Copic pens. I then die cut out my Deutschland Border in heavy cardstock and used as a stencil, shading Milled Lavender on to my image and I distressed the edges with my distress tool. Layering on to coloured cardstock. 


I cut my Doily in half, offsetting on the underside. 


I used 2 of the Border Strips to the edge of my card, adding a little texture paste through a stencil on to my patterned paper.


I placed my flourishes on, paper piecing in a few extra swirls. Don't worry about your joins as your flowers will hide them.


Finally adding my roses which had been shaded with Copic pens.


A closer look at the centre mounted, notice how the stenciling around Tilda compliments the Doily and Border strip.


Cheery Lynn dies used :


Thanks for stopping by today and good luck to everyone entering our Weekly Challenge with the chance of winning a $20 spending spree here at Cheery Lynn Designs.

See you all next week.


Julie x

Copyright Statement


All content, including designs, pictures and words are the exclusive property of the author of each blog post. Information shared here is for inspiration only and may not be copied for publication, competition or profit. Thank you for your cooperation.

SOCIAL MEDIA 2


Follow Us @jointhemakersmovement


All content, including designs, pictures and words are the exclusive property of the author of each blog post.
Information shared here is for inspiration only and may not be copied for publication, competition or profit. Thank you for your cooperation.