Showing posts with label Nautical Wheeler Doily. Show all posts

Tuesday, April 3, 2018

Floral Arrangement

3:30 AM 1 Comments
A warm Hello to you.  It's Debbie hosting the blog today from Debbie's Time Out . Today I am going to share a card with you using some beautiful flowers and greenery from Cheery Lynn Designs..


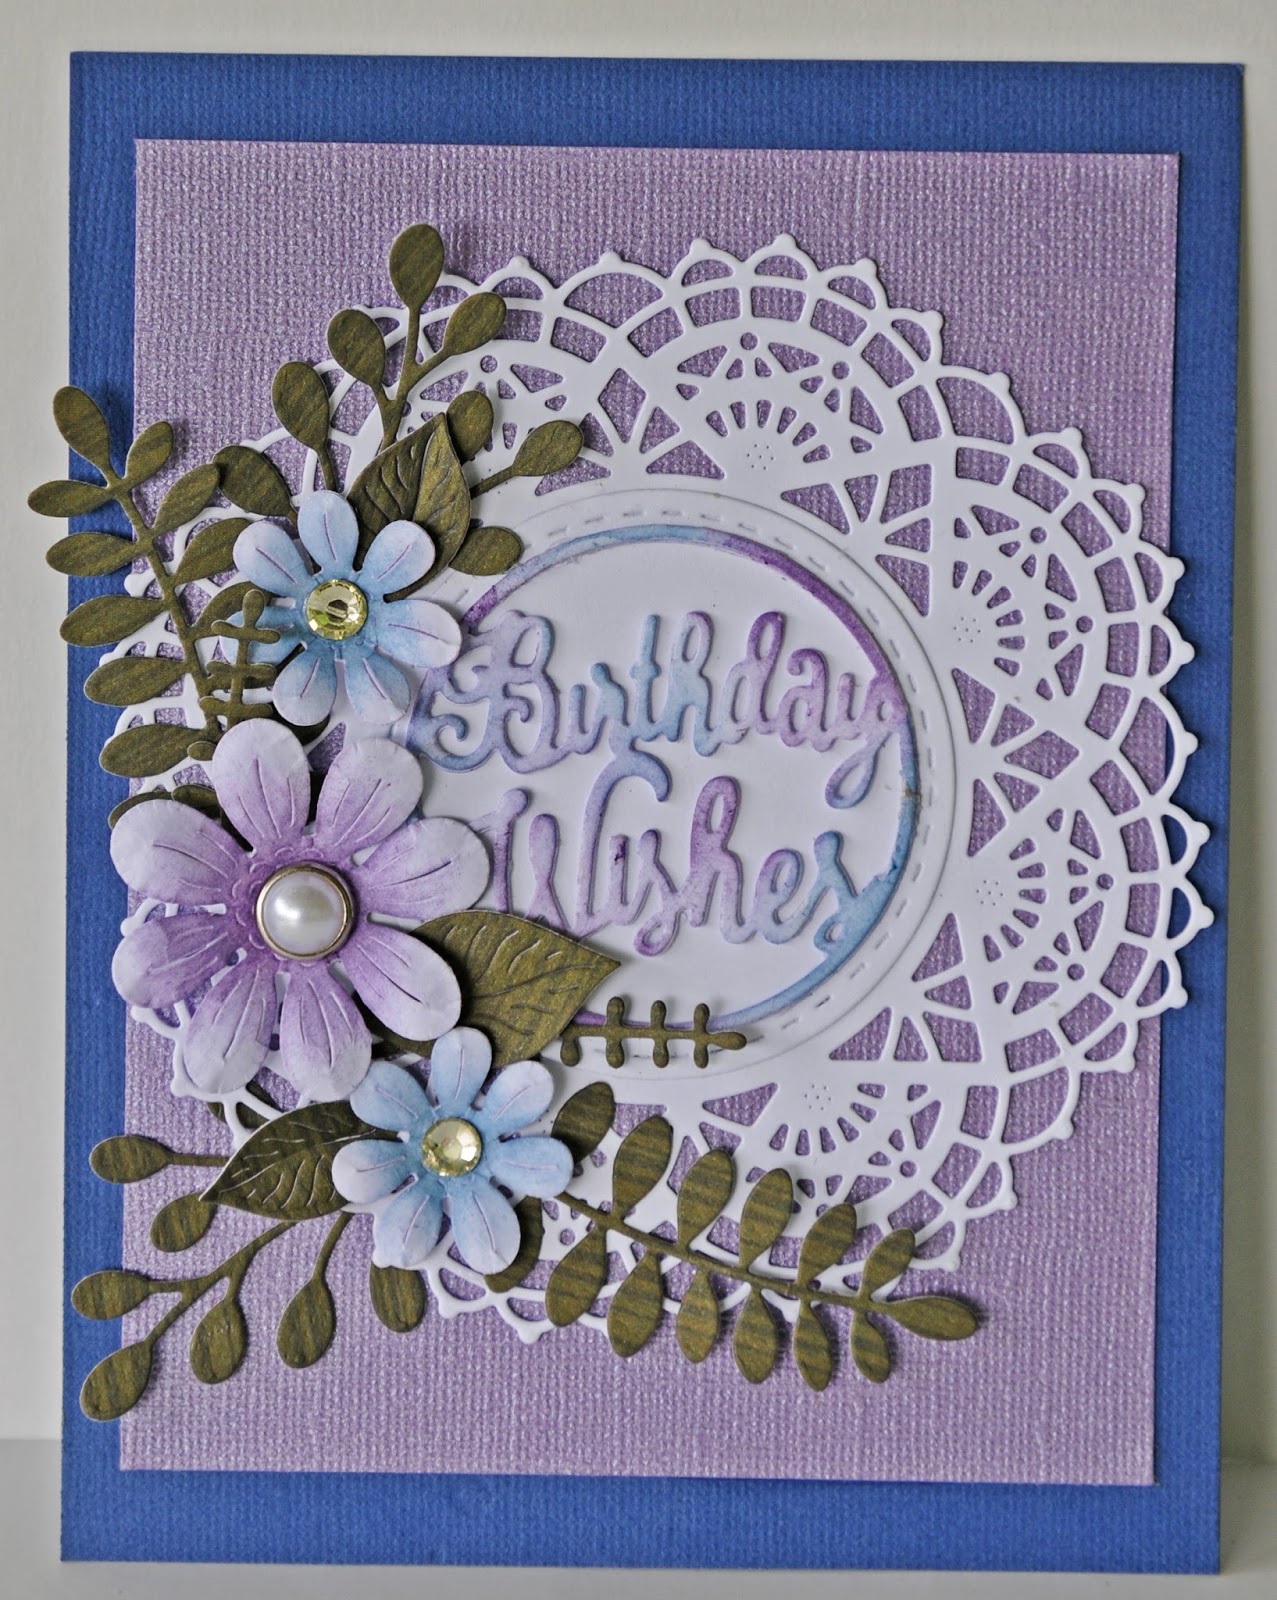
For the base I matted a purple patterned paper with black cardstock. I cut one of the Nautical Wheeler Doily. The doily cuts out in two pieces. So I layered the large one onto the base first and then tucked the smaller one in behind on the top corner. This gave me a pretty base to layer my flowers and greenery onto.


I cut and layered some greenery onto the doily from the Fern Leaf,  Branch 2  and Olive Branches sets. The big center flower was created using the Daisy Strip . The smaller flowers were cut from the Tea Rose small and the Tea Rose Medium. All flowers were colored and then sprayed with water and shaped with a stylus. Some pearls and prills were added to the center of the flowers.


On the inside of the card  I used the Pop Up Best Wishes. These pop up cards are fun and easy to make. 

Thanks so much for visiting the blog today. I hope you find some time today to craft, create and relax. Have a crafty day my friends.

Dies Used
Pop Up Best Wishes Word - 1 Piece Die Set - B935
Nautical Wheeler Doily Die - DL180
Fern Leaf Die - B666
Branch 2 Piece Die Set - B466
Olive Branches 2 Piece Die Set - B147
Daisy Strip 6 Piece Die Set - B259
Tea Rose small- 6 Piece Die Set - B435
Tea Rose Medium - 6 Piece Die Set - B436

Saturday, August 13, 2016

Live Laugh Love By Debbie Brownmiller

3:30 AM 2 Comments
A warm Hello to you. It's Debbie from Debbie's Time Out hosting the blog today. I am featuring Cheery Lynn Designs beautiful Gardenias today.


I have used the Nautical Wheeler Doily  and Lattice Valance Border  for my base. These both make for an elegant card, especially on the dark background.


For the gardenias, I inked only the centers of the petals and then spritzed them. The dies I used for them are the Gardenia Strip  and  Small Gardenia .  I shaped them with a stylus and then assembled them. I tucked in a few leaves from the Rose Leaf Strip .


The Live Laugh Love is one of my favorite sentiments. I inked here and there with purple and blue but also leaving some of the white for highlights.

I invite you now to come join the Bi-weekly  challenge
@ http://cheerylynndesigns.blogspot.ca/search/label/challenge for your chance to win a $20.00 shopping spree. I would love to see what you create.

Thanks for visiting the blog and for all the comments you leave. I really appreciate them.
                                                                        Have a crafty day.
                                                                            Debbie

Dies Used
Nautical Wheeler Doily - DL180
Lattice Valance Border - B406
Gardenia Strip - B339
Small Gardenia - B433
Rose Leaf Strip - B241
Live Laugh Love - B564

Tuesday, June 14, 2016

Birthday Wishes by Debbie Brownmiller

3:30 AM 4 Comments
Hi.  It's Debbie with you today from Debbie's Time Out. Today I am featuring two dies sets from the May release and I am loving them. They are the Birthday Wishes Circle Die  and Floral Bouquet Kit Die Set .


I started with the Nautical Wheeler Doily  as my base to build on. I layered the Birthday Wishes  onto the Circle Stitch and Cut Tool  .


Now look at this flower arrangement created using only one die set. It is the Floral Bouquet Kit Die Set   and it is amazing as you can see.

I invite you to come play along in the Cheery Lynn Designs Challenge at http://cheerylynndesigns.blogspot.ca/search/label/challenge. You will have a chance to win a $20.00 shopping spree. I would love to see your creations.

Thanks for visiting the blog today and have a crafty week.

Dies Used
Birthday Wishes Circle Die - B783
Circle Stitch and Cut Tool - LG Silver Stitch Tool - LSC-4
 Floral Bouquet Kit Die Set - B777
Nautical Wheeler Doily - DL180

Saturday, April 30, 2016

Vintage Corset by Julie Lavalette

3:30 AM 4 Comments

Hi everyone, it's JULIE here today hosting. I am sharing a card with you this week with quite a lot of techniques on it. So let me take you through all my stages.


Layering my die cut corners behind my layer of card gives a different look to our corner dies.


I used my stitched rectangle as a guideline, counting the stitches, to die cut out my patterned strip evenly, holding down with a little tape. I worked from the outside on both sides towards the centre. This way I new my card would have even spacing.


I measured in between my gaps and added strips of paper with foam tape which I tattered at the edges. My centre strip was ever so slightly wider than the rest so I balanced this by adding my cream Anastasia border.


I cut my Nautical Wheeler doily in half and offset onto my stamped image which had also been tattered at the edges and a scattering of Frantage added.


My corset was cut out 3 times in different patterned paper and reinserted in to the negative spaces. I curved the edges at the top and bottom to give my corset a 3D effect adding my angel wing lace finishings and a few sparkly gems.


Adding some splashes of paint and some shabby flowers to finish. 


Thanks so much for stopping by today and I hope you get a chance to join in our Current Challenge which is Mothers Day. We all look forward to seeing your beautiful entries.

Cheery Lynn Dies Used:


Crafty Hugs,


Julie x

Thursday, August 20, 2015

Nautical Tag by Jenny Alia

3:30 AM 1 Comments


Hello!  Jenny here with you today with my take on this week's Doilies Challenge.  I love this Nautical Doily.  It's always a show stopper on cards.  I decided to go with a nautical theme and my tag evolved from there.  

I began by cutting an oval from the Oval Classic Silver Stackers.  I sponged distress ink on the background and left the die cut in the die so I'd get a white edge.  I then distressed the outer edge with some brown distress ink.  

I cut the Sand Dollars and Starfish and colored them with distress ink as well.  It's difficult to see but the Ships Anchor was actually covered in silver embossing powder and is metallic.  The Ship's Compass (one of my favorite dies) is so detailed.  It didn't need much to embellish it but I again colored it with distress ink.


To top everything off I used a seahorse left over from another project.  It's one of the three dies in the Seahorse Family.  Like the sand dollars and starfish he was originally cut with kraft card stock but was colored with blue, green and brown distress inks.  To  finish I cut a hole with a hole punch and tied twine to the top. 

Cheery Lynn Designs Dies

Thanks for visiting and make sure to join the Doilies Challenge for a chance to win $20 towards shopping at Cheery Lynn Designs!

Friday, June 5, 2015

Thank You Doily Card with Corina Finley

3:30 AM 3 Comments

Hello Crafty Friends!

I am back with you this week to share a Thank you card I have created using the Nautical Wheeler Doily as my inspiration. I wanted to create this card with a lot of depth and layers. I love how the colours worked together and how my flowers and Dandelions die mimics the background pattern paper.


I cut my base from dark gray cardstock, die cut the Horizon Square Boutique Stacker Frame from light gray cardstock and layered my pattern paper on top. I then heat embossed the Nautical Wheeler Doily with embossing powder. I used the doily as a guide to trim away the center piece from the pattern paper, so that I could stamp my sentiment on the cardstock layer underneath.

My flowers were cut from white cardstock, leaves from the Rose and Leaves die set in dark gray cardstock and the Add a Flourish from light gray. I added the Dandelions in a rich marigold colour for a touch of boldness and Rhinestones for shine!


Above you can see a close up of the center and stamped Thank You sentiment. This card could have easily been turned into a shaker card by just adding acetate to the sentiment opening and sequins!

Dies used:
Nautical Wheeler Doily - DL180

Dandelions (Set of 2) - B453


I hope you will play along in our weekly Cheery Lynn Designs Challenge 187 - Red, White and Blue. You could win a $20 shopping spree at the online Cheery Lynn Design Store.

Thanks for joining me today!

Take care,
Live, Laugh & Create 

Thursday, June 4, 2015

Off to Great Places with Jenny Alia

3:30 AM 2 Comments

Hello, it's Jenny here with a red, white & light blue card.  First I used the largest of the Deutschland Boutique Stackers to cut the blue layer that was glued to a white A2 card.  The red layer was cut with the Rectangular Classic A2 Frames.  I stamped the quote, cut it with a small circle from the Circle Classic Silver Stackers Set, and adhered it to the Nautical Wheeler Doily.  The interior of the circle was shaded with antique linen distress ink.


The flowers were cut with the Poinsettia Strip.  I used a light blue card stock and shaded the edges with peacock feathers distress ink.  I crumpled the petals for a distressed look and added rhinestone centers.  The leaves were cut from the Flourish Leaf Strip and flourishes from the Add a Flourish dies.  Then I tucked them into the flowers.  


Last I used one of the Small Exotic Butterflies, colored him with distress ink, popped him up with foam adhesive and added rhinestones.

Cheery Lynn Dies

Thanks for visiting and make sure to check out the Red, White & Blue challenge for a chance to win a $20 voucher to the Cheery Lynn shop.  

Hugs, Jenny

Saturday, January 3, 2015

Butterflies and Flowers Card by Julie Lavalette

3:30 AM 4 Comments
Click to Enlarge

Happy New Year to Everyone, it's Julie here today and I hope you have all had a wonderful time during the festivities. My card for this week I decided to use the fabulous Chrysanthemum Strip to make an abundance of flowers for my card.


I started off by die cutting my background in a Dusky Pink Shade.


My doily was edged with Spun Sugar ink at the edges and in the centre, this softened the starkness of the White Cardstock against my vintage image and I also added some Pearlised Glitter glue.


My flowers were made by adding a little Spun Sugar ink into the centres of each layer. I used my embossing tool to shape the petals, layering up and adding Flower Soft to the centres.


My leaves were cut out in different shades of Green and my Butterflies were double layered with 2 shades of Pink Cardstock.


Finally arranging my floral bouquet onto my card.

Cheery Lynn Dies Used :


Good luck to everyone entering our Weekly Challenge and I will see you all next week.


Julie x

Saturday, September 20, 2014

Flutterby Butterfly by Julie Lavalette

3:30 AM 4 Comments

Hi Everyone, Julie here hosting the blog today. Hope you are having a nice weekend and getting some crafty time to yourself. I love the elegance of white on white cards and with this weeks challenge being Things with Wings, I felt inspired to combine both together.


My corners I creased slightly down the middle and glued at the edges to give a 3D effect. I also layered up my dies but rather than gluing totally flat onto my card, I layered with silicone glue to encourage the light to reflect in between the layers to show the beauty of my die cuts.


My butterflies I sprayed some glue onto and added an extra fine glitter to also capture the light and give some sparkle.

Cheery Lynn Dies Used:


Good luck to everyone entering our challenge this week and I will see you all next Saturday.

Julie x


Friday, July 11, 2014

Love Music Card with Corina Finley

3:30 AM 5 Comments

Hello Everyone!
 
Corina here with you today,  to share with you my latest card creation using Cheery Lynn Dies.


The Summer season is time for Weddings! Two weeks ago the Challenge on the Cheery Lynn Blog was Wonderful Weddings. I thought that I might try and give you a little inspiration on creating a Wedding Card. Remember that the past challenge entries are always available for you to take a look back on.


I hope you will play along in our weekly Challenge 140 - In Stitches. You could win a $20 shopping spree at the online Cheery Lynn Designs store!

Dies used:
Musical Staff Mesh Border - B403
Love (Set of 2) - B227
Sentiment Frame #2 - B190
Cuties 1 - B149
Sweet Christine - B434
Tea Rose Medium - B436
Whistle a Happy Tune - B400
Ankara Lace Doily with angel Wing - DL232
Nautical Wheeler Doily - DL180

Thanks for joining me and have a  great weekend!
 
Take care,

Corina Finley
Live, Laugh & Create

Friday, June 13, 2014

Coffee with a Friend!

3:30 AM 9 Comments
 
Hello Everyone! Corina here with you again on this fabulous Friday!
 
Do you notice that the cards you make tend to be in the same colour palette and it is sometimes hard to create in colours that are not your favourite? I call this "CCZ" - Colour Comfort Zone! ....... Pink is 100% outside my CCZ!


I wanted my Doilies to be stacked, so I cut out three of my favourites and trimmed so they fit on top of each other. I also used my sewing machine for the first time on a card! Love the look of the zigzag and straight stitching!

 
This week try creating outside your CCZ! You never know what will happen -  perhaps you might start liking your "Pink"!
 
Dies used:
Thanks for joining me today!
 
Take care,
 
Live, Laugh & Create

Copyright Statement


All content, including designs, pictures and words are the exclusive property of the author of each blog post. Information shared here is for inspiration only and may not be copied for publication, competition or profit. Thank you for your cooperation.

SOCIAL MEDIA 2


Follow Us @jointhemakersmovement


All content, including designs, pictures and words are the exclusive property of the author of each blog post.
Information shared here is for inspiration only and may not be copied for publication, competition or profit. Thank you for your cooperation.