Showing posts with label Small Exotic Butterflies #1 with Angel Wings. Show all posts

Saturday, January 27, 2018

Happy Birthday Pop Up Card with Bonnie Garby

3:30 AM 0 Comments
Hi everyone.  Bonnie here from Make Time to Craft with you today and I have a pretty birthday card with a fun 3D pop up element on the inside from Cheery Lynn Designs.
My card front is created with the Quatrefoil A2 Frame 1 die layered over a pretty piece of Distress Ink Paper.  I then added ribbon across the center running under my sentiment.  The a pretty butterfly was added to the lower right corner.

Cheery Lynn Dies used:


Folding Double Step Pop Up Die Elements Using 3D Pop Up Dies from Cheery Lynn Designs
To view this video on YouTube, please click HERE.
My card was finished off with a pretty bi-color bow made on my Bow-it-All V3.0 using ribbon from the January Ribbon Club Assortment from Really Reasonable Ribbon.
Thanks so much for stopping by today.  Happy Crafting!


Saturday, August 26, 2017

Hello by Jenny Alia

3:30 AM 1 Comments

Hi friends!  Today I'm sharing a card I created after looking through my bin of leftover die cuts.  I've been doing some cleaning and I thought the best way to clean out is to use saved items.  The Wagon Wheel, Chrysanthemum flowers and Dutch Daisy Border  were all previously cut and colored.  I cut the Ivy Strip out of patterned card stock.


The Hello is from the Bohemian Word Die Set .  I tend to use this set a lot, I just love the large hello and the font is both elegant and modern.  I cut the word twice to get the white shadow.  The center of the wagon wheel is a metal brad.  Last I added the butterfly because I thought the corner of the card looked a little too bare.

Cheery Lynn Dies 

I hope you enjoyed my card and thank you for stopping by the blog today.  Make sure to check back on the 28th to join in the Cheery Lynn Blog hop to check out all the new Fall & Winter dies!

Tuesday, May 16, 2017

Floral Birthday Card with Bonnie Garby

3:30 AM 0 Comments
Hi there Cheery Lynn die lovers.  Bonnie from Make Time to Craft here today to share a pretty floral birthday card using one of my favorite flower die sets from Cheery Lynn Designs.
I have lots of layer on this card, but I think it's pretty easy to see from the photo how the layers were assembled.  I just love the Square Frames die for square cards.  

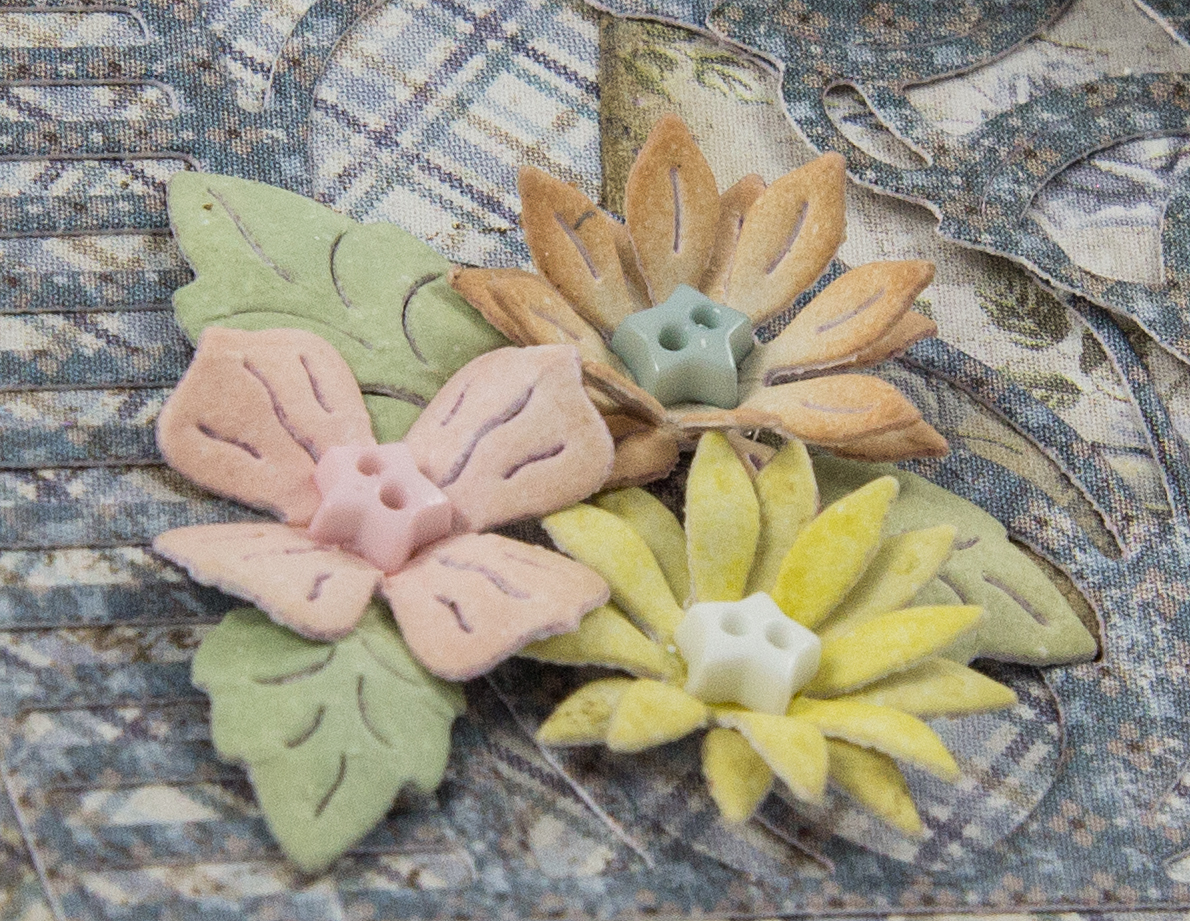
My blue/tan background paper was made using Distress Inks spritzed with water.  My flowers and foliage were created with the Floral Bouquet die set which is such a versatile flower set.  I used some of the same paper from my background for the blue flower petals along with some dark blue and kraft color cardstock.  The layers were also inked with an old script stamp for some additional interest.  The flowers and foliage were cut and then shaped with a stylus and foam pad.  The flowers were layered and finished off with some cool metal gear embellishments from Really Reasonable Ribbon.  I added a pretty butterfly to the right side of the card to balance things out.

Cheery Lynn Dies used:

My card was finished off with a pretty bi-color double-loop bow made on my Bow-it-All Tool using Ivory and Capri Blue Delicate Stitched Satin Ribbon from Really Reasonable Ribbon.
I hope my card today inspires you to pull out some of your favorite dies from Cheery Lynn Designs and create your own pretty floral card.  Happy crafting!

~ Bonnie ~

Monday, September 5, 2016

Birthday Wishes by Julie Lavalette

3:30 AM 2 Comments

Hi fellow crafters, it's JULIE hosting the blog and today I am using one of the fabulous Cardmaker dies for my card.


I started by matting and layering Craft Consortium's Wild Rose papers tattering them at the edges for a shabby feel. My Cardmaker layer I added foam dots behind to lift for extra dimension, I love the intricate design of the cardmaker overlay on my card.


Then onto my favourite part arranging my flowers which have been shaded with Distress inks and Flower Soft added to the centres. 
Finishing off with my butterfly, added bling and my drop shadowed sentiment.

Cheery Lynn Dies Used :

I hope you feel inspired to join in our Current Challenge with a chance of winning a $20 shopping spree.

 Crafty Hugs,
Julie x

Tuesday, March 29, 2016

Follow Your Dreams with Bonnie Garby

3:30 AM 1 Comments
Hi there friends.  It's Bonnie here today from Make Time to Craft filling in for Amy.
I was really in a Spring mood when I was working on Saturday, even though the temperature didn't really support that.  I went with a lavender, pink and white color combination.  Beautiful roses and butterflies are a great addition to any card and I just love this new Dutch Daisy Oval Doily die for Spring themed projects.  

I stamped my beautiful sentiment from Quietfire Design on white card stock and cut that out with one of the XM7 Oval dies.  I wanted to mat that with a purple layer just a little larger and I didn't have a die for that, so I used my Magic Matter tool from Puzzle Mates and traced around it with the 1/8" wheel and fussy cut it out.  Where there's a will, there's a way!
Then I added some Stick It adhesive to the back of a white piece of card stock and cut my Dutch Daisy Oval Doily.  I adhered that to a lavender oval cut with the Oval Classic Stacker and then I added a layer of white mulberry paper.  I wet the edges of the mulberry paper to tear it and leave the fuzzy, feathery edge.  Then I added that to another purple oval.

The dots on the white background were created with the Large Parallel Rectangle Pierce Plate and I just love the texture it gives.  I used one of the pieces from the Dutch Daisy Accents set to fill in some of the white space in the corners of the card.

My roses were made using the Medium Tea Rose die.  I cut the layers, inked them and shaped them with a stylus and then adhered them to create the pretty roses.  
The final touches were the pretty sparkly butterflies and the gorgeous bi-color double loop bow made on my Bow-it-All Tool using Grape and Sherbet Delicate Stitched Satin from Really Reasonable Ribbon.
Cheery Lynn Dies used:

Thanks so much for stopping by today.  Don't forget, there is still time to enter our current 'Anything Goes' themed challenge for a chance to win a $20 gift certificate to Cheery Lynn Designs.

Sunday, February 7, 2016

Love Mini Book by Jenny Alia

3:30 AM 5 Comments

Hi, it's Jenny posting on my first Sunday.  With the changes in the Cheery Lynn challenge (you now have two weeks to enter and can enter up to two projects!) my posting day has also changed.   I was inspired by the current Tickled Pink challenge and my pink-loving daughter who wants me to make little books for all her equally pink-loving friends for Valentine's day.  


I started with the mini book die and pink design paper.  You don't need many dies or embellishments with this die because the book is pretty small.  It's perfect for a purse brag book, mini coloring book or note pad. 


The center rectangle is one of the smaller dies in the Fleur de Lis Boutique Stacker A2 Frame set.  The heart is from the Two of Hearts set, the green side accents are from the new Quadrafoil Accents die set and the butterfly is from the Small Exotic Butterflies #1 set.  


Amlost everything was colored with distress ink and I also added stickles on the heart and butterfly wings for sparkle.  I tied the book together using thin twine and glued pearls to the accents and green-yellow rhinestones to the butterfly.

Cheery Lynn Dies

Thanks for visiting and I hope this inspires you to try your own mini book.  Make sure to join in the In Tickled Pink Challenge for a chance to win $20 towards shopping at Cheery Lynn Designs.  
Hugs,  Jenny

Saturday, January 2, 2016

Happy New Year 2016 by Julie Lavalette

3:30 AM 1 Comments

It's JULIE here and a Happy New Year to everyone, let's hope 2016 is a wonderful year ! Today I have made a celebration card that could easily be adapted into another type of card by simply changing the words.


I started off by cutting layers using plain and patterned Cardstock and tattering the edges of the faux stitched layers.

I layered up my Ornament Flourish and Word dies twice to give a shadow effect. 


My Sentiment Tag was also tattered around the edges.


Finishing off with a few sparkly gems and a double layered Butterfly.

Good luck to everyone entering our Weekly Challenge with the chance of winning a $20 spending spree at Cheery Lynn Designs.

Cheery Lynn Dies Used:

Crafty Hugs, 
Julie x

Tuesday, September 29, 2015

Wishing You Sunny Days by Karen Maldonado

3:30 AM 7 Comments

Hello there sweet Cheery Lynn friends!

It's Karen here, sharing my "anything goes" challenge car.  Today, marks two years since I became a Cheery Lynn Designs Team Member.  It's very bittersweet posting my last blog entry for this amazing company!  On that note, I thought this sentiment was fitting for expressing my gratitude for all your lovely comments throughout my term here as DT member.  If you happen to follow my blog, I will still be promoting the use of these gorgeous and intricate dies!

I love to layer, so basically, I started with the French Flair Classic Silver Stacker die as my base.  Next, layered the Horizon Fishtail Banner right on top of the French Flair piece.  Then, I  die cut the Pierced Stacker #2 and stamped my sentiment.  I layered this onto the Circle Classic Silver Stacker, 
and then place it onto the Daphne Doily! You will notice that I intentionally left some of the pieces within the doily for a slightly different look.


Then, I made a blue daisy using the Daisy Strip! I die cut the Leafy Flourish and Leaf sets and placed them both underneath my flower. I added a sweet rhinestone flourish as well!  Lastly, I cut out one of the butterflies from my Small Exotic Butterflies set, and added a few shiny pearls.

List of Cheery Lynn Designs dies used: 


Come join in the fun playing this week's challenge for the chance at a $20 gift certificate to the on-line store!

Hugs & Smiles,

Saturday, June 27, 2015

Pretty Bows by Julie Lavalette

3:30 AM 1 Comments

Hi Everyone, It's Julie here today sharing with you my latest vintage style card.


This photo shows you the start of my layers. You will see I have shaded the edges with Distress Ink and used my Distress tool around the edges of my card for a shabby look.


My Butterfly I used embossing powders on and added a little button onto the centre.


My bow once die cut out I tattered the edges with my Distress Tool adding a little ink to the edges.


My flowers were all shaded with Distress Inks and shaped using my embossing mat, adding little buttons into the centres.

Cheery Lynn Dies Used:


Thanks for stopping by to see my post today and good luck to everyone entering our weekly challenge.


Julie x

Tuesday, June 16, 2015

Graduation Card by Karen Maldonado

3:30 AM 0 Comments

Hi there Cheery Lynn friends!
Karen here today sharing a bright and cheery graduation card!

I started by creating a 4.5 x 5.5 card base in black card stock.  Then, I layered
some beautiful designer papers to the top.

Next, I used the diploma and cap from the newest Graduation Set (set of 2),
and cut my pieces using black and white cardstock.
Then, I created a beautiful flower using my Gardenia Strip &  Rose Strip
I placed all these pieces onto the Oval Little Stackers Nesting die and then
layered it onto the Pierced Stacker #2 piece.

I die cut the sentiment using the smallest die from the Graduation (set of 2),
placed it onto the card, and then finally added one of the dies
from the Small Exotic Butterflies #1 set!  Lastly, I placed some pearls
onto the butterfly and to the card corners!!


I think it will be a perfect card to give for graduation, along with a nice
gift certificate or some cash tucked away inside just for that special gal!

List of Cheery Lynn dies used: 


It's still early in the week and plenty of time
to join in on this week's challenge!!

Good luck and I look forward to seeing what you create this week!!

Hugs & Smiles,
Karen

Thursday, May 14, 2015

Roses of Friendship Card with Jenny Alia

3:30 AM 1 Comments

Hello friends, it's Jenny here today with a card inspired by this week's Roses challenge.  I cut and and assembled the Medium Tea Roses and then actually created everything else from there.  I love the ombre cards I've seen and decided to incorporate some of that into my card using the Ankara Lace Border die and stacking each different yellow layer.


I cut the blue background layer once with the Curved Border die and then cut the patterned paper three times to get the fancy edge and the dot pattern.  The stack of Ankara Lace Borders was glued to the card and then I cut the edge off the Ankara Doily and tucked it under the edge of the stacked borders.  The sentiment layer was cut using the new Pierced Stacker #4 and adhered with foam tape.


I colored the the roses to match the other colors in the card using distress ink and a foam dauber.  I added some white Olive Branches and blue Add a Flourish flourishes to the floral spray and finished by adding the two butterflies from the Small Exotic Butterflies die.

Cheery Lynn Designs Dies

Thanks for visiting and be sure to check out this week's Roses challenge for a chance to win $20 towards shopping  at Cheery Lynn Designs!

Saturday, January 31, 2015

Shabby Butterflies by Julie Lavalette

3:30 AM 5 Comments

Hi Crafty Friends,  Its Julie here today. I'm sharing with you a Shabby Style card with some mixed media on it. It is approximately 5 3/4 inches square in size.


Here is the start of the layers on my card. I cut a square of patterned paper and then placed my Dutch Daisy Border die on with some low tack tape to cut. I used my Distress Tool around the edges and added a couple of scraps of paper which I inked at the edges.I then applied some Texture Paste through a strip of Sequin Waste to act as a Stencil. Once dry I added a little Distress ink to coordinate with the paper.


I used the large and medium die in the Sentiment Tag set, cutting white cardstock and adding a little Distress ink to the larger die before layering up and adding some Stickles around the middle. I then layered onto my Alpine Flourish.


My Butterflies were cut in patterned paper and layered up twice.

Hope you have enjoyed looking at my card and now feel inspired to try this style of card. Good Luck to everyone entering our Weekly Challenge.

Cheery  Lynn Dies used :

Have a creative weekend,


Julie x


Saturday, January 3, 2015

Butterflies and Flowers Card by Julie Lavalette

3:30 AM 4 Comments
Click to Enlarge

Happy New Year to Everyone, it's Julie here today and I hope you have all had a wonderful time during the festivities. My card for this week I decided to use the fabulous Chrysanthemum Strip to make an abundance of flowers for my card.


I started off by die cutting my background in a Dusky Pink Shade.


My doily was edged with Spun Sugar ink at the edges and in the centre, this softened the starkness of the White Cardstock against my vintage image and I also added some Pearlised Glitter glue.


My flowers were made by adding a little Spun Sugar ink into the centres of each layer. I used my embossing tool to shape the petals, layering up and adding Flower Soft to the centres.


My leaves were cut out in different shades of Green and my Butterflies were double layered with 2 shades of Pink Cardstock.


Finally arranging my floral bouquet onto my card.

Cheery Lynn Dies Used :


Good luck to everyone entering our Weekly Challenge and I will see you all next week.


Julie x

Copyright Statement


All content, including designs, pictures and words are the exclusive property of the author of each blog post. Information shared here is for inspiration only and may not be copied for publication, competition or profit. Thank you for your cooperation.

SOCIAL MEDIA 2


Follow Us @jointhemakersmovement


All content, including designs, pictures and words are the exclusive property of the author of each blog post.
Information shared here is for inspiration only and may not be copied for publication, competition or profit. Thank you for your cooperation.