Showing posts with label Southern Charm Valance. Show all posts

Friday, April 21, 2017

Just For You by Debbie Brownmiller

3:30 AM 3 Comments
Hi, it's Debbie from Debbie's Time Out. Glad to see you here. Today I am sharing a card with flowers. To me flowers always make for a beautiful card to give to that someone special.
I started the base of this card by embossing it with the Hearts and Rose Leaves Embossing Plate .
It is always nice to have that extra texture on the base of your cards.
I then layered the Royal Scandinavian Oval Doily  to one side of the card and the Southern Charm Valance Die  at the top and bottom of the card.
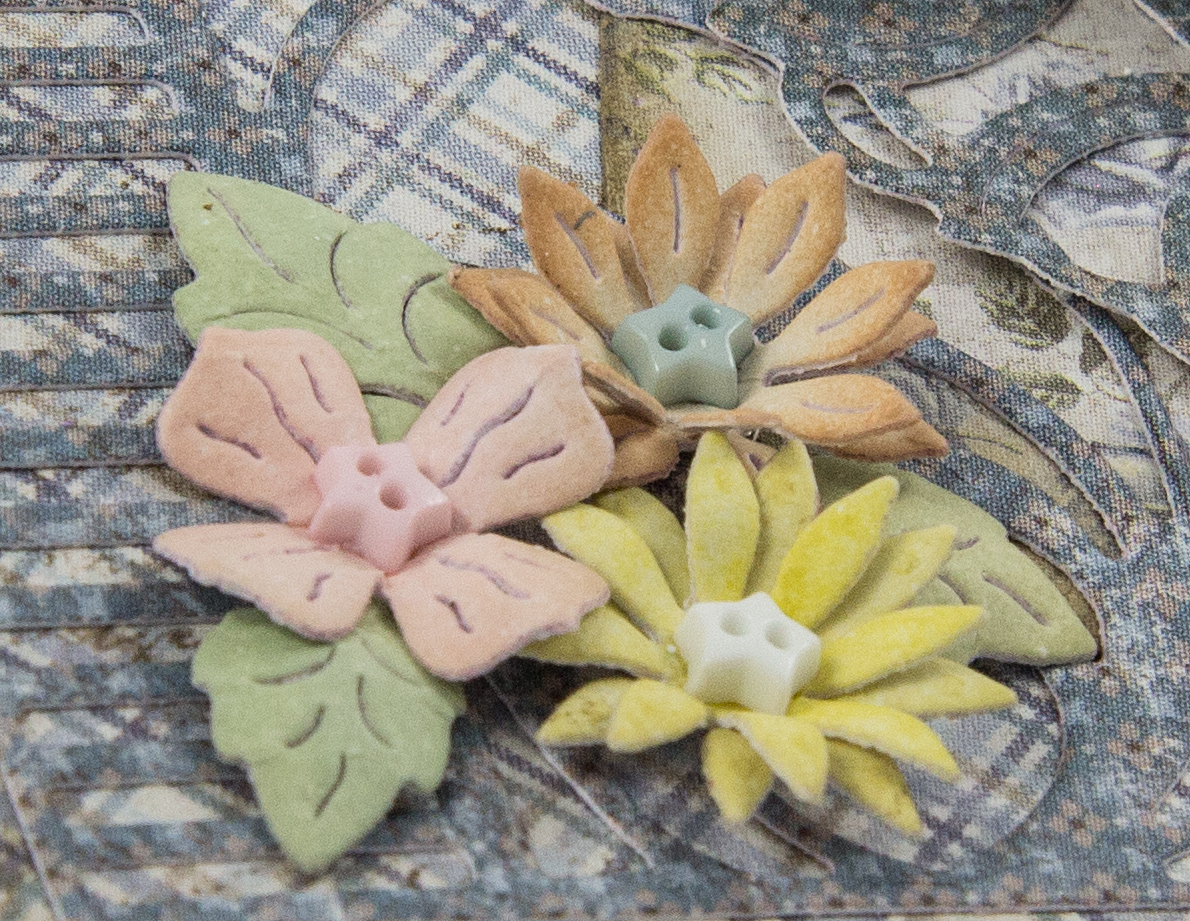
The Mini Flourish One  was used as a background for the flowers and leaves.  The flowers are the Chrysanthemum Strip inked up with distress inks for color. The leaves were cut from the Build a Flower #2  and tucked in behind the flowers. A pearl was placed in the center of each flower to finish them off .
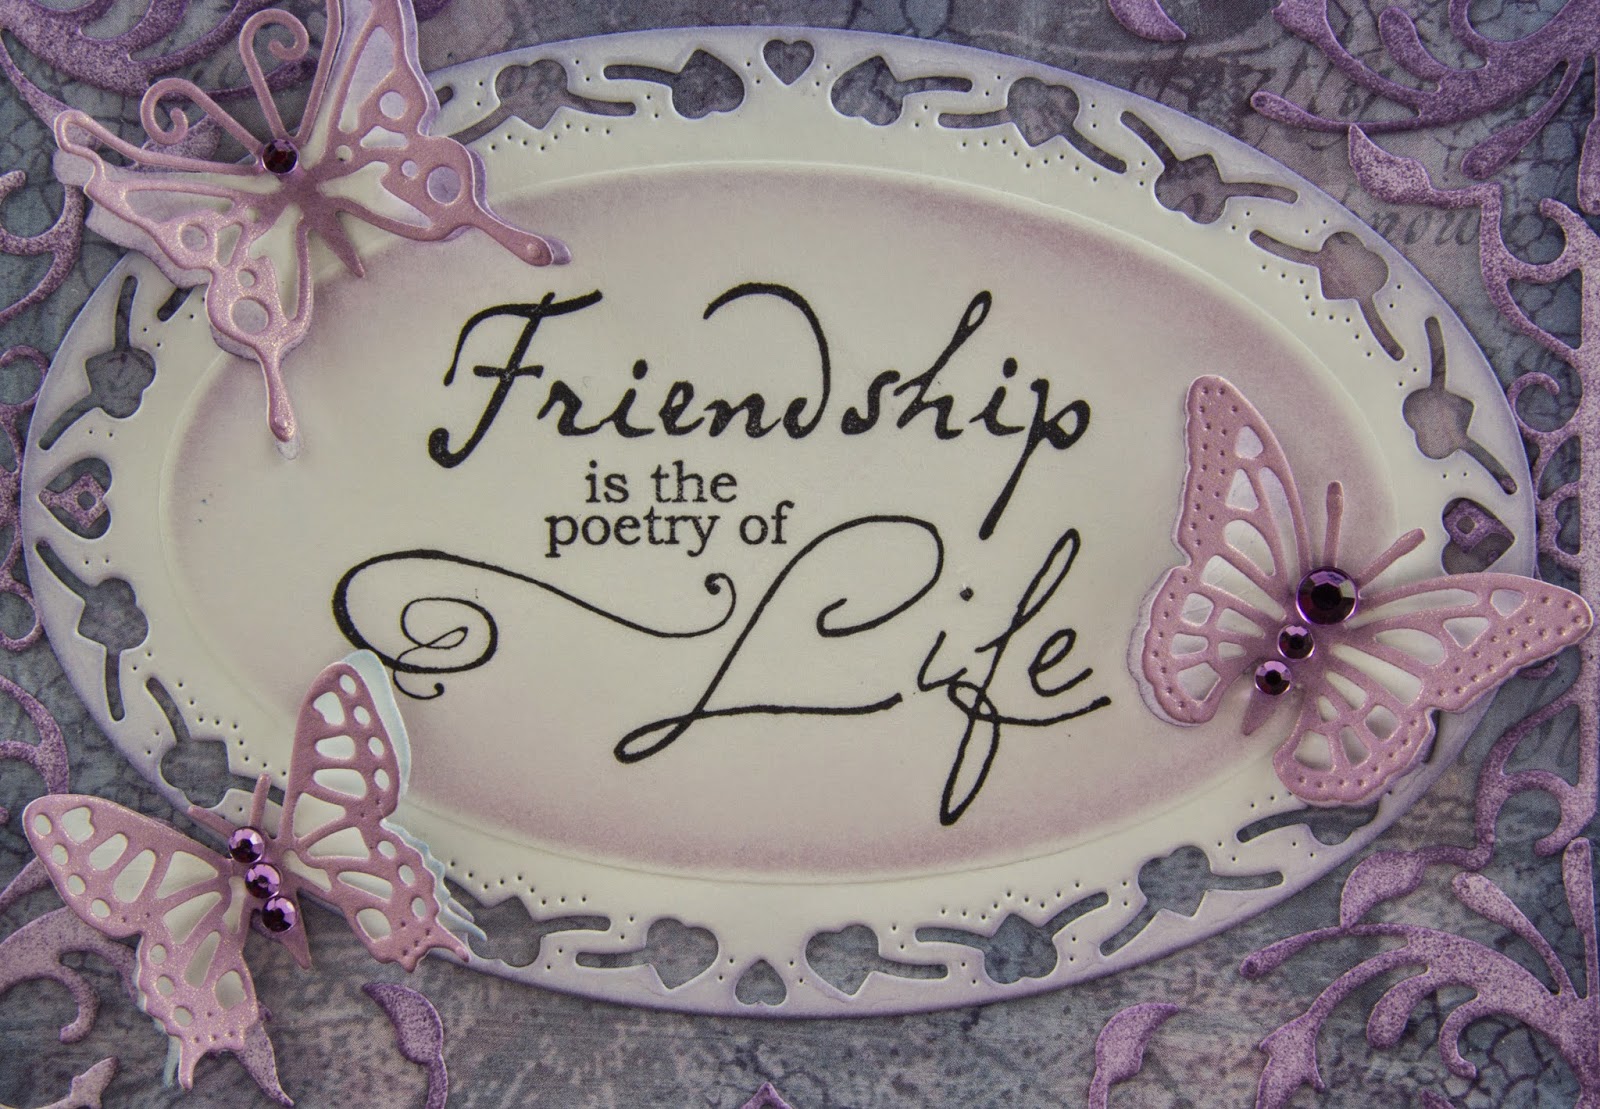
I cut the sentiment "Just For You" from the Just For You Oval Die  . I then traced the outer edge of the die onto the purple paper and fussy cut it out to place behind the sentiment. The XOXOXO were placed along the bottom of the sentiment.

I would like to thank you for visiting the blog today and for the comments you leave. I hope I have inspired you to play with some of Cheery Lynn Designs flowers. They have a huge variety of flower dies to choose from.

Dies Used
Hearts and Rose Leaves Embossing Plate - E134
Royal Scandinavian Oval Doily 2 Piece Die Set - DL307
Southern Charm Valance Die - B454
XOXOXO 2 Piece Die Set - B375
Just For You Oval Die - B784
Mini Flourish One Die - B170
Chrysanthemum Strip 6 Piece Die Set - B311
Build a Flower #2 27 Piece Die Set - B187

Sunday, October 16, 2016

Carolers Christmas Greeting Card by Ginny Nemchak

3:00 AM 0 Comments
Hey there Paper Peeps! Happy Sunday to you. It's my day to share some Christmas inspiration and I've created a sweet little greeting card with carolers, snowflakes and blingy embellishments. I've started with an A2 sized card base and layered on patterned papers.  The Oval Stitched die cut makes the perfect frame for the vintage image.
I've got several dies cut in crisp white for a wintry scene. The Neighborhood Border  creates a base with the Icicles nestled underneath.  To complete the arrangement there's Snowflowers topped off with blingy accents and glitter for a frosty finish.
The Southern Charm Valance had a fabulous edge border that was easy to fussy cut and helps to balance the arrangement on the bottom.  A simple bow with pearly center is a nice finishing touch and hides where the die cut was joined in the center.
~Cheery Lynn Designs Dies~
Ribbon trims and embellishments from Really Reasonable Ribbon.
Okay that's all for me. Wishing all  of you a happy and productive day. : ) G

Saturday, February 13, 2016

Be Mine by Julie Lavalette

3:30 AM 1 Comments

Hi Everyone, its JULIE here today and I am sharing some inspiration for Valentine's Day using a couple of the new dies from our latest release.


I started off by matting and layering my stacker layers onto my card  and then I added my border to the top and bottom of my card.  I paper pieced my flourish into place to make it larger for this design, hiding the join with a flower. My flowers were cut out of patterned cardstock and some Flowersoft added to the centres.


I just adore this new Film Set, you get 2 different sizes in the pack. I cut mine out in Black cardstock and then positioned the same die over my image, this way it would nest perfectly into my Photo Frame.


My Teddy was cut out in White cardstock, shading with Distress ink. I layered patterned and black cardstock behind the accents. The heart and his arms were layered on twice for extra dimension. I also placed a little bend into the cardstock at his ears and feet. Finishing off with a little bling.

Cheery Lynn Dies Used:


Thanks for stopping by today and I do hope to see you joining in our latest Bi-Weekly challenge which currently is Tickled Pink.


Crafty Hugs, 
Julie x

Saturday, June 27, 2015

Pretty Bows by Julie Lavalette

3:30 AM 1 Comments

Hi Everyone, It's Julie here today sharing with you my latest vintage style card.


This photo shows you the start of my layers. You will see I have shaded the edges with Distress Ink and used my Distress tool around the edges of my card for a shabby look.


My Butterfly I used embossing powders on and added a little button onto the centre.


My bow once die cut out I tattered the edges with my Distress Tool adding a little ink to the edges.


My flowers were all shaded with Distress Inks and shaped using my embossing mat, adding little buttons into the centres.

Cheery Lynn Dies Used:


Thanks for stopping by to see my post today and good luck to everyone entering our weekly challenge.


Julie x

Saturday, December 20, 2014

Merry Christmas Everyone by Julie Lavalette

3:30 AM 1 Comments
Click to Enlarge

Hi Everyone, it's Julie here hosting the blog today. In Scotland we have had our first covering of snow on the hills and it has turned very cold, but I don't think we will get a White Christmas. 
My card this week has been arranged by building up layers of die cuts in complimentary colours of card.


You will notice I have added Stickles to help define my layers and to add the all important sparkle to a festive card.


My Poinsettia's were made by colouring White card with Distress Spray Stains and adding a little Gilding wax to the edges and a few stamens in the centres. I arranged my Holly Leaves and Pine Branches to form a Festive arrangement. 


I stamped my centre image adding more Stickles and Silicone glue to raise it up slightly. Finishing off my card with a few Red Gems. 

Cheery Lynn dies used : 


Good luck to everyone entering our weekly challenge

Wishing you all a Merry Christmas and thanks so much for all your lovely comments throughout the year. I love reading them. 

Julie x 

Saturday, October 18, 2014

Wish You Were Here by Julie Lavalette

3:30 AM 4 Comments

Hi Everyone, Julie here hosting the blog today. 

Can you believe it's the weekend once again and only another week until the clocks change here in the UK and the dark winter nights are upon us.

I hope you are all loving the new release dies as much as I am. This card shows you what I have done with another couple of them. I stamped my postcard stamp, shaded it with Distress added some crackles and mounted onto the Alpine Flourish Doily die. I totally love all the detail on this die and shaded it also with distress. It gives a stunning Vintage look. The clever thing with this die is you have the option of having a solid centre to stamp on, add a sentiment to or place your centre coordinating die piece into it for a lace look.


My binoculars I die cut out in Grey and Black cardstock slightly off setting for a shadow effect. I then put some Glossy Accents onto the lens area and rubbed a little distress over to highlight.


A pretty Vintage style flower and some black gems were added to finish my Parisian themed card.

Cheery Lynn New Release Dies Used:

Other Cheery Lynn Dies used:

If you haven't checked out the new release yet please click here. Good Luck to everyone entering our Weekly Challenge and I will see you all next Saturday.


Julie x

Monday, September 15, 2014

Patriotic Page with Rhonda

3:30 AM 3 Comments
Greetings and welcome to the Cheery Lynn Designs blog!  It's Rhonda here today to host the blog.

I made a patriotic page today featuring a photo of Mt. Rushmore that I took when we were on vacation this summer. There was something so patriotic and majestic about seeing the monument in person.


I started with an 8x8 piece of white cardstock and used Fancy Corners #4 on the corners. Next, I used the Scalloped Rectangle and aligned it to cut a 7x7" square. (This is one of the Reflections Boutique dies.) At the top I used a Victorian Romance Flourish as a hanger type of element in between my layers. Lace Heart Square is next.


I had some pieces left from my project last week, so you will see the Foliage Embossed white cardstock and French Lattice on top, tucked under the Southern Charm Valance on the right.


To anchor my photo I used the Polynesian Sails Oval, then layered a medium Horizon Oval Boutique Stacker with foam squares. The photo is then attached with foam squares. This gives me a lot of area to layer my cuts. On the bottom you'll see a snip of Sophia's Heart Border, another piece left over from a previous project. 

Layered on the right are the Quills and a Wheat cluster, topped with the Star and Birds of Earth and Sky. To the left of that is a Branch. There are Cloud cuts layered under the photo and one attached with foam squares. 

Cheery Lynn Designs Dies Used:
Fancy Corner Cuts #4 - B431
Scalloped Rectangle - DL199
Lace Square Heart - DL189
Polynesian Sails Oval - DL153
Clouds and Rain - B320
Stars (Set of 3) (Utility) - QF120
Horizon Oval Boutique Stacker Frames - DL252
French Lattice Small - FRM132
Foliage Embossing Plate - E127
Victorian Romance Flourish - DL151
Sophia's Heart Border - B333
Wheat Heads (Set of 2) - B388
Quill and Ink Pot - B369
Southern Charm Valance - B454
Birds of Earth and Sky - B349
Branch (Set of 2) - B466

Please join us this week for our all new challenge "Things with Wings".  You could win a gift certificate for $20 to the online store just for playing along! You can't win if you don't play. 

Thanks much for stopping on over to the blog today.  It's always a pleasure to see you visit and read your lovely comments.
~ Rhonda

Saturday, May 17, 2014

Friendship Card by Julie Lavalette

3:30 AM 4 Comments


Hello Everyone,

It’s Julie here today, thanks for visiting.
I have made a Friendship card to share with you all today.


All my dies were cut out using white cardstock and shaded with Distress inks apart from my little butterflies of which I used Pearlised cardstock. 


On the front edge of my card I cut this to be about half an inch shorter than the back edge. I then positioned 2 layers of the Dancing Doily die on the front and 2 on the inside of the card.

I absolutely adore the design and elegance of the new Southern Charm Valance die. I placed a strip along the top and bottom of my card and then cut out another 2 strips and paper pieced the middle section into the sides of my card.


     Dies used :
You still have time to enter this week's challenge Dry Embossing and win a nice prize !

Enjoy your weekend, and I’ll see you all next Saturday.

 Julie x


Copyright Statement


All content, including designs, pictures and words are the exclusive property of the author of each blog post. Information shared here is for inspiration only and may not be copied for publication, competition or profit. Thank you for your cooperation.

SOCIAL MEDIA 2


Follow Us @jointhemakersmovement


All content, including designs, pictures and words are the exclusive property of the author of each blog post.
Information shared here is for inspiration only and may not be copied for publication, competition or profit. Thank you for your cooperation.