Showing posts with label Step Card. Show all posts

Tuesday, November 22, 2016

Winter Sweater by Debbie Brownmiller

3:30 AM 1 Comments
Hi It's Debbie back with you from Debbie's Time Out. Glad to see you here visiting the blog.


We have had a pretty good amount of snow here so when looking thru my papers and seeing this sentiment paper I thought it perfect for a winter card.


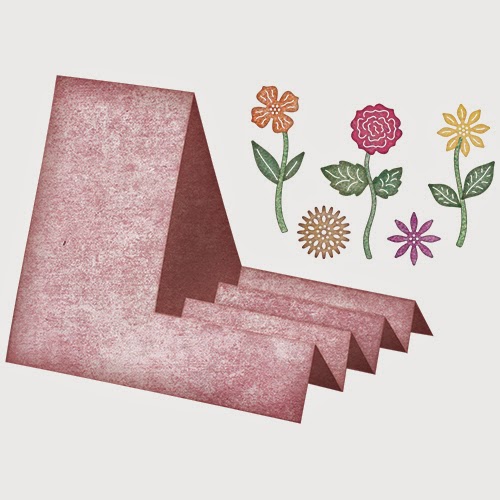
For my base I used the Step Card and place the paper sentiment in the center. 


This sentiment was perfect for using the  Christmas Knick Knacks  set with. The toque and mittens are part of this set. I used the Icicles Border Die  along the top. This icicle dies is one of my favorites that I use a lot.


Along the bottom I have layered the Dancing Snow Flurries . The snowman, scarf and presents are also from the Christmas Knick Knacks . That is it for this time. I hope I have inspired you to get creating.
I would like to invite you  to join our bi-weekly challenge for your chance to win a $20.00 shopping spree.

Thanks you for visiting the blog and for all the comments you leave. Have a wonderful day.

Dies Used
Snowflake Set 2 2 Piece Die Set - B635
Dancing Snow Flurries Die - B486
Christmas Knick Knacks 10 Piece Die Set - B331
Icicles Border Die - B472
Step Card - B348

Monday, August 1, 2016

2016 Fall & Winter Holiday Release Part 3 Fall & Thanksgiving with Lisa Blastick

3:30 AM 18 Comments

Hi everyone! Welcome back! Today, Im sharing with you our new release with Cheery Lynn Designs!
 It is called 2016 Fall and Winter Holiday Release and it is in 4 part series. 
This is part Part 3 Fall and Thanksgiving


I wanted to make a step card and it is really easy by using the "step card bundle". 
I layered one patterned cardstock and then placed all the fun dies on top. The adorable turkey and leaves and swirls are all part of the new release. 


Here you can see I layered the "happy turkey day " with some foam in the back for extra support. 


Cheery Lynn Designs New Dies Used:

Cheery Lynn Designs Older Dies Used:

Thanks for stopping by and be sure to check out more fun new release from our design team! 
Also don't forget this week's challenge for your chance to win $ at the Cheery Lynn Designs store! 

Be sure to leave a comment today and every day between July 22nd and August 3rd.  One lucky person that leaves a comment on the selected day will win a $20 gift certificate to Cheery Lynn Designs. 

Have a great day! 
Hugs Lisa 

Saturday, February 13, 2016

Be Mine by Julie Lavalette

3:30 AM 1 Comments

Hi Everyone, its JULIE here today and I am sharing some inspiration for Valentine's Day using a couple of the new dies from our latest release.


I started off by matting and layering my stacker layers onto my card  and then I added my border to the top and bottom of my card.  I paper pieced my flourish into place to make it larger for this design, hiding the join with a flower. My flowers were cut out of patterned cardstock and some Flowersoft added to the centres.


I just adore this new Film Set, you get 2 different sizes in the pack. I cut mine out in Black cardstock and then positioned the same die over my image, this way it would nest perfectly into my Photo Frame.


My Teddy was cut out in White cardstock, shading with Distress ink. I layered patterned and black cardstock behind the accents. The heart and his arms were layered on twice for extra dimension. I also placed a little bend into the cardstock at his ears and feet. Finishing off with a little bling.

Cheery Lynn Dies Used:


Thanks for stopping by today and I do hope to see you joining in our latest Bi-Weekly challenge which currently is Tickled Pink.


Crafty Hugs, 
Julie x

Saturday, June 27, 2015

Pretty Bows by Julie Lavalette

3:30 AM 1 Comments

Hi Everyone, It's Julie here today sharing with you my latest vintage style card.


This photo shows you the start of my layers. You will see I have shaded the edges with Distress Ink and used my Distress tool around the edges of my card for a shabby look.


My Butterfly I used embossing powders on and added a little button onto the centre.


My bow once die cut out I tattered the edges with my Distress Tool adding a little ink to the edges.


My flowers were all shaded with Distress Inks and shaped using my embossing mat, adding little buttons into the centres.

Cheery Lynn Dies Used:


Thanks for stopping by to see my post today and good luck to everyone entering our weekly challenge.


Julie x

Saturday, June 20, 2015

Summer Garden by Julie Lavalette

3:30 AM 2 Comments

Hi Everyone, It's Julie here today. Isn't it lovely the summer flowers are starting to bloom and I thought this week I would bring part of my garden onto my card.


I started by layering my Flourish onto my card as a background accent and added my Pocket Watch with silicone glue.


My leaves were cut out in green card stock and shaded with distress ink, rolling my edges and layering on with Silicone to give a natural look to my leaves. My Flowers were coloured with Copics and a little Flower Soft added to the centres.


We have a Baby Blue Tit which frequents our garden regularly and I just had to include him on my card. I shaded him with Distress inks and used a Fineliner to hi light the black.


Adding Stickles, bling and a stamped sentiment which was fussy cut to finish.

Thanks for stopping by to see my post today. Good luck to everyone entering our Weekly Challenge.

Cheery Lynn Dies used:

Julie x


Saturday, June 13, 2015

Fathers Day card by Julie Lavalette

3:30 AM 2 Comments

Hi Everyone, It's Julie here today. A week on Sunday marks the Celebration of Fathers Day in both the UK and USA, so I thought it would be nice to share my inspiration for this special day. My Dad loves being out in his garden and his cat is not usually far away from him, so I decided to create this little scene on my card.


I started off by using the Brick Embossing Plate and some Beige card stock. Once embossed I dry brushed Gesso onto my bricks to highlight them. Next mounting onto Green Cardstock and stitching around the edges for detail. My garden fence was shaded with a little Distress ink to shabby it up and a couple of layers of grass added.


My watering can I added a little gilding wax to highlight it. My flowers,leaves and dragonfly were shaded with Copics.


My sunflower was shaded also with Copics and I made the word Dad from my words Day/And as I have still to get the Cheery Lynn die saying Dad.


Cheery Lynn Dies Used:


Thanks for stopping by today and for the lovely comments you leave. I love to read them. Good luck to everyone entering our Weekly Challenge this week.

Julie x


Thursday, May 7, 2015

Sending Love Card with Jenny Alia

3:30 AM 3 Comments

It's Jenny here today with a twist on this week's Lots of Layers challenge.  I used the new Step Card Bundle Set-3 to create a garden scene.  


I folded and cut the center of an A2 card instead of cutting the side like in the above piture. That's one of the great things about this die, you can move it around to create the look you want and make entirely different cards.  I used the flowers from the die to embellish the card.  Here is a photo from above so you can see how the flowers and grasses are layered.


I cut a piece of patterned paper the same size as an A2 card front and cut it with the main step die.  I glued the patterned paper to the front of  step card and trimmed the sides a little so the patterned paper fit perfectly.  

I cut the flowers and leaves using the flower dies in the set and colored them with distress ink before adding rhinestone centers.  The Sending and Love die cuts were colored to match the roses.  


I cut multiple layers of the Grass Border for the front two layers.  For the tall grass on the back layer I used the Cattails & Reeds die.  The Faerie Mushrooms were colored with distress ink and tucked in between the grasses.  I also cut a white card stock backing to layer behind the mushroom tops.


Last I added the hummingbird and dragonfly dies from the Tiny Things With Wings die and added clear stickles to the dragonfly wings and roses for sparkle.  

Cheery Lynn Dies

Thanks for visiting and be sure to check out this week's Lots of Layers challenge for a chance to win $20 towards shopping at Cheery Lynn Designs!

Hugs, Jenny

Wednesday, April 22, 2015

Your Kindness...with Lisa Blastick

3:30 AM 2 Comments

Hello, Its Lisa back this week sharing more New Cheery Lynn Diecuts from this month's new release! I was in the mood for yellow this week and found these beautiful papers to go with all the new beautiful diecuts.  First, I love the A2 Step Card Bundle Set. It's so easy and fast to use, plus it has beautiful intricate swirls to add to your card. 


I used the Dutch Daisy Oval Doily onthe side of the step card. Then I traced the inside oval that comes with the Dutch Daisy Oval Doily and added pearls along the edges.  The sentiment was printed on cardstock and then diecut with Royal Scandinavian Tag 2. I layered it on top of the Dutch Daisy Oval Doily. The edges of the tag are pierced and it really is a wonderful addiction to your collection. 


The side view of the Step Card. I added 2 layers of the Feathered Friends to make the bird study attached to the front and in the background corner I used the Royal Scandinavian Tag 1. Last but not least, I added some flowers made with Medium Rose and Miniature Rose.

New Release Cheery Lynn Diecuts Used:


Other Cheery Lynn Diecuts Used:


Thanks for stopping by and be sure to check out this week's challenge Mother's Day for a chance to win $20 at the Cheery Lynn Designs Store! 
Hugs, Lisa 

Thursday, February 5, 2015

Something Blue For You with Rhonda

3:30 AM 9 Comments
Welcome to the blog, and happy Thursday to you!  It's Rhonda here today to share my project with you for this week.

I really wanted to play along with our challenge theme for this week, "Add A Flourish", because the beautiful flourishes were how I fell in love with Cheery Lynn Designs dies. They are so elegant and add the perfect finishing touch to your projects.

 
For my project today, I used our Step Card die, the Alpine Flourish Doily as a layer element, topped with the Mirror Mirror Doily Frame. To frame in the design, I used the Southern Charm Valance on the bottom. It reminded me of a garden gate feel. 

 
I layered in a few various elements to mix things up, some cheesecloth, then Quills, Dandelions, the Medium Tea Rose and Small Tea Rose along with the Shasta Daisy to create the floral cluster. A Sentiment Frame #1 is used to anchor the sentiment flair.

Cheery Lynn Designs Dies Used:
Step Card - B348
Quill and Ink Pot - B369
Tropical Flourish - B127
Mirror Mirror Doily Frame - DL286
Southern Charm Valance - B454
Alpine Flourish Doily (Set of 2) - DL282
Rose Leaf Strip - B241
Tea Rose Small - B435
Tea Rose Medium - B436
Shasta Daisy - B310
Expandable Tiny Borders - B215
Dandelions (Set of 2) - B453
Sentiment Frame #1 - B189

Thank you so much for stopping on over today!  Please join us this week for our new challenge, "Add a Flourish". You could win a $20 gift certificate to shop at the Cheery Lynn Designs online store just for playing along.

We also have an active Design Team Call right now.  Please check out all of the details here! This is an amazing team to be a part of!

~ Rhonda

Thursday, July 3, 2014

Center Step Card Tutorial

1:58 PM 6 Comments

One of my favorite dies from Cheery Lynn Designs is the Center Step Card die.   There have been a lot of requests for a tutorial showing how to use this die.  So I have done a little step by step for you.  First of all, there are a total of 6 dies in the package and they are resting on a magnetic sheet.  You do not use the magnetic sheet in your machine, that is simply for storage.


Take a piece of card stock and cut it down to 6 x 12 inches (or slightly less than 6 if you are using a Cuttlebug)  Obviously you will need extended plates for your die cut machine.  Using the largest die, which is your card base, tape it down to your card stock and run it through your die cut machine.

 
With the card stock right side up, the above picture shows you the direction you want to fold your score lines.  I burnish these scores line down quite well.


And here you see what the base looks like after the folding.


Now it is time to die cut the 5 individual panels.  Choose your papers, the die on the top in the photo above is the inside panel.  Tape each die down and run them through your die cut machine.  


And here is the front of my card with the panels attached.


And the inside of my card with the panel attached.  Very simple and oh, so gorgeous.  Stop by on July 15th for the Cheery Lynn Designs July 2014 new release to see how I have decorated my card.  For dies used in the sample card at the top of this post, visit my previous blog post here.

Tuesday, June 10, 2014

Dream Big Steampunk Dreams

3:30 AM 4 Comments


 Happy Tuesday everyone! leslierahye here with card of encouragement to Dream Big! I love the steampunk feel of this image and thought it would be great on the step-card base with some of my favorite steampunk dies and the Dream Big Sentiment!


Cheery Lynn Dies used


*****

Remember there is still time to join the new challenge!!! Challenge #136 is  Creative Corners There is a chance to win a $20 shopping spree at Cheery Lynn Designs. Thank you for stopping by today!


Monday, April 7, 2014

Happy Easter with Rhonda

3:30 AM 2 Comments
Happy Monday to you!  It's Rhonda here today to host the blog for you.

I've created an Easter themed card this week. It's coming up faster than you realize, especially when you stop into your local department stores.  Ha! At any rate, I was inspired to create something Easter themed this week.

"Happy Easter" (Step Card)

Some details...

I started my design with the Spring Basket 2, then changed my mind.  I had it cut out with that cute bunny and I then knew I wanted the sweet bunny to be a part of the design. I've added a touch of cheese cloth here and tucked in some barbed wire behind the layer.

For the bunny's tail, I took a bit of a cotton swab and pulled it apart, then glued into place with my Glossy Accents. Copics were used to accent some color on the bunny also.

I love that the Step Card die set has every piece included in the set!

If you love the look of an elegant card, consider giving the Step Card die set a try. It really makes creating a beautiful and unique card design an easy task.

Cheery Lynn Designs dies used:
Step Card - B348
Horizon Oval Boutique Stacker Frames - DL252
XM Scallop Oval - XM8
Oval Classic Silver Stacker - M-7

Other:  Copic, Q-Tip, Foam Squares, Glossy Accents, Ink, Sentiment Stamp, Pearls and Bling

We would love for you to join us in our challenge this week for Challenge 127 - "Anything Goes!".  You read that correctly, it's going to be so much fun!!!  You never know, you might be the lucky recipient of a $20 shopping spree to the Cheery Lynn Designs store.

Thanks so much for stopping on over today!
~ Rhonda

Copyright Statement


All content, including designs, pictures and words are the exclusive property of the author of each blog post. Information shared here is for inspiration only and may not be copied for publication, competition or profit. Thank you for your cooperation.

SOCIAL MEDIA 2


Follow Us @jointhemakersmovement


All content, including designs, pictures and words are the exclusive property of the author of each blog post.
Information shared here is for inspiration only and may not be copied for publication, competition or profit. Thank you for your cooperation.