Showing posts with label Grass Border. Show all posts

Tuesday, July 17, 2018

Spooky Scene by Jenny Alia

3:30 AM 0 Comments

Hi friends, I'm back today sharing a Halloween card.  Now that's it's gotten so hot here in NY I'm looking forward to autumn weather.  I love Halloween and I've started to see things popping up in online ads and I was inspired to pull out my Halloween dies. 


 Most of the work in this card went to creating the background by blending inks and then spritzing with water until the colors blended.  I also added a spritz of a white dimensional spray.  

To create the grass behind the fence I layered two different grass die cuts.  The fence did was much higher but I cut off the bottom.  It's a beautifully ornate die but I didn't want the fence to overshadow the tree.  The moon was cut out of a platinum colored glitter paper.  Last, I added the bats for spooky vibe.  


Cheery Lynn Dies

Thanks for stopping by the blog today!
Hugs, Jenny

Thursday, March 22, 2018

Happy Easter with Cheryl Walker

1:30 AM 0 Comments

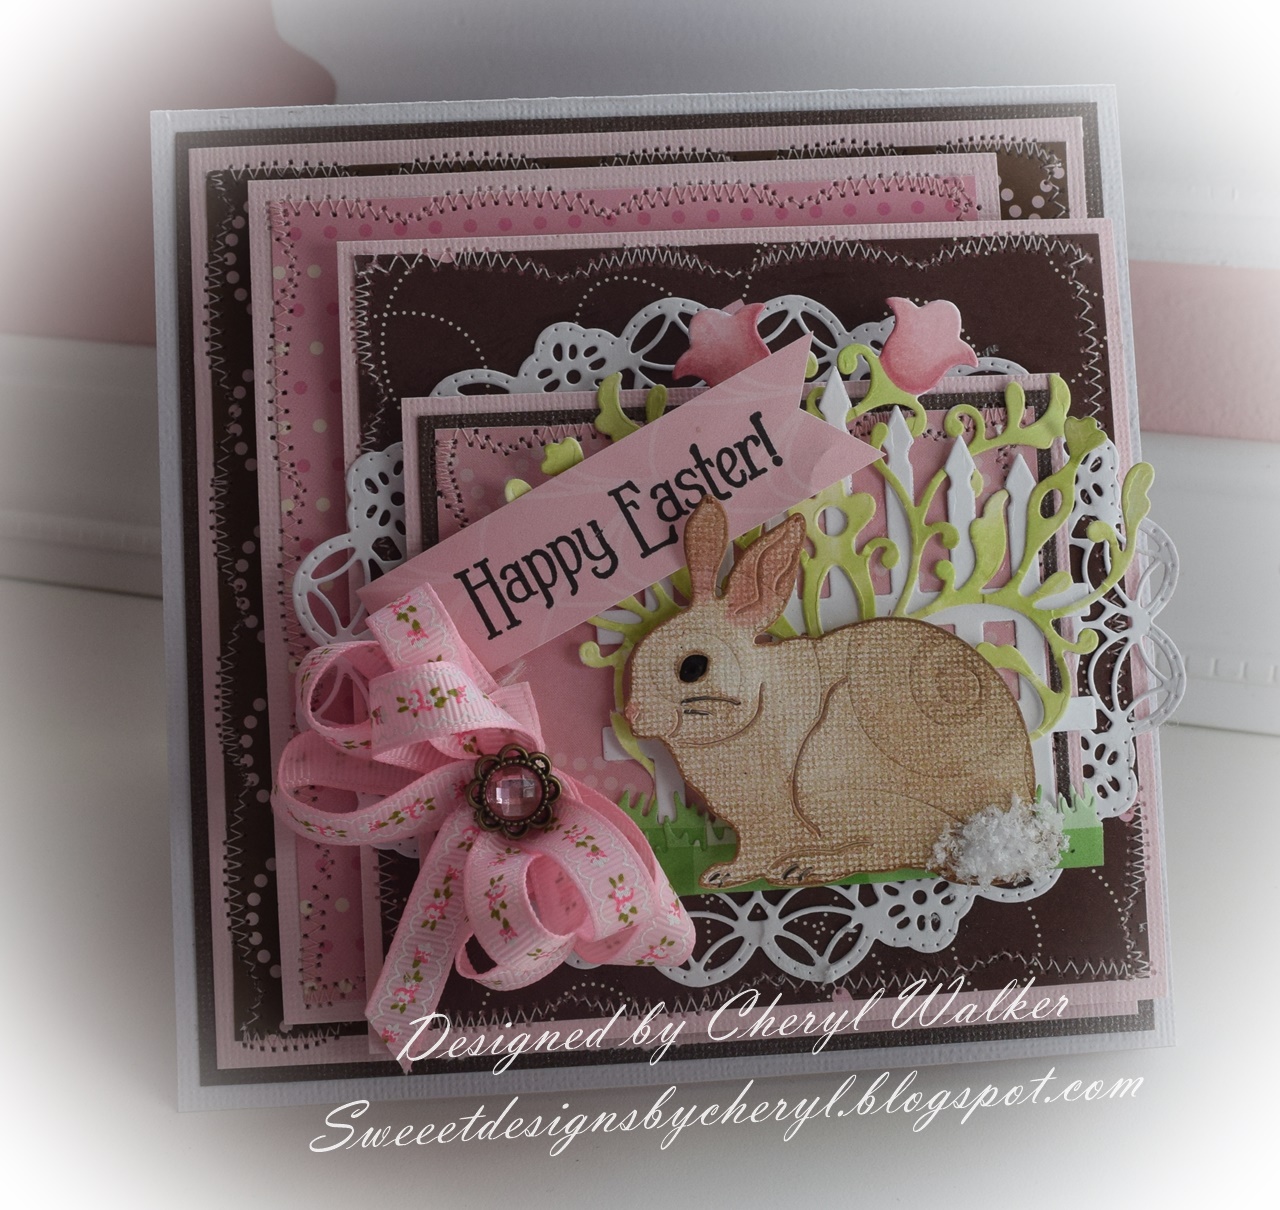
Hello everyone and Happy Thursday to you all! Today I have a sweet Easter card made with Cheery Lynn's Beautiful Dies.  I love the bunny dies, they are super cute and fun to work with as well.

On this card I chose the Bunnies for Easter, they are a perfect! I used just the one, and he was cut using a white card stock that came embossed with swirls.  I think its Bazzill, I just came across a stack of this card stock and thought it would look cute. I also wanted to use the beautiful Ornament #7 die, and I colored it with Copic markers, as it was cut out in a white card stock. I'm in love with the ornament dies Cheery Lynn has and need to add a few to my Wish List! The Garden Gate Die was a perfect match for this sweet bunny...heheheehe.  I also used the grass border cut out once and then cut it apart to layer for behind the bunny.  For my sentiment I cut a pink coordinating design paper. I also used the Polynesian Sails Oval for behind all the top layers.  It was cut in white card stock.

I love making the cutesy Easter cards, they are so much fun  to design :) I do hope you enjoyed my post for today :)

Cheery Lynn Supplies Used:
Ornament #7 CAS07 there are also others to choose from

Thank you so much for stopping by and have a lovely day!
Hugs to all,
Cheryl

Tuesday, September 5, 2017

Happy Halloween Card with Bonnie Garby

3:30 AM 1 Comments
Hi Cheery Lynn lovers!  Bonnie here today from Make Time to Craft sharing a silly/spooky Halloween card I made using some of the newest Halloween dies from Cheery Lynn Designs.
I've been making lots of fun background papers using Distress and Distress Oxide inks lately, and the dies sets I've used today are perfect to pair with a somewhat 'busy' background as they still stand out.
There is nothing too complicated with this card.  I just layered the Distress Ink paper on black and green cardstock and adhered it to my card base.  I then cut the dies in single layers in the colors show.  For the eyes I cut a small scrap of cardstock in the color I selected and glued it to the back of the die cuts for the eyes and mouth.  The grass strip was adhered along the bottom only so I could tuck parts of the cats behind the grass for a more realistic look.

Cheery Lynn Dies used:

Below is a peek inside my card.  I used the Twisted Tree die to decorate the inside while leaving space for a message of your choice.
I finished my card off with a shabby bow created on my Bow-it-All V3.0 using one of the ribbon styles from the September Halloween Themed Ribbon Club Assortment from Really Reasonable Ribbon.
Thanks so much for stopping by today.  Are you busy working on your Autumn or Halloween themed cards yet?


Thursday, April 27, 2017

Cheery Lynn Camping Set with Laurie Schmidt

12:30 AM 1 Comments


Hi everyone!

 It's Laurie here from Stamping up North, with my turn to host at the Cheery Lynn blog today.  I decided to create a scene that is a familiar one with so many people up north....campfires! Nothing tastes better then hot dogs and marshmallows cooked over the fire with friends and family. It's always a good time sitting around the fire, relaxing and talking. 

Cheery Lynn has such a great camping set for creating fun scenes. I used the tree and camp fire, and added the Whimsical Sun and Clouds
Here's a close up of the cute, happy face on the sun:


I also added a lawn chair and some grass, and framed it all with the A2 rectangular scalloped frames.


Here's a list of the dies I used:


Grass die  CAFLRS15

Beach set B785


Making this card has me anxious for our first campfire this season, I can't wait!

Thanks for stopping by!

Friday, April 14, 2017

Happy Easter by Julie Lavalette

3:30 AM 2 Comments

Hello and Happy Easter weekend to everyone, it's JULIE here hosting the blog and I have a cute Easter card to share with you all today.


I used Maja Design papers on my card today which worked so well in creating my Easter Parade. My rabbits were so much fun to build up, I added cotton tails onto them and a drop of Black Liquid Pearls into the centre of their eyes.


My girl rabbit I also added a Diamanté onto her bow and a little lace onto the edge of her dress. I glued them in place with some Silicone Glue to add dimension mounting them onto my grass border, aren't they so cute.


My sun was layered twice and my banner was curled at the edges and mounted with Silicone Glue for dimension adding my Happy Easter sentiment.


Cheery Lynn Dies Used -

Thanks so much for stopping by today and I hope you have a wonderful weekend.

Crafty Hugs,
Julie xx

Thursday, April 6, 2017

Dream by Jenny Alia

3:30 AM 0 Comments


Hello, it's Jenny here from Jen's Paper Obsession hosting the blog today.  I'm sharing a card I made that has a window in the front.  I was planning a shaker card but with everything going on inside the window I decided to keep it simpler.  It does have a raised plastic window though.
 I cut a circle in the piece of designer paper and sandwiched the plastic between that circle and a piece of thin chipboard in which I cut a smaller circle.  I also cut the Dream word out of the same chipboard before painting it with some new sparks paint.  The mushrooms were backed with white paper and I cut the read tops and mounted them on mushrooms cut out of white.  I added all my elements and adhered the layers together with a strong double sided tape.


Cheery Lynn Dies

I hope you like the result.  Thanks for dropping by the blog today.  


Hugs, Jenny

Tuesday, March 21, 2017

Easter Wishes With Lisa Blastick

3:30 AM 3 Comments

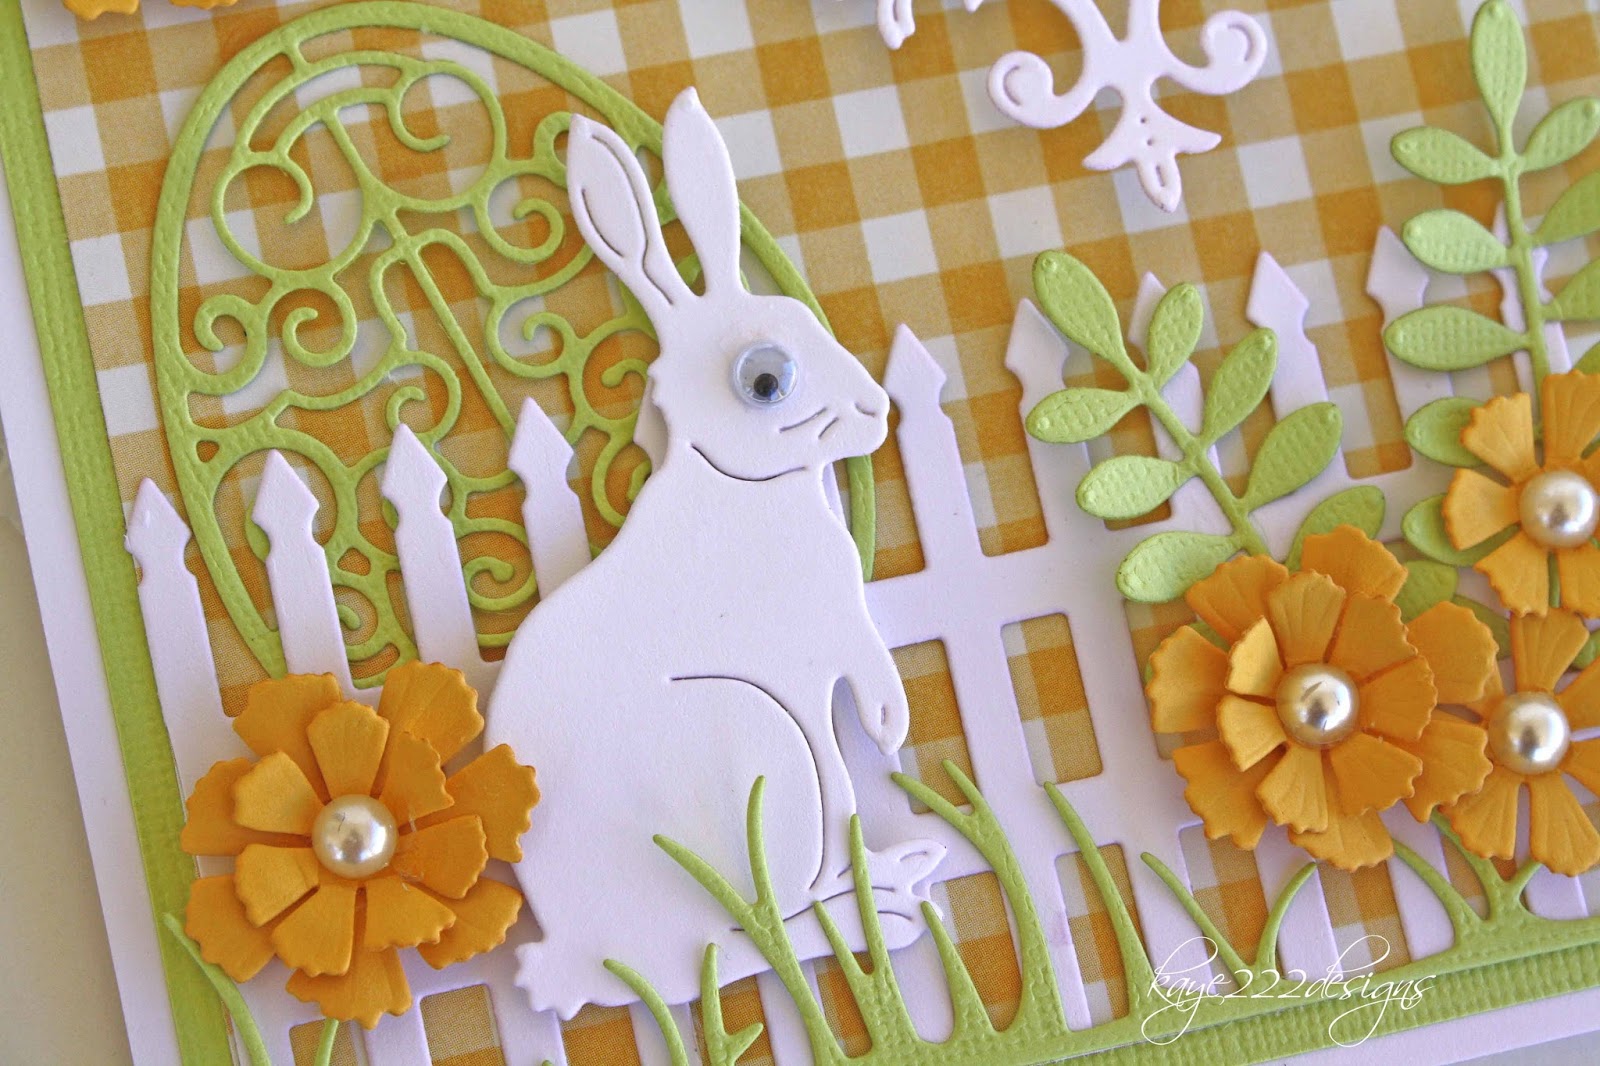
Hi! Welcome back to another Easter card for Cheery Lynn Designs! I had a fun time making this Easter card using several die cuts from Cheery Lynn Designs. I adore the "bunny" and I added his fun eye. The "lace egg" in the background is so delicate... Perfect for Easter. 


I stamped the sentiment on the "quatrefoil tag" in black ink. All the flowers are "sweet williams strip" and I added pearls in the center. The "floral bouquet kit" is a must have because there are so many flowers and leaves to choose. I also added the "grass border" and "victorian fence" 


A closer view...love the details on the tag...


The adorable bunny, egg, flowers and grass...


The inside using the "curved border set" Easy to place a gift card behind. 


Thanks for stopping by today! 
Hope you enjoyed! 
See you soon....
Hugs Lisa

Sunday, August 7, 2016

Walking Zombie by Jenny Alia

3:30 AM 4 Comments

 Hi crafty friends!  It's Jenny back today with a Halloween card using some of the latest Cheery Lynn dies from the Fall and Winter Release.  I love this Walking Zombie, he's got great detail and he can be dressed up in so many ways.  He's also really different.  I tend to collect Halloween dies and I have nothing like him.  He's an individual!  


 I began this card with a 5.5 inch white card base.  I then adhered an orange square cut with the Castle Edged Squares die. On top is a piece of patterned card stock cut with the Square Pierce & Cut Tool. It has a great little pierced detail edge. I cut the Zombie once to create the body and then again to make his clothes.  The shirt was cut out of green paper and his pants out of blue and they were aged using distress ink.  I added a little bit of red card stock behind his clothing and blue behind his eyes to accentuate his scars and eyes. 


The grass was made using both the Grass Border and the Grass Border 2 dies.  The little toxic beaker was backed from behind with black paper.  The Happy Halloween sentiment is from the new Witch's Skirt set.  

Cheery Lynn Dies

Thanks for visiting today and I hope you'll join in the current Back to Nature challenge for a chance to win a $20 gift card to the Cheery Lynn Designs shop!

Monday, August 1, 2016

2016 Fall & Winter Holiday Release Part 3 Fall & Thanksgiving with Lisa Blastick

3:30 AM 18 Comments

Hi everyone! Welcome back! Today, Im sharing with you our new release with Cheery Lynn Designs!
 It is called 2016 Fall and Winter Holiday Release and it is in 4 part series. 
This is part Part 3 Fall and Thanksgiving


I wanted to make a step card and it is really easy by using the "step card bundle". 
I layered one patterned cardstock and then placed all the fun dies on top. The adorable turkey and leaves and swirls are all part of the new release. 


Here you can see I layered the "happy turkey day " with some foam in the back for extra support. 


Cheery Lynn Designs New Dies Used:

Cheery Lynn Designs Older Dies Used:

Thanks for stopping by and be sure to check out more fun new release from our design team! 
Also don't forget this week's challenge for your chance to win $ at the Cheery Lynn Designs store! 

Be sure to leave a comment today and every day between July 22nd and August 3rd.  One lucky person that leaves a comment on the selected day will win a $20 gift certificate to Cheery Lynn Designs. 

Have a great day! 
Hugs Lisa 

Sunday, March 27, 2016

Easter Basket by Jenny Alia

3:30 AM 2 Comments
For our March Blog Hop featuring IOE Plates and Embossing Folders please click HERE.


Hi Cheery Lynn fans, it's Jenny here today wishing you a Happy Easter!  This card was centered around this fun Easter Basket.  I cut out the Easter Basket twice and colored the first one.  Using as scissor I cut the eggs and bow off the second basket, colored them individually using distress ink and the glued them on top of the first basket.  To further embellish the eggs I added glitter glue.  The basket is popped up with foam adhesive.  I like how the glitter glue made some of the ink run and the eggs look as though they'd really been colored with dye.


This is a step card using the Step Card Bundle Set #3.  You can see a video HERE explaining how the step card die works. I glued rectangular strips of green card stock to each of the steps before adhering grass to each.  The shorter Grass Border 2 was glued to the first two "steps" and the Grass Border on the two background steps.


I cut a top fold A2 size card with the step die and then used the main die in the Step Card set to cut a piece of dotted patterned paper.  It was easy to then fold the paper and cut away the bottom portion of the dotted paper with an Exacto knife.  The background panel was made with a piece of patterned card stock with a Lattice #2 overlay.

Cheery Lynn Dies

Thanks for visiting the blog today.  There's still time to enter the current Anything Goes challenge, join in for a chance to win a $20 gift card to Cheery Lynn Designs!

Saturday, March 12, 2016

Easter Cupcake Baskets by Julie Lavalette

3:30 AM 3 Comments

Hi Everyone, it's JULIE here today and I am sharing with you some Easter Inspiration using our fab new Cupcake die.


These cute little baskets which measure approx 3" diameter by 4" height are easy to make and once I worked out all the measurements it didn't take long to make the second one. So let me show you how to make them.


I started by cutting my Cupcake Wrapper from cardstock and added a double layer of grass to the base. To get the grass strip to curve around your cupcake die, layer on sections measuring about 2 inches in length, offsetting the grass on each layer.


For my base I used the 2 largest dies in the Circle Classic set. You will see in this photo I cut my die out and then drew around the outer part of my smaller die and fussy cut out some notches.


My Cupcake Wrapper I added a little bit of glue to the die cut join for added strength for the weight of my chocolate eggs and formed the shape of my cupcake. I then bent all my notches up on my circle and added a little glue to each one, pushing my circle down into my cupcake to form the base of my basket, pressing all the notches onto my cupcake wrapper.


This makes it all lovely and neat and the grass disguises the notches on the inside.


Next I added on my handle with some brads, you will notice I have the pretty side of my Brad to the inside of my basket as I hid the closure with a flower on the outside.


Now the fun bit of adding all my Easter Chicks, sweet Bunny and flowers.


I disguised my join on the cupcake wrapper be carefully placing a Chick or Bunny over the join.


I finished off my baskets with a pretty bow and some Chocolate Mini Eggs which had been gathered inside a Cello bag that we normally place our cards into. I tied with some Easter ribbon and a die cut Sweetheart Candy.


Cheery Lynn Dies Used:


Thanks so much for stopping by today and you still have plenty of time to join in our Current Challenge which is Doilies.

Crafty Hugs, 
Julie x 

Copyright Statement


All content, including designs, pictures and words are the exclusive property of the author of each blog post. Information shared here is for inspiration only and may not be copied for publication, competition or profit. Thank you for your cooperation.

SOCIAL MEDIA 2


Follow Us @jointhemakersmovement


All content, including designs, pictures and words are the exclusive property of the author of each blog post.
Information shared here is for inspiration only and may not be copied for publication, competition or profit. Thank you for your cooperation.