Showing posts with label Floral Bouquet Kit. Show all posts

Thursday, June 21, 2018

Favorite Peeps with Lisa Blastick

3:30 AM 0 Comments

Hello my favorite peeps! Thanks for stopping by today to check out my latest creation for Cheery Lynn Designs. I was thinking about my sister yesterday when I made this card. When she was a little girl her nickname was "chicks" So every time I see a chicken I think of her....


My son suggested the grey chicken wire....sometimes they stop by my scrap room....lol


I added red flowers with gala glitz in the centers and flourishes with orange leaves? Guess you can use your imagination for leaves....I just wanted it match.


A186 Chicken
FRM144 Chicken Wire Fence

Thanks for stopping by today! Have a great week!
Hugs Lisa 

Thursday, May 24, 2018

Patriotic Floral Note Card with Bonnie Garby

3:30 AM 0 Comments
Hi Cheery Lynn fans.  Bonnie here from Make Time to Craft today with a pretty Patriotic Floral Note Card I created using pretty dies from Cheery Lynn Designs along with ribbon from the May Ribbon Club Assortment from Really Reasonable Ribbon.
The Floral Bouquet Kit die set from Cheery Lynn Designs is so versatile that I find myself using it again and again - if not for the flowers, then certainly for the foliage pieces.  This set is a great addition to any die collection.


The flowers were cut in red, white and blue cardstock.  I inked the white layers with red and blue ink.  I then shaped the petals and assembled each flower, finishing off with a White Half Pearl for the center.  I then arranged the foliage pieces around the sentiment panel and then adhered the flowers over that.

My card is finished off with a pretty bi-color bow created on my Bow-it-All V3.0 using ribbon from the Patriotic themed May Ribbon Club Assortment from Really Reasonable Ribbon.  The center of the bow is adorned with a Star Shaped Pearl Embellishment.
Thanks so much for stopping by today and happy crafting!

Friday, April 13, 2018

Just for You Note Card by Bonnie Garby

3:30 AM 0 Comments
Hi Cheery Lynn die lovers!  Bonnie from Make Time to Craft here with you today sharing a pretty floral note card featuring some pretty dies from Cheery Lynn Designs.
I created by background by cutting the lattice die out of blue cardstock and layering it on a cream cardstock background.  I then ran a piece of brown ribbon across the center of the card, added the base of the sentiment frame, layered the tan swiss dots ribbon on that and then added the sentiment panel.

Next I pulled out my very favorite flower die set - the Floral Bouquet Kit, and cut the flower and foliage pieces.  I shaped them using a foam pad and stylus, assembled and added white half pearls for the centers.  I then arranged the floral cluster below the sentiment.

Cheery Lynn Dies used:
FR16 Lattice

My card is topped off with a pretty bi-color bow created on my Bow-it-All V3.0 Tool using two of the ribbons from the April Ribbon Club Assortment from Really Reasonable Ribbon.
Thanks so much for stopping by today.  Have a crafty day!


Wednesday, March 21, 2018

Happy Easter!

12:30 AM 0 Comments


Laurie here from Stamping Up North sharing an Easter card today!

I started out with one of my favorite dies....Cheery Lynn's Funny Bunny. He always makes me smile. This time I stuck him inside an Easter basket, and added a few eggs for good measure.


I adhered a small pink flower onto the basket from the Floral Bouquet Kit. Then I backed it all onto a nesting doll oval and lattice.


Here's a list of the dies I used:


Thanks for stopping by!


Monday, March 19, 2018

Colorful Thank You Card with Bonnie Garby

3:30 AM 0 Comments
Hi Cheery Lynn fans.  Bonnie from Make Time to Craft here with you today with a bold and colorful Thank You card featuring some pretty dies from Cheery Lynn Designs.
The wild and colorful Distress Ink background paper I created is a perfect backdrop for a bold white frame die.  It really shows off the detail of the die.  I also used some of the background paper I created for the Thank You sentiment which was backed with a turquoise layer for a shadow effect.
I also carried the paper through for some of the layers of the pretty flower to pull everything together.
The flower was created with the Daisy Strip for the petals and then I created the center using the center die from the Black Eyed Susan strip.  The leaves came from the Floral Bouquet kit.  Why not mix and match flower pieces to create even more options!

Cheery Lynn Dies used:

My card was topped off with a pretty bi-color bow created on my Bow-it-All V3.0 Tool using Hot Pink and Turquoise Delicate Stitched Satin Ribbon from Really Reasonable Ribbon.  The center of the bow was adorned with a heart shaped pearl embellishment.
Thanks so much for stopping by today.  I hope I've inspired you to pull out your flower dies and try mixing and matching some of the petals and leaves.  Happy crafting.


Wednesday, March 7, 2018

Thank You Tag by Jenny Alia

3:30 AM 0 Comments

 Hi friends!  I was in a mood to make a tag.  I grabbed design paper that I never use, glued it to a tag, trimmed it and my project evolved. 


I backed the circle with a piece of black cardstock for some contrast.  The flowers were made with the Gardenia strip and Build-a-flower #2 dies.  I used two different yellow-green papers for the foliage cut using the Floral Bouquet Kit.  For sparkle I added glitter glue on the Thank You Circle and rhinestones on the flower centers.

Cheery Lynn Dies

Thanks for stopping by the blog today.
Hugs, Jenny

Saturday, December 30, 2017

Happy New Year Hostess Gift idea!

3:30 AM 1 Comments
Hi there Cheery Lynn fans, Maggi here.  First, I want to wish you all a very happy, healthy and prosperous New Year.  I hope 2018 is memorable for you in many good ways!   I'm sad to say that this is my farewell post for Cheery Lynn Designs.  It has been a wonderful 13 months designing for them and I am so appreciative of the opportunity given me.  Thank you so much everyone at Cheery Lynn Designs.  I love their dies, they are so imaginative and fun to work with.  However, it is time to let someone else enjoy the privilege of being on Cheery Lynn's design team.

 Now let's look forward to the New Year celebrations.  To to kick off the holiday, I've turned an ordinary bottle of champagne into  a fun hostess gift by adding this shaker bottle hanger.  I used the New Year 2017 Shaker Die Set to make the shaker.  The die has 2017 as part of it's design so I just simply cut that off and glued the included sentiment, Happy New Years, to the acetate on the front of the shaker.


I used a large cut from the Coved Rectangle Stitch And Cut Tool set and placed behind the bottle hanger, using the bottle hanger as the 2nd layer.  On top of that I used a black starred layer cut with the A2 Frames Rectangular Scalloped set.  Next is the floral design paper cut with the Pierced Stacker 2 set.   All the papers I used are from Graphic 45's Vintage Hollywood collection and the dancing couple is fussy cut from one of the design papers.

The flowers are handmade using a mix of layered cuts from the Judy's Blooms Die,  Sweet Williams Die,  Indie Bouquet , and Floral Bouquet Kit 8 Piece Die Sets.


 To top the hanger and give a real festive look, I added two pretty bows and a floral center.


One thing I really love is a pretty swirly flourish and here I've used Flourish #7 Die.


Thursday, December 14, 2017

Christmas Time by Julie Lavalette

3:30 AM 0 Comments

Hi everyone, it's JULIE here hosting the blog and today I am sharing some more Festive Inspiration using some of our beautiful Dies along with Maja Design Papers.


I started by fussy cutting my figure and inking at the edges, matting and layering onto my tattered inked layers.


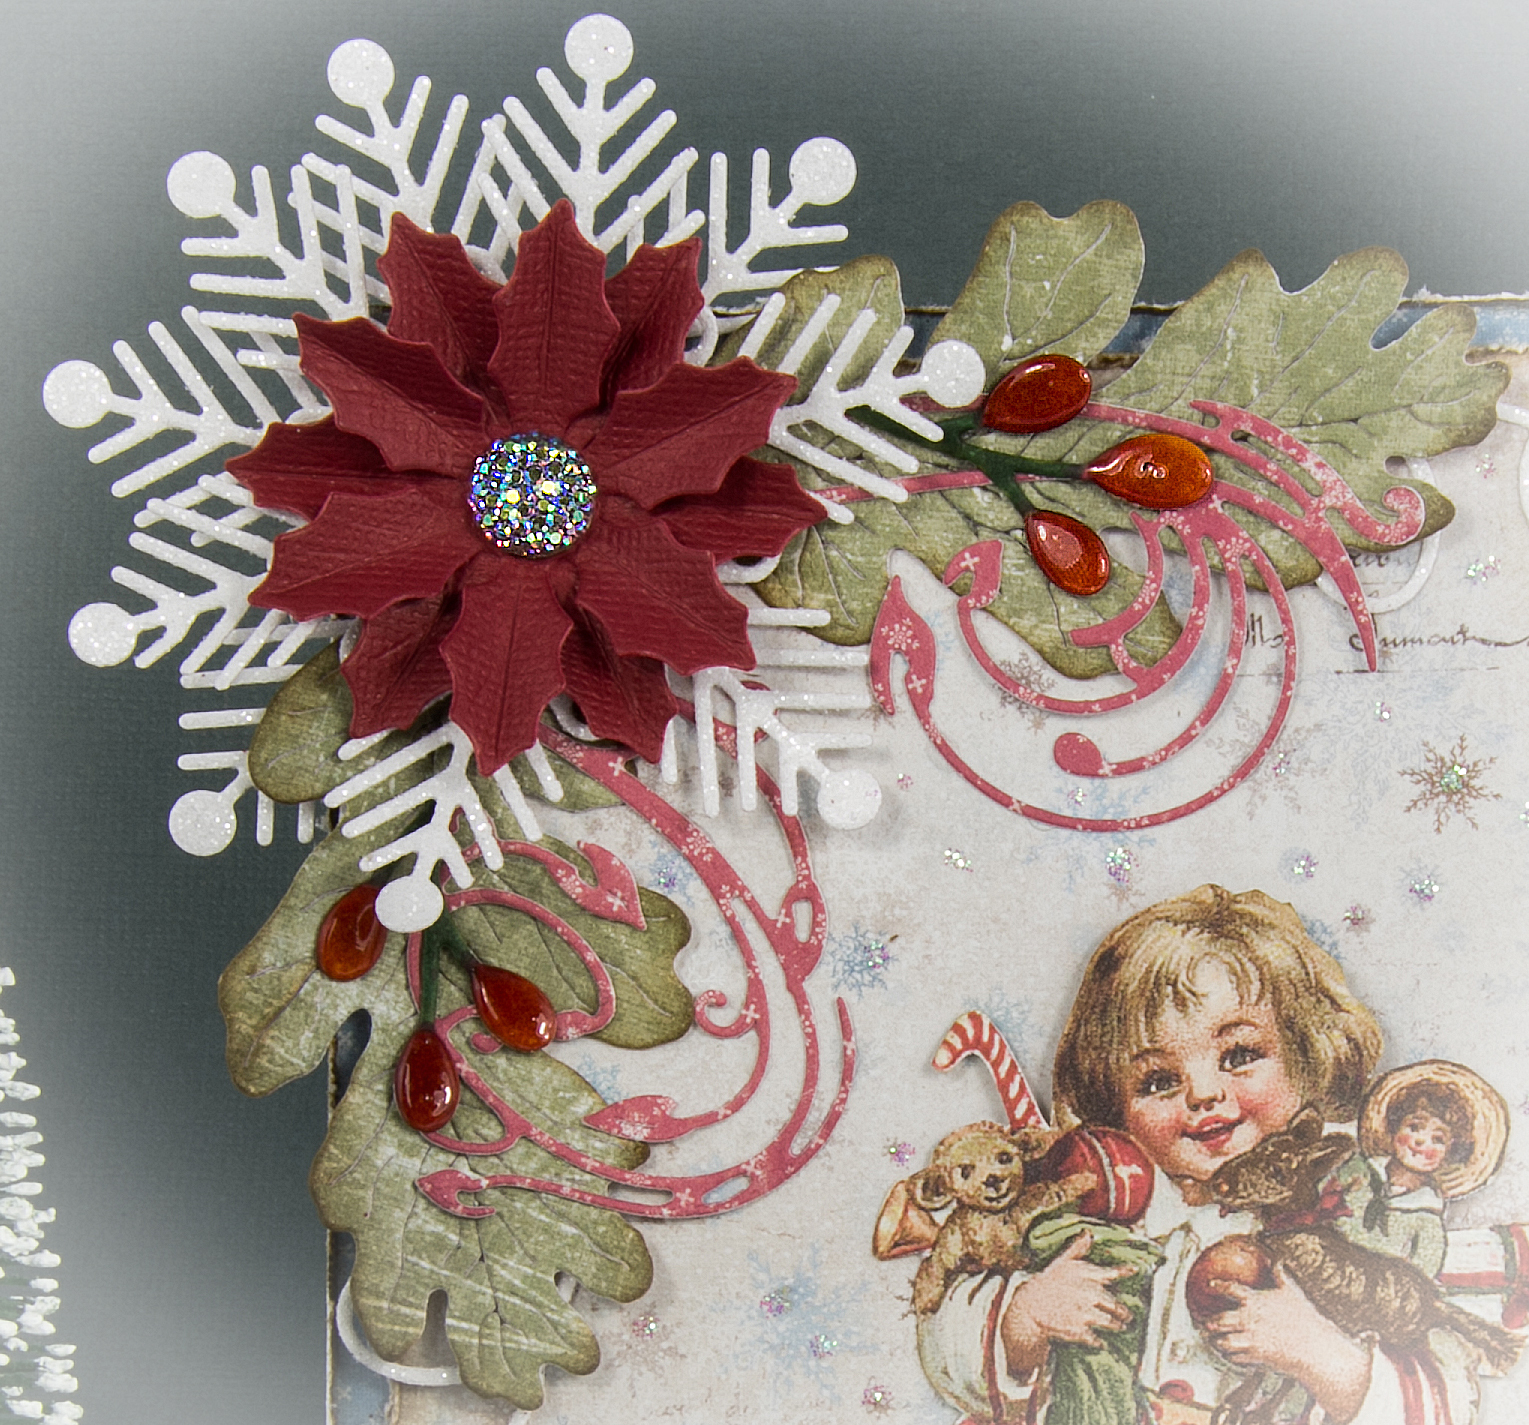
I layered a mixture of foilage inking my leaves at the edges, adding Glossy Accents onto my berries and cutting out my Snowflakes from Glitter Card and adding some shape into them. Finishing with some flourishes and a Poinsettia along with a sparkly gem and Accents of Stickles for added sparkle.

Cheery Lynn Dies Used:

Crafty Hugs, 
Julie x

Sunday, December 10, 2017

Let it Snow!

3:30 AM 0 Comments

Hi there, Maggi here to share a big tag with you.  I've used a lot of Cheery Lynn Designs dies to make this layered large tag from Creative Embellishments (it's 5.5" x 10").  Starting from the bottom, a brown striped oval using Oval Scalloped LG Stackers Nesting Dies , then a blue patterned piece cut with Horizon Coved Rectangle Boutique Stacker Frames Die, next another brown piece cut with Royal Scandinavian Boutique Stacker A2 Frame, a blue piece cut with A2 Frames Rectangular Scalloped, and finally topped with a cut-apart from the Graphic 45 Seasons collection.  I know, that's a lot of layers and some are barely visible.  Still, all those layers work together to make this beautiful tag.

In the upper right corner I've used two cuts from the Horizon Fishtail Banners 3 Piece Die Set and topped that with a die cut label using the Sentiment Frame #1  set.  Next I layered on a sticker from the Seasons collection and topped all that with handmade flowers.

I made two sizes of roses using the Large Rose 7 Piece Die Set and the Tea Rose Small- 6 Piece Die Set.  The flowers with the pearled stamens were made with Judy's Blooms Die and the other white flowers were made with Floral Bouquet Kit 8 Piece Die Set.  Then to set off my florals perfectly, I used the dainty Branch 2 Piece Die Set .  I really love this branch, the leaves are a perfect size and just so pretty!  I wanted to add lots of sparkle to my flowrs so they have been painted with clear Wink of Stella and then highlighted with Star Dust Stickles.

The Let It Snow - 4 Piece set makes such a great title, I love the font and the pretty stars that come with the die set.  I went over all the letters with Star Dust Stickles for lots of sparkle!  Underneath the title I used two different sized cuts from the Pierced Stacker 3 set.  I also used some cardboard to pop up the top layer to make it really stand out.


Other:
Graphic 45 Seasons Collection
Creative Embellishments Large Tags

Tuesday, November 21, 2017

Shaker Ornaments with Maggi

3:30 AM 0 Comments
Christmas time is all about family and children in my mind and here is a project you can do with the kids.  These are shaker tree ornaments that are so simple to make.  All you need is our shaker die kits (listed below).  The shaker kits even come with shakers but I opted to use glass beads for shakers in these.

Make two shakers and glue them together.  For the bell, cut the clapper off one so they match up nicely.  Since I used white foam to make the shakers, I took a Faber-Castell Big Brush Pen in green and inked all around the two shakers.  You could use any ink to color the edges.

Embellish the tree top and the bell with a small flower from the Floral Bouquet Kit 8 Piece Die Set .  Shown here are the reverse sides of the above - these are all ready to tie on your tree.


Cheery Lynn Designs Products Used:


Other Products Used: 
Graphic 45 Winter Wonderland Collection
Really Reasonable Ribbon Seam Binding


Friday, November 17, 2017

Best Wishes by Jenny Alia

3:30 AM 0 Comments

Hi everyone!  Today I planned my card around this lovely Best Wishes Sentiment Square die that I just picked up on clearance at  Cheery Lynn Designs.  I love these word dies in squares, circles and ovals.  It's so easy to build a card around them and the beautiful font creates a wonderful focal point on projects.


The square fit perfectly in many of the doilies and for this card I used the Dutch Daisy Square Doily.  I used white and blue with a creamy tan thrown in to add to the bridal theme. I used my go-to Floral Bouquet Kit for the leaves.  All of these leaves came from the same set.  The flowers are actually from the Embellishments #3 die set.  Cheery Lynn has such a wide range of flower dies but I wanted to play with something a little different and I liked the light, airy quality these created.

Cheery Lynn Dies

Thanks for stopping by the blog today.  Make sure to check out the wonderful dies Cheery Lynn has on clearance.  The sales are great!  

Tuesday, November 14, 2017

Joy to the World by Julie Lavalette

3:30 AM 0 Comments

Hi Cheery Lynn Fans it's JULIE here today. Gosh I can't believe how fast we are now approaching the end of the year and it will soon be Thanksgiving Day for all our American friends. So today my card is inspired by this celebration.


I started by distressing my 2 layers of Maja Design papers at the edges and layered onto my card. I cut out my wreath in 3 shades of paper from the same pad, cutting 2 of my wreaths so they would stretch out a little larger than the base one. The cut was hidden by my drop shadowed reindeer.


My large sunflower was coloured with Copic Pens and Micro Beads added into the centre. The smaller sunflowers I added Flowersoft into the centres and also touches onto the wreath. My berries were coloured with Copic and 2 layers of Glossy accents added letting them dry between coats. Finishing with arranging my bouquet onto my card.

Cheery Lynn Dies Used:

Thanks so much for stopping by today.

Crafty Hugs, 

Julie x

Sunday, September 10, 2017

Vintage Easel Card

3:30 AM 1 Comments
Hello Cheery Lynn fans!  Maggi here with a vintagy easel card.  I love to make easel cards but I like to give them a twist by giving the front a nice shape like this scalloped oval.  I used Cheery Lynn's Oval Scalloped LG Stackers Nesting Dies 6 Piece Die Set to do that.  I love how nice the oval card front looks sitting up against the rectangular base.

 
I used Photoplay papers and ephemera from the French Flea Market collection to make this card. You know the connection...Paris...fashion, perfect collection to use with the Antique Dress Forms dies from the recently released Veriloquent Vintage Collection.

Next I added the Polynesian Sails Oval Die to add a pretty doily effect.  Then I tucked in some ephemera, the bird cage and "enjoy today" card from the paper collection.

To finish my card off, I made some pretty flowers with the Floral Bouquet Kit 8 Piece Die Set backed with leaves cut with the Flourish #14 2 Piece Die Set.  

Cheery Lynn Designs Dies Used:


Thanks for visiting today, I appreciate it!
Maggi Harding

Tuesday, August 15, 2017

Sweet Little Baby of Mine Card with Bonnie Garby

3:30 AM 1 Comments
Hi everyone.  Bonnie here from Make Time to Craft today with a pretty card for a baby boy featuring some of the new dies from the Cheery Lynn Designs Vintage collection.
This is one of those cards that I just couldn't get right.  Honestly it almost ended up in the garbage, but I decided to share anyway.  Now I'm not saying it's a disaster, but it just needs 'something' and I couldn't pinpoint what.  And I really did try.  You have no idea how hard I tried!  I think it's a color thing, but I could not resolve it to my satisfaction....
Anyway, I went with it anyway mainly because I love the background I created with the new Vintage Tile die and I wanted to show you how I did it.  I will be using this technique again for sure.

Cheery Lynn Dies used:
B777 Floral Bouquet kit
XM4 Circle
CASO20 Nesting Doll Circle Shapes
CABD-109 Nesting Doll Tags #1

I topped my card off with a pretty bi-color bow created on my Bow-it-All V3.0 Tool using Blue Topaz and Royal Blue Delicate Stitched Satin Ribbon from Really Reasonable Ribbon.  There is also a piece of Royal Blue Ribbon topped with Baby Feet Multi Grosgrain Ribbon running across the center of the card under the pram.

The flowers were cut, shaped and assembled using pieces from the Floral Bouquet kit and the flower centers are 10mm flat back pearls.  The flowers were added to the card under the pram medallion.

For the card background I created with the Vintage Tile die, I cut four tile pieces out of white cardstock that was backed with Stick It adhesive for ease of adhering it to the card.
Take two pieces and overlap them as shown above matching the center points on the sides.  I do this on a cutting mat so it's easy to have everything properly aligned.  I have used low tack tape to hold the pieces.  
Then I used my acrylic ruler and rotary cutter and cut right through the middle to they will align perfectly.
I used some of the quick drying Designer Dries Clear glue and glued the edges together and then I did this again with the other two pieces.
Then take the two groups of two pieces and align the same way matching the center points on the sides.  Align your ruler through the middle again and cut.
This will give you a large background perfect for a 5-1/2" square card.  I love to find different ways to use my dies to stretch their functionality.  This makes it easier for me to justify my purchase.  
As you can see, it's not perfect, but since it's not my main focal point (at least not the center of it), nobody will ever know.
Thanks so much for stopping by today.  I hope I've inspired you to try to find additional ways to use some of your dies.  Happy crafting!


Copyright Statement


All content, including designs, pictures and words are the exclusive property of the author of each blog post. Information shared here is for inspiration only and may not be copied for publication, competition or profit. Thank you for your cooperation.

SOCIAL MEDIA 2


Follow Us @jointhemakersmovement


All content, including designs, pictures and words are the exclusive property of the author of each blog post.
Information shared here is for inspiration only and may not be copied for publication, competition or profit. Thank you for your cooperation.