Showing posts with label Flourish #1. Show all posts

Thursday, May 31, 2018

For You Card with Cheryl Walker

1:30 AM 0 Comments
Hello crafty friends and Happy Thursday to you all! Cheryl here with a sweet card created for Cheery Lynn Designs using the darling Cats.  I LOVE their tails and how they make a heart shape around the sentiment. Also used several other Cheery Lynn dies, and I will list them below for you.

On my card I started by cutting out both the cats in 2 different design papers, then used perfect pearls over them both to give some glitz to both kitties.  Next I added a sweet little flower to the left one, and it's from the Tiny Flower Kit die. I also made up the flowers from the same die using pink paper, used perfect pearls to them, and added a viva pearl dot to the center of each. The greenery was distressed with green ink and then colored with perfect pearls green.  Then I added the branches using the wreath strip.

The brown frame is from the Mirror Mirror Doily Frame, and then the white was also cut using the same die set. I distressed the white one with pink ink.

Cheery Lynn Supplies:
Cat CABD-45
B376 Tiny Flower Kit die
BD-17 corners
DL286 Mirror Mirror Doily frame
Flourish #1
Flourish #3
B21 wreath strip


Thank you for stopping by and have a lovely day!
Hugs to all,
Cheryl

Tuesday, January 9, 2018

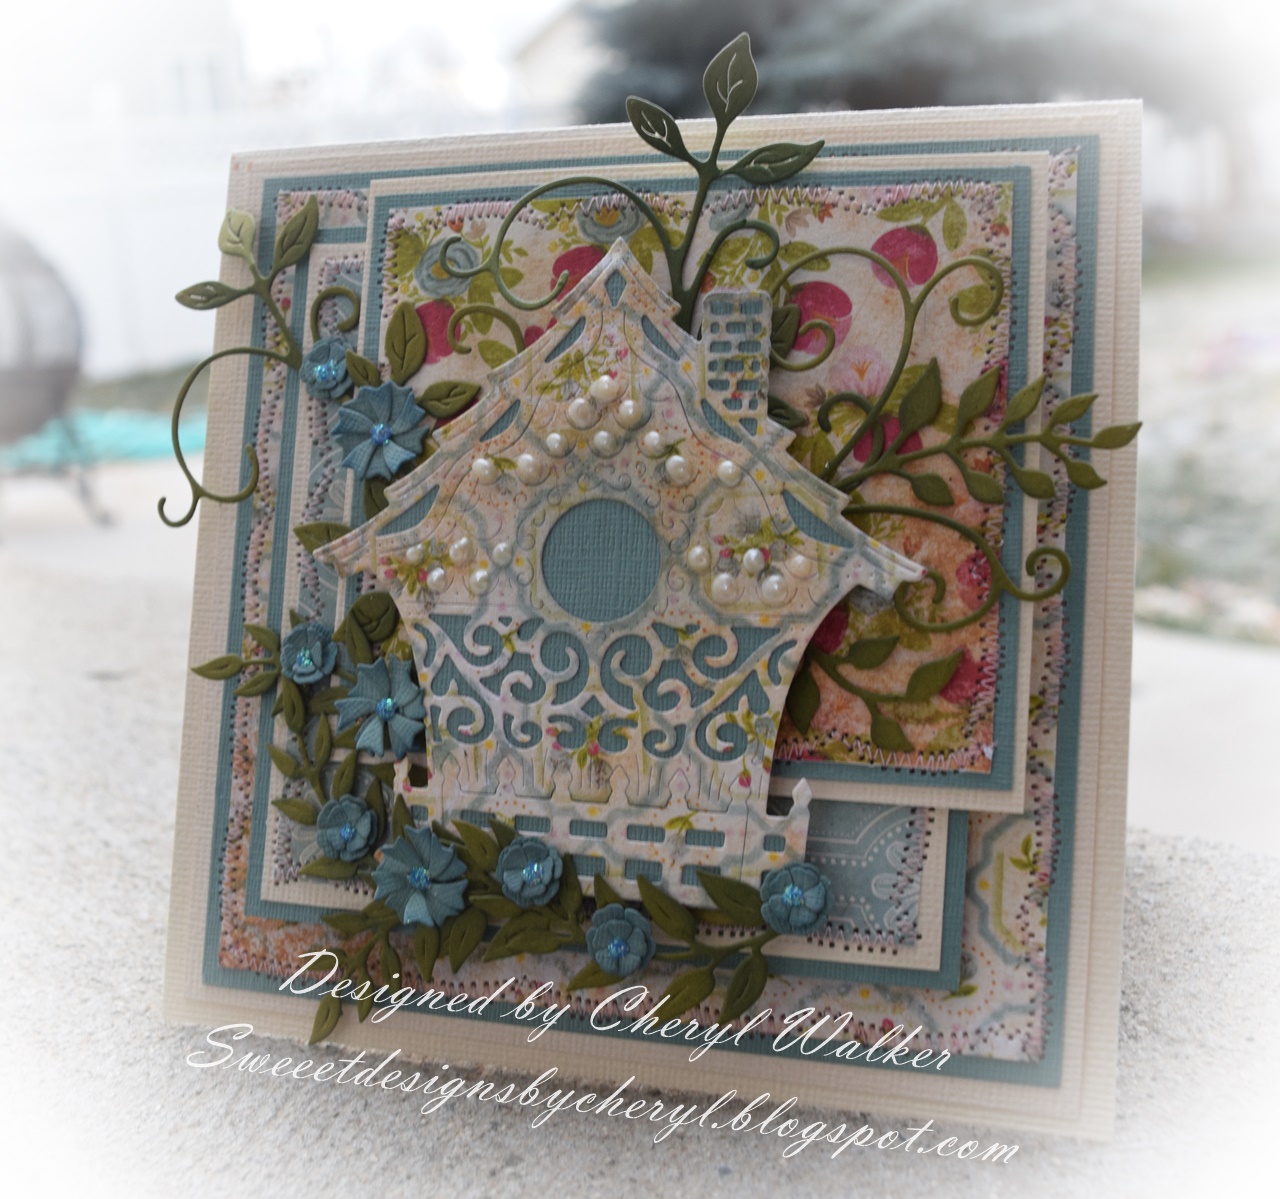
Fancy Bird House Card with Cheryl Walker

1:30 AM 0 Comments
Hello crafty friends and Happy Tuesday to you all!
Today I have a super sweet card I created using Cheery Lynn Dies, and some Vintage Lace papers. Love the Bird House, it's absolutely gorgeous! I decided to just distress it a little and add some Viva Pearls to decorate it a bit.

The card base is 5 3/4" x 5 3/4" and is a cream card stock. Next I added layers of the Vintage Lace design papers and card stock.

For the greenery I used Cheery Lynn's Olive Branches, Flourish #1, Flourish # 3, and Tiny Flowers kit for all the flowers. Love how small they are, and I think they go perfectly with this beautiful bird house. I did add some Stickles to the centers of each of the flowers, and distressed each flower using a blue ink.

The bird house was cut using the coordinating design paper, and then backed with the same blue card stock. I distressed the bird house using a blue ink, and did that lightly, as to not overpower the beauty of the birdhouse. Next I decided to add some pearl dots using the Viva Pearl pen.

Cheery Lynn Supplies used:


Other supplies:

Viva Pearl Pen
Stickles
Ink
Sewing
Bazzill card stock and design paper

I love the look of this card and the Shabby Chic/Vintage feel it gives. Super fun to create, as I always enjoy working with Cheery Lynn Dies! Hope you enjoyed my post for today!
Thank you for stopping by, and have a lovely day!

Hugs to all,
Cheryl Walker
Sweeetdesignsbycheryl.blogspot.com

Thursday, May 11, 2017

Basket for Mom

3:30 AM 1 Comments
Well this should have been an Easter basket but I'm a day late and a dollar short as they say, so I turned it into a Mother's Day basket filled with my Mom's favorite chocolates!  She'll love it!

To start my design, I used Coved Rectangle Stitch Nesting Set - SM Silver Stitch Nesting Set 6 Piece Die Set - MS10 to cut panels for the front and back of the basket.  I just cut rectangles for the side panels and used a corner chomper to memic the coved corner on the front panels.  Then I added Border #7 Die - CABRD7  in the center.  I cut a little tag with the smallest of the  Horizon Fishtail Banners 3 Piece Die Set - DL278 and stamped a simple greeting.

I used several different flower dies (listed below) to make the flowers that embellish the front and back panels.  I always like to tuck in a few leaves to my floral clusters and one of my favorite dies for making leaves is Flourish Leaf Strip 5 Piece Die Set - B178.

The handle is "gussied up" with more flowers, a seam binding ribblon and  beautiful flourishes cut with  Flourish #1 Die - CAFLRS1.

On this side view you can really see how pretty that leafy flourish looks cascading down the side.  The papers I used are from Graphic 45's DCE Once Upon a  Springtime.  The pinks and greens are perfect for this springy Mom's Day project don't you think?

That's it for me today!  What are you making for your Mom for Mother's Day?


Horizon Fishtail Banners 3 Piece Die Set - DL278

Graphic 45 Once Upon a  Springtime DCE
Really Reasonable Ribbon seam binding

Sunday, April 30, 2017

A Pretty Basket for Mom - Maggi Harding

3:00 AM 0 Comments
Well this should have been an Easter basket but I'm a day late and a dollar short as they say, so I turned it into a Mother's Day basket filled with my Mom's favorite chocolates!  She'll love it!

To start my design, I used Coved Rectangle Stitch Nesting Set - SM Silver Stitch Nesting Set 6 Piece Die Set - MS10 to cut panels for the front and back of the basket.  I just cut rectangles for the side panels and used a corner chomper to mimic the coved corner on the front panels.  Then I added Border #7 Die - CABRD7  in the center.  I cut a little tag with the smallest of the Horizon Fishtail Banners 3 Piece Die Set - DL278 and stamped a simple greeting.

I used several different flower dies (listed below) to make the flowers that embellish the front and back panels.  I always like to tuck in a few leaves to my floral clusters and one of my favorite dies for making leaves is Flourish Leaf Strip 5 Piece Die Set - B178.

The handle is "gussied up" with more flowers, a seam binding ribbon and  beautiful flourishes cut with  Flourish #1 Die - CAFLRS1.

On this side view you can really see how pretty that leafy flourish looks cascading down the side.  The papers I used are from Graphic 45's DCE Once Upon a Springtime.  The pinks and greens are perfect for this springy Mom's Day project don't you think?


Other
Graphic 45 Once Upon a  Springtime DCE
Really Reasonable Ribbon seam binding


That's it for me today! Thanks for joining me.


Thursday, March 30, 2017

A Mother's Day card with Maggi

3:30 AM 0 Comments
Here's a pretty card for Mom with a hidden greeting that you could change for any occasion.  There's a tag hidden under the image that pulls out.  You can see the hidden tag in the next photo.  I've use some Maja Designs paper with bright white cardstock.  
I used a couple of layers of Maja Designs Enjoying the Outdoors paper along with the bright white cardstock.   The striped background layer was cut with French Flair Pierce And Cut Tool .  Then I cut a layer with Quadrafoil Square Doily 2 Piece Die Set and tucked it in the top left corner.  Over the top of that, I layered an image from the design paper.  The little tag that I stamped my sentiment on is also from the design papers.
I used Cherry Blossom 2 Piece Die Set to make the flowers.  I just shaped them a little bit and stacked two layers together and topped with some fun pink bling.
I used Flourish #1 Die underneath the flowers to give the appearance of a vine winding its way up the side.


Cheery Lynn Designs dies used:

Thanks for joining us on the Cheery Lynn blog!

Maggi Harding

Copyright Statement


All content, including designs, pictures and words are the exclusive property of the author of each blog post. Information shared here is for inspiration only and may not be copied for publication, competition or profit. Thank you for your cooperation.

SOCIAL MEDIA 2


Follow Us @jointhemakersmovement


All content, including designs, pictures and words are the exclusive property of the author of each blog post.
Information shared here is for inspiration only and may not be copied for publication, competition or profit. Thank you for your cooperation.