Showing posts with label Doily Dies. Show all posts

Thursday, July 19, 2018

Sweet Cupcake Card with Cheryl Walker

1:00 AM 0 Comments
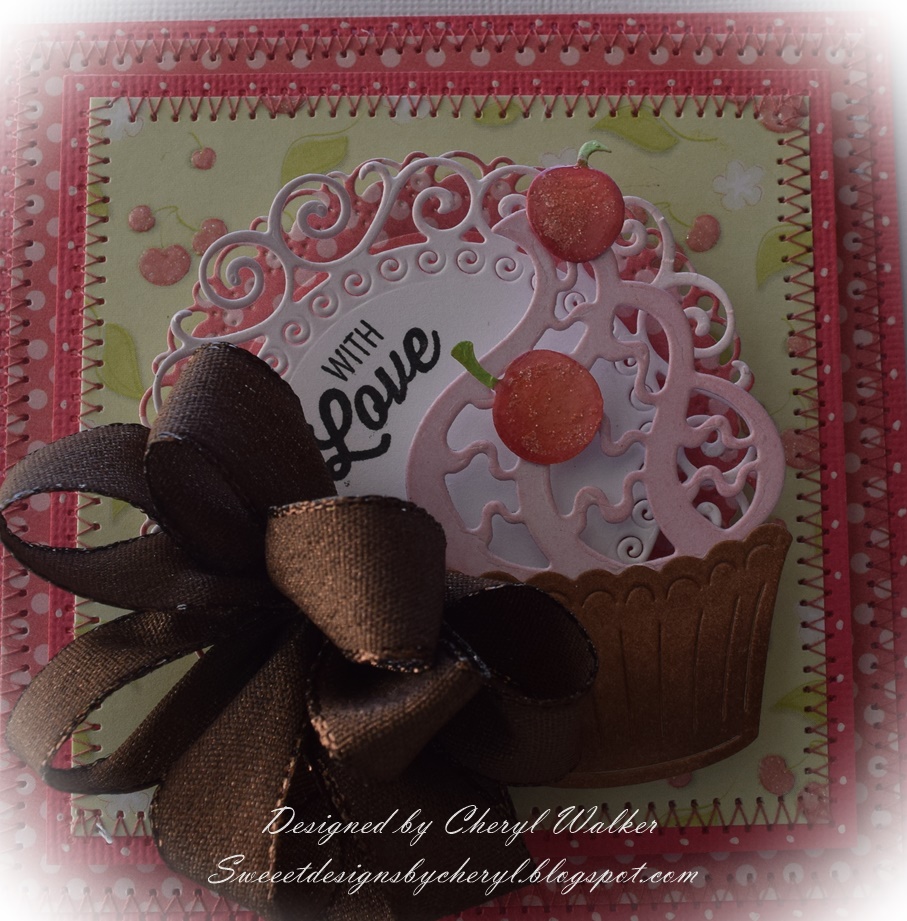
 Hello everyone and Happy Thursday to you all! Today I have a super SWEET Cheery Lynn cupcake card to share.  Yep, it's a sweet one...heeehehehe.  I love this little cupcake, it's absolutely too cute, and I really enjoyed coloring this one up. I used Copic markers on it, and I also used some Stickles and Glossy Accents on the cherries.  Yes I used both on them, super fun right??!!!

The card was layered using some old design papers I had come across in my stash when I was sorting through it a couple of months back, trying to clear out some things and make room for creating :) This darling cherry paper and polka dots was in some scraps I had on one of my shelves, so I pulled it out and set it aside to use, and thought how perfect it would be with this darling Cheery Lynn Cupcake die.

I layered the cupcake on 2 other Cheery Lynn dies and will list them below. This card was super fun and easy to make.

Cheery Lynn Designs:
Cupcake CABD42
Flourish Frame B888
DL272 Doily Dies
Big Sister die cutting machine
Best glue ever


Thank you so much for stopping by and have a lovely day!
Hugs to all,
Cheryl

Sunday, July 30, 2017

A Sweet Friendship Card with Cheryl Walker

12:30 AM 0 Comments
 Hello and Happy Saturday to you all! Today's sweet card was designed for Cheery Lynn Designs using 7 BEAUTIFUL Cheery Lynn Dies! To start with I chose to use the 2 different sizes of the Gardenia die. I LOVE the layering design of this die. I also love how Cheery Lynn makes them into strips so you can run it through the machine so easy and have lots of cuts . Oooo I'm also LOVING my Big Sister Die cut machine that I got through Cheery Lynn Designs! LOVE it more than the Big shots machine, I guess because you can adjust the level of pressure on your dies. Its awesome!!! If you haven't seen this machine, you have to watch their video.
 Enough of me rambling on....hehehee now onto my card for today.

On this card I chose to use some older Crate paper to make some chocolate looking flowers. LOVE these gardenias ( B433 Small Gardenia Strip & B339 Gardenia Strip) and how they turned out. I spritzed them with spritz spray to give them some glitz, and to shape them easier. Love these!!!

The leaves B241 Rose Leaf Strip and the Flourish #8 were cut out using a green and then distressed.

The sentiment from The Project Bin was stamped on the LPC4 circle die, and then layered on the DL272 Doily Die.  Layered behind this is the DL282 Alpine Flourish Doily.
Thank you for stopping by, and please leave a comment letting me know what you think of my card for today!

Hugs to all,
Cheryl

Tuesday, January 6, 2015

Steampunk Love

3:30 AM 1 Comments


Happy Tuesday everyone! leslierahye here sharing a Steampunk Valentine using the Gears Mesh as an insert in the Mirror Mirror Doily Frame. I cut the center of my doily out with the thin oval die provided and then fit my gears behind it. Both the Gear Mesh and the Wings were cut out of black card stock and sponged with gold chalk powder to produce the shimmer.The focal heart was simply layered with the large Two of Hearts in the back, the wings and then the smaller Heart 'n Gears die cut. 

  Cheery Lynn Dies used
*****
Remember there is still time to join the new challenge!!! Challenge #166 is Winter Whites There is a chance to win a $20 shopping spree at Cheery Lynn Designs. Thank you for stopping by today!

Tuesday, December 2, 2014

Seasonal Greetings

3:30 AM 4 Comments

Happy Tuesday everyone! leslierahye here With a seasonal holiday card using some of my favorite elements! Even though I  live in a VERY WARM state, snowflakes are one of my favorite design elements for winter. For this card I used the Snowflake Wonder Doily  along with Snowflowers sets and the Snowflakes plate. The elegant Fancy Deer paired with some shiny florals and bling. Below is a brief tutorial with all the tips.

Begin by cutting the Snowflake Wonder Doily without the center die out of Kraft and mist with an opaque white mist. I masked the center of the doily with a square. 

Once I was happy with the look of the outer of the doily, I misted lightly from high so that it looked like a light misting of snow.

I then returned my mask to the doily to mist with a blue-hued mica mist. I heat set this mist to hold the colors in place.

I placed a red square behind the doily to coordinate with the red flowers that will be placed on the card and to help the doily to pop off the card. I then layered on snowflakes and a Fancy Deer with antlers--to add extra sparkle the white pieces were misted with a Pearl white mist. This focal square was place on the top two-thirds of the card.

I then began layering my florals on top of the mini flourish band. I built the flowers and added beads to the centers with a clear lacquer. The petals of the leaves and flowers were also painted with the lacquer to add shine [see last photo for the full effect]

Bling was added to several snowflake centers to add more sparkle.


  Cheery Lynn Dies used

*****
Remember there is still time to join the new challenge!!! Challenge #161 is Tis the Season There is a chance to win a $20 shopping spree at Cheery Lynn Designs. Thank you for stopping by today!

Wednesday, October 29, 2014

SWEET CAUSE FOR CELEBRATION WITH ANITA KEJRIWAL

3:30 AM 2 Comments
A big hello to all....
Hi,  Its Anita here for weekly wednesday post. Once again , I'm bringing to you a new release die from Cheery Lynn. This month, a whole new range of intricate dies have been released and yes !!! they are so versatile.  The doily dies are divided into two parts and can be mix and matched and even used with other dies.


For my card, I cut out a hinged front from the Heart French Flair Boutique stacker frames from black card stock. I cut another piece in white and layered it inside the card after distressing it with evergreen bough distress ink. Then I cut medium piece from the second stacker frame and layered in the front again .  This I kept white in order to high light the new doily die.  Then I cut a circle in black placed on top of the new circle doily. On this, I placed the smallest part of the stacker frame.Then I put the second centre portion of the doily.  This I distressed with Ever green bough  Here, I have put some pearls to decorate the centre.  The flowers are cut and made from the Judy's Blooms die. I have coloured the flowers and leaves from Distress inks.


The Inside View

Supplies

Lords and commons  doily ( set of 2)
Heart French Flair boutique Stacker frames-DL 269
Judys bloom CL 184
Distress inks-Evergreen Bough. squeezed lemonade. mowed lawn
stamp-justrite

The new challenge at the Cheery Lynn blog is all about borders and edgers.  So do join us for some amazing prices.
See you again next wednesday,. Happy crafting.

Copyright Statement


All content, including designs, pictures and words are the exclusive property of the author of each blog post. Information shared here is for inspiration only and may not be copied for publication, competition or profit. Thank you for your cooperation.

SOCIAL MEDIA 2


Follow Us @jointhemakersmovement


All content, including designs, pictures and words are the exclusive property of the author of each blog post.
Information shared here is for inspiration only and may not be copied for publication, competition or profit. Thank you for your cooperation.