Showing posts with label Celeste Glover. Show all posts

Wednesday, March 28, 2012

Best Wishes

3:30 AM 8 Comments
Hello and welcome back!

This week I wanted to share with you an easel card that I have made.  


I started off making a regular easel card out of card stock.  I then used the French Flair - Scalloped XL-13 die with the French Flair - Classic L-12 die on top in the blue and lastly the French Flair - Classic - XL-12.  I hope thats not too confusing!


Next I used the Spring Basket 1 and added the Darling Daisies.  I thought the Darling Daisies were cute for this card as they reminded me of spring and the flowers weren't too big and they sat perfectly in the basket.  I used one of the Exotic Butterflies small and finished off with a ribbon at the top of the basket.  On the bottom of the card the rabbit from the Nesting Eggs was used as it was a wee bit smaller.  I also used Cuties 2 as a border this time for the edge of the card.


Dies used:
If you haven't already entered the challenge for this week, jump on over to the Cheery Lynn Designs blog to get all the info!

Thanks for stopping by

Wednesday, March 21, 2012

Tag Me!

3:30 AM 5 Comments
Hello and welcome back!

I hope you had fun last week with the Easter Blog Hop and to continue with the Easter theme I have made some tags.


These tags are simple and really easy to make.  First I chose some coloured card stock and cut out using the largest of the Nesting Eggs die.  I chose patterned paper as I thought it was a bit more fun, then used the second largest of the Nesting Eggs die and popped it on top of the card stock.  I decorated with ribbons and bling and used the rabbit from the Spring Basket 1 as he was a little bigger and fit perfectly on the tags.

Why not make some this Easter and give your family and friends a home made tag to go with their Easter goodies!

Dies used:

Don't forget to "hop" on over to the Cheery Lynn Designs blog and enter the current challenge for your chance to win a voucher.

Thanks for stopping by 

Wednesday, March 14, 2012

Easter Eggs

3:30 AM 7 Comments
Hello and welcome back.
I finally received my Easter dies!  Unfortunately I have been sick this last week and it was a bit of a rush to get my post ready.  So please bare with me while I get thru this bout of sickness.


I thought I would make something different this week.  I used some old packaging plastic in the shape of a cylinder and popped an egg into the middle.  On the outside I tied a bow (that has little chicks on it) and then began to cut out and stick down my dies.  


Firstly, for the large egg, I cut out the Spring Basket and used one of the Lace Egg dies in the centre.  I then used the Bunny and Chick Border to run along the bottom of the cylinder.  For the tag I used Nesting Eggs with the bunny from the Spring Basket and popped him in the middle.


For the smaller project, I used another plastic cylinder and filled it up with small Easter eggs.  I then used the Lace Egg die again and cut four eggs out and placing them all around the cylinder.  Topping off with a bow (this one had bunny faces on it!) I also made a tag.  This was using the Nesting Eggs again and also the bunny that came with the set.

Dies used:

I hope you like my projects and again, I am sorry that I only had a short time in which to bring you this post.  Please look out for the weekly challenge, on again at the Cheery Lynn Designs blog.

Till next time Celeste

Wednesday, March 7, 2012

Pomander Balls

3:30 AM 11 Comments

Hello and welcome back.
Does this remind you of your Nanna?  


A pomander, from French pomme d'ambre, i.e. apple of amber, is a ball made of perfumes, such as ambergris (whence the name), musk, or civet.[1]The pomander was worn or carried in a vase, also known by the same name, as a protection against infection in times of pestilence.


For both of the balls I only used the smaller die of the Judy's Blooms set.  I just wanted to show that you can create lovely items with very few dies.  Until you can afford to splash out (wouldn't that be nice!),  you can still do a lot of creating.


To make these pomanders, all you need is a styrofoam ball, a bit of ribbon or lace and some pearls or brads for the centres. I just cut multitudes of the small flowers from Judy's Blooms, placed one on top of another and glued them into place around the ball.  I inked the edges and glimmer misted all the petals and then spritzed the whole lot with water and lavender essential oil, (for the purple one and water and rose essential oil for the pink one.).

Thanks for stoping by and if you haven't already checked out the latest challenge for Cheery Lynn Designs, head over to their blog and have a go!

Till next week,  Celeste

Wednesday, February 29, 2012

Little Girl Banner

3:49 AM 10 Comments
Hello and welcome back.

This Wednesday I am showing you my banner.  It was completed just before the weekend.  I was very excited to be doing a banner, as I thought no one else had made one.  Then  to my surprise, Jeannie's creation came up.  All I can say is,  "Jeannie, great minds think alike" and I hope you like mine just as much as all the fantastic comments you gave Jeannie.
So here goes!


I started off with wooden off the page flowers from Kaiser and went about covering them with Sweet Nothings 6 1/2 paper pad also by Kaiser.  Starting with the Dainty Dutch Deco Frame, I cut the middle out and used that for the middle of each flower.  On top of the flower are bling alphabets with small wings just underneath.  The edges of the flowers are covered in pearls.  The flowers are made up of the Miniature Rose, the Cuties 2, the Darling Daisies and the Stacker Flower #1 Leaf.  Finishing off with ribbon and binding them all together used pink links.


Dies used:


Thanks for stoping by and if you would like to join in the fun at Cheery Lynn Designs, click here to find the latest challenge.

Happy Scrapping Celeste.

Wednesday, February 22, 2012

Number One Fan!

3:30 AM 12 Comments
Hello and welcome back.  Celeste here with you for another Wednesday.

Today I want to show you a card I made using the Eazi-Score, that Phyllis from Diamond Card Craft sent to the Design Team members a little while back.
I used the score board and instruction booklet to make this Bouncy Card.


I started off using purple card stock to make the card.  Next I used some patterned paper to put on the bottom of the card and in the square.  I cut out the Folding Fan from the same card stock as the main card and then used a shimmering purple to go over the fan itself.  One flower using the Large Rose and Cuties 2 dies was used at the bottom.  Lace Corner Deco A were used for the corners on the square of the card, while two of the other Lace Corner Deco A were used for the stand of the card.


To add some "greenery", the Olive Branches were popped in behind the flower.  On the stand of the card I used the Small Dragonfly with Angel Wing in one corner and the Darling Daisies in the other.  


Don't forget the challenge this week.  Head on over to the Cheery Lynn Designs blog for all the information and good luck!

Dies used:

Thanks for stopping by Celeste


Wednesday, February 8, 2012

Bless You!

3:30 AM 13 Comments

Hi every one and welcome back.  Celeste here with you for another Cheery Lynn Designs Project.

For a long time I have wanted to dress up a Tissue Box.  I finally found one (from Kaiser) and got to work.  I hope you like it!


First I covered the whole box in neutral tones and then started with the borders.  For the borders up the top, I used the Lace Light Deco Border and for the bottom with ribbon threaded thru, I used the new release Country Girl.  Up on top I used the Lace Light Deco Border.


Next the foliage came along.  This was the Tropical Flourish and Olive Branches.  I cut these out and inked with Tim Holts inks.  


The flowers were made up of the Miniature Rose, Large Rose and Cuties 2.  These were put together and placed on the corner and two sides to look like a trail of vines and flowers.  The Exotic Small Butterflies were added to the two sides.


Dies Used:

Please head on over to the Cheery Lynn Designs Blog for all the information on the current challenge.

Have fun and thanks for stopping by

Wednesday, February 1, 2012

Mother and Daughter

3:30 AM 9 Comments

Hello and welcome back.  It's Celeste here with you for another Cheery Lynn project!
Today I have a surprise for you.  My daughter Amberly created a card with my Cheery Lynn Design dies, and this is her creation!


She found the silhouette of one of my dies, the Fanciful Flourish.  She asked if she could use it and together we cropped and put it on white card stock.  I asked what she would like to do next, and she chose to use the Darling Daisies.  She even new what to do with them!  


Amberly then decided that she was going to put the rub-ons in the corner, and that it was good the way it was.  Don't you love the simplicity of children?  She is going to give it to her Nanna, who is in a nursing home.
Now onto my project.


To keep it in theme with Amberly's project, I decided to make a card too!
I saw this image on a free vintage stamp site and knew I wanted to use it.  It is not a traditional scene to use on a card, but I loved the colours and the style.


Using the new Swedish Spring Oval Frame, I cut it in half and put half on the front, and the other half on the bottom of the easel card.  Doing this also helps the card stay upright (or open).


The using the Cuties 2 and the Miniature Rose dies I cut the flowers and popped them on with the Olive Branches tucked just underneath.  I added the pin, using the same colour theme.


Dies used:
B147 Olive Branches
B150 Cuties 2
B152 Miniature Rose
FRM135 Swedish Spring Oval Frame

If you would like a challenge, Cheery Lynn Designs has their latest on now and you can find all the details 'HERE'.

Thanks for stopping by and happy crafting, Celeste

Wednesday, January 25, 2012

Bride and Groom

3:30 AM 5 Comments

Hello and welcome back.  Celeste here with you for this Wednesdays post.

It was my 19th wedding anniversary last week and since I received the new release Wedding Garter border, it seemed appropriate that I do something regarding my wedding day!


Here is my wonderful hubby and myself on our wedding day.  I used the Diamonds & Starburst embossing plate under the photo and on top of that, I placed the Dutch Doily Rectangle Frame over the photo.  I then added the Wedding Garter border around the embossed paper and added the bride and groom lettering.


All the flowers were cut out of white card stock and inked with various Tim Holts distress inks.  This took a while but the end result was quite worth it!


I found that the best way to stick all these flowers down, was to use glue dots.  After sticking down most of the flowers, the Fanciful Flourish and Olive Branches were inserted underneath.


The flowers were to represent my bouquet, but I got a little carried away! They were so much fun to play with.  In my veil I had small crystals, so to incorporate these, I used crystals in the middle of my big flowers.


Dies used:

If you would like to enter the challenge this week for a voucher to win one of these wonderful dies, head on over to the Cheery Lynn Designs blog to get all the information.

I hope you like my layout this week, as I had a great time reliving the memories of my special day.
Till next time Celeste

Wednesday, January 18, 2012

Sister

3:30 AM 8 Comments
Hello.  This is Celeste here, and this is going to be a big blog!  So get comfortable, grab a cuppa, take the phone off the hook and be prepared to be wowed :)


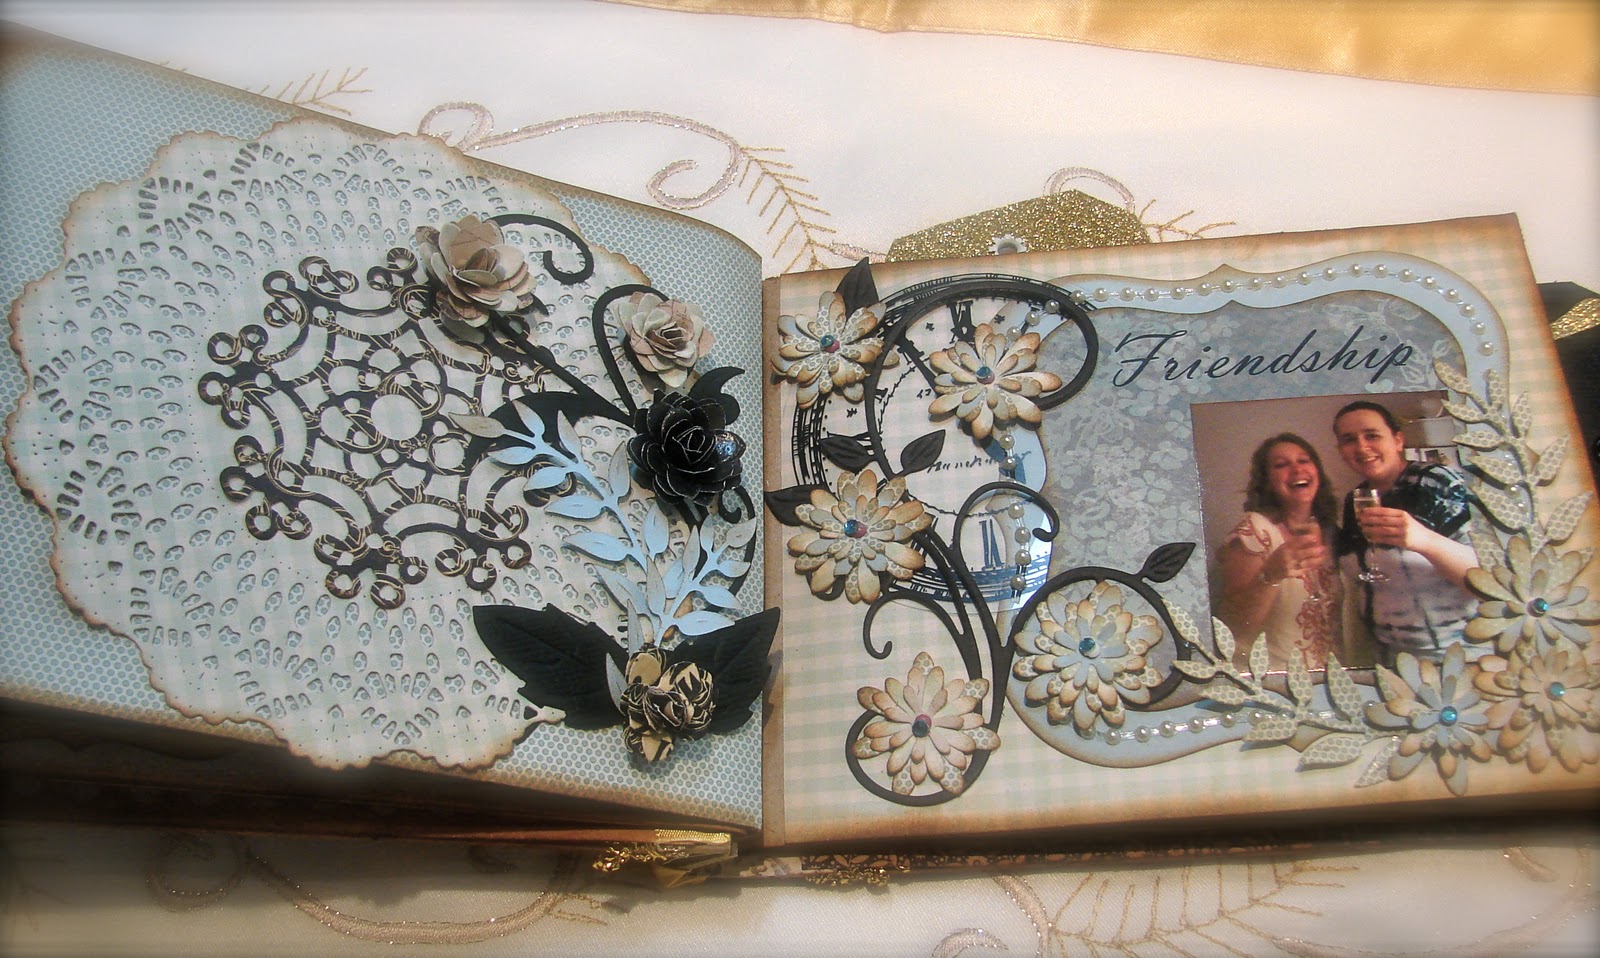
This is an album I made for my sister, who lives in America.  We are only 14 months apart in age and are very close.  I miss her very much.  Anyway this is for her birthday! 
In the above picture is the front cover of this album.  I have used numerous dies and the paper is from My Minds Eye, Sunshine collection.  I used the Judy's Blooms die for the cover adding a pin and a photo of myself with my sister.  Thickers were used for the title.


On the first page, above left, I used the Sweetheart Frame with the Medium Rose and Large Rose dies.  These were glued down flat so that they would not get ruined in transit.  On the second page, above right, I used my all time favourite die, the Fanciful Flourish, in gold and added Darling Daisies in gold and black card stock.


For the third page, above left, I liked this paper too much to cover it up!  So using the French Flair-Classic, I just cut out one of the nesting dies and popped a photo on and used a rub-on up the top which I will put her name in.  To make the fourth page, right hand side, I wanted it to look kind of uniform.  So I just cut another of the French Flair-Classic dies and put a photo on that one too.  I added ribbon and some bling because you always need bling somewhere!!


For the fifth page, above left, I used blue (also in the Sunshine Collection) to break up the album with.  The English Tea Party die was used as the base while the inside of the Dainty Dutch Deco Frame was popped on top.  It was fun taking these two dies and putting them together to get this great outcome for the page.  Another one of my favourites is the Tropical Flourish, which I have cut in black for contrast.  I added the Olive Branches and Stacker Flower #1 Leaves and then making (with great effort!) roses with the Cuties 2 die.  The sixth page, above right,  the Fanciful Flourish was used again! with the Darling Daisies and Olive Branches.  This time I used the larger two French Flair-Classic dies, inked around the edges and put pearls around too, before adding the photo.


On the seventh page, above left, I made a pocket for some tags and journaling.  I used again! the French Flair-Classic nesting dies and the Lace Light Deco Border, which is fast becoming another favourite!!  I kept this page nice and simple so that the tags could be the focus.  They are shown further down the blog.  On the eighth page, above left, to keep uniform again, the French Flair-Classic die was cut and a photo of my sister's dog, Gordon, was popped in.  For the corner of this page I used the Victorian Romance Flourish with the Olive Branches and the Large Rose die, popped on top.


For the ninth page, above, I used the French Flair-Classic nesting dies and used them to make a frame for the photo.  I loved the way it turned out and as you can see I LOVE the French Flair-Classic die.  Until it's out of my system you will be seeing it everywhere LOL.


For the back cover, I cut around this bird that was on one of the papers, and just popped him on the back.  Seeing as the album will be mostly sitting on this side, I didn't want anything on the back that might get caught.


These are the four tags that are inserted into the spaces between the pages.  From left to right, the first tag has the Tropical Flourish with the Medium Rose on the front and on the back, photo below left, I used a transparency and some rub-ons.  In the second tag, Judy's Blooms and a Large Rose die made up the flower, while the French Flair-Classic nesting dies made for the photo mats.  On the reverse is space or journalling.  The third tag has space for journalling or small photo, and I cut the Medium Exotic Butterfly out of gold and popped it onto the black background of the tag.  On the reverse of the third tag I used the Judy's Blooms leaves with the Miniature Rose die, the French Flair-Classic die and the Ribbon Eyelet Border Die at the bottom with yellow ribbon wound thru.  The last tag on the far right has the Lace Light Deco Border up and down both sides with a photo at the bottom and pearls at the top.  On the reverse of this tag is a picture and a left over part of the Lace Light Deco Border that fit the photo perfectly.


The photo below is just a close up of the Cuties 2 die and how it should come out.  I believe Sandy put up a quick tutorial on the blog (which was invaluable) sometime last week.  You must check it out and have a try.


And lastly here are the two tags that sat in the pocket on page seven.  One was made from the French Flair-Classic, again! nesting dies.  The other tag was made using a shipping tag and covered in my collection of papers.


Well.  You have made it to the end of my blog!  I thank you sincerely for reading it all and coming on this Cheery Lynn Designs journey of dies.  I had such fun making this album and I know my sister will be thrilled with it.

Dies used:

Ok folks, thats it!  Please head on over to the Cheery Lynn Designs blog and look out for the weekly challenge.  Using these dies you could create an album like this.  Have a go!

Till next time Celeste

Wednesday, January 11, 2012

HAPPY 2012!

3:30 AM 6 Comments
Hello and welcome back!  Celeste here with you for another Cheery Lynn Designs project.


Seeing as we are bringing in the new year, I have made a calendar this week.  I found this Kaiser beyond the page desk calendar in my stash and thought it would be perfect for another project.  Of course I dressed it up with Cheery Lynn Designs dies!


Firstly I covered the main piece with paper from the Kaiser Craft 6 1/2 inch paper pad Madame Boutique series.  I love this paper as it has gold foil on some of the papers and it brings to life the miniature roses perfectly.  


Using the miniature rose die, and darling daisies die, I inked the edges and put together a few flowers.  Before adding them though, I made the leaves using the olive branches and stacker flower leaves.  Starting in the middle I kind of made my way around popping in the leaves and flowers as I went.  


Lastly I slipped in the photo and the month, which you can also change.  I hope you like the finished product.  
Thank you to my beautiful twins Cameron and Amberly for posing for me!


Dies used:

If you haven't already entered the weekly challenge, head on over to the Cheery Lynn Designs Blog for all the information.  You too could be in the running to win a $20 voucher!

Thanks for stopping by Celeste

Wednesday, January 4, 2012

Bathing Beauties Card

3:30 AM 5 Comments
 Hello everyone.  It's Celeste here with the last in my series of Bathing Beauties.  I have created a card to match my layout and tags.  I hope you enjoy.


Firstly I started off with 6x6 card stock and folded it at the top so the card could be lifted up.  I then used the French Flair-Classic dies to create the base of the card.  I used the French Pastry Doily under the picture just so the edges could be seen.  


I made the small flowers out of the Miniature Rose die and just popped them on top of the Fanciful Flourish and inked and stickled them.  


The main flower is made up of the Judy's Blooms die with the leaves and the Pair of Ferns resting on top  of the French Pastry Doily.  I put the Dragonfly on the left hand upper side of the card and inked and stickled it too.


 This is the inside of the card. I, again, used the French Flair-Classic Die to look like the outside of the card.  I used one of the smaller dies of the French Flair-Classic dies to make a place to write or stamp a saying or whatever you would like to put in.


  For the flower, I just used the inside of the Heartland America Large die and the Heartland America XL die and popped both doily's together with the petals of the Judy's Blooms  on top.  With the Fanciful Flourish underneath and another Miniature Rose, I finished the inside of the card.


Thanks for stopping by and I hope you had a Happy and Safe New Year.  All the best for 2012.

Dies used:  

If you would like to win a $20 voucher for some of these amazing dies, pop on over the Cheery Lynn Blog and enter the weekly challenge.  You can also check out the awesome projects the Design Team have created.  Good Luck!

Copyright Statement


All content, including designs, pictures and words are the exclusive property of the author of each blog post. Information shared here is for inspiration only and may not be copied for publication, competition or profit. Thank you for your cooperation.

SOCIAL MEDIA 2


Follow Us @jointhemakersmovement


All content, including designs, pictures and words are the exclusive property of the author of each blog post.
Information shared here is for inspiration only and may not be copied for publication, competition or profit. Thank you for your cooperation.