 |
| Flower Created Using Cheery Lynn Designs Little Stackers Circle Nesting Dies |
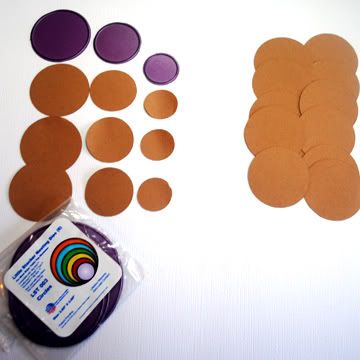
Little Stackers Circle Nesting Dies (the first three smallest dies in the set)
Paper Towel
Hole Punch
Decorative Brad
Tattered Angels Glimmer Mist (Antique Linen)
Lunch Bag Kraft paper
Green Cardstock (for leaves), Pink and Rustic White Cardstock for card base mats
Easter Graphic printed on Rustic White Cardstock from The Graphics Fairy
Easter Graphic printed on Rustic White Cardstock from The Graphics Fairy
From Kraft lunchbag cardstock, die cut three each of the smallest circles from the Little Stackers Circle Nesting Dies. Also die cut another 13 circles of the third from the smallest circles of the Little Stackers Circle Nesting Dies.
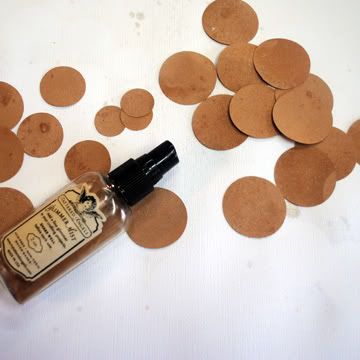
Lightly mist all the circles with Tattered Angels Antique Linen Glimmer Mist and blot dry with a paper towel.
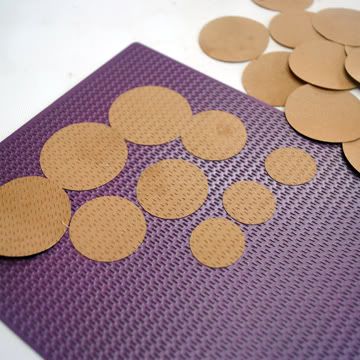
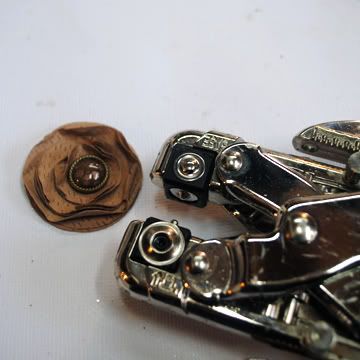
To create flower center, emboss three each of the first three smallest Nesting circles using the Large Rectangle Stitcher Plate.
Crumple up circles into balls and then straighten them and layer on top of each other with the largest toward the bottom of the stack.

Punch hole through entire stack of circles (in the center) and attach a decorative brad to hold them all together.
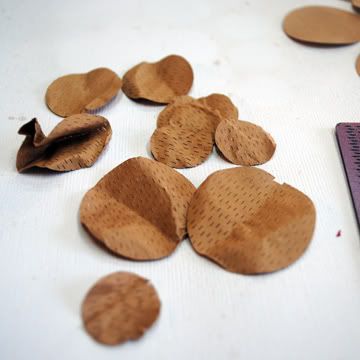
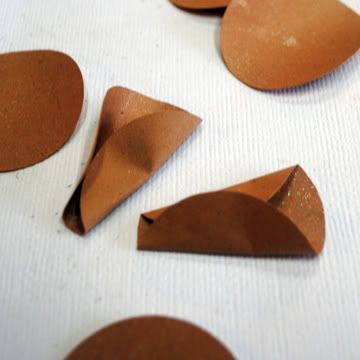
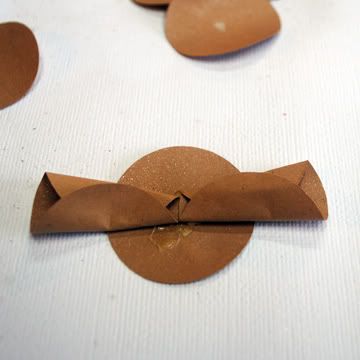
Set aside flower center. Use one of the other 13 circle die cuts as your flower base and roll each of the other 12 circles into cones. Attach to the circle base with glue.
Attached the cone petals with glue as shown until the entire base circle is covered in cone petals.
Adhere flower center to petals with glue.
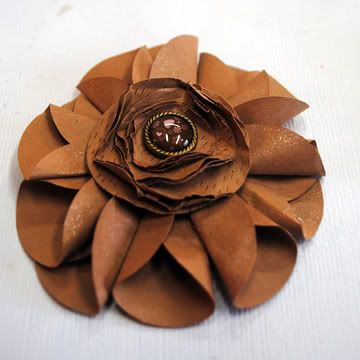
Hold flower in palm of hand and squeeze to scrunch up flower petals and add more dimension.

Pull and arrange layers until you are satisfied with the way the flower looks and attach to your next project as desired with Dimensional Leaves die cuts.

Join us again here at the Cheery Lynn Designs blog for another great product featuring your favorite Cheery Lynn Designs dies.


Gorgeous Beth! I will have to try this one! Were you using lunch bags or grocery store bags??
ReplyDeleteAbsolutely gorgeous! The flower is very dramatic. I love how you recreated it to use your Cheery Lynn dies.
ReplyDeleteBeth this is sooo pretty!!
ReplyDeleteWOW!! That flower is amazing! Definitely have to try it!
ReplyDeleteFantastic tutorail and great technique to show
ReplyDeleteWhat a gorgeous card. Beautiful colors and I love the flower.
ReplyDeleteGorgeous flower. Thanks for the directions for making it. Edna
ReplyDelete