Showing posts with label Horizon Coved Rectangle Boutique Stacker Frames. Show all posts

Friday, July 21, 2017

Baby Card with Maggi

3:30 AM 1 Comments

Graphic 45's Precious Memories collection is so perfect for making baby cards along with Cheery Lynn's Baby Pram die.  Take a look at that sweet Baby Pram, isn't that just the most perfect die for a baby card?  It's part of the new vintage die release from Cheery Lynn Designs.   I've layered it over the Distressed Honeycomb die, which is also part of the vintage release.
This is a step card, here you can see how it stands on its own.  I made cherry blossoms to gussy up my card.  They are easy to make, just a couple layers and a pearl center.  Ink the edges and center to make the flowers more realistic.


I stamped a sentiment onto the Pierced Stacker .  I also used the Pierced Stacker  in a larger size behind the pram diecut.  

When I make step cards I always like to have my diecuts extending beyond the card's edge.  I used the Horizon Coved Rectangle Boutique Stackers to cut a large frame and layered that at the bottom allowing it to extend over the top of the card.


Cheery Lynn Designs Die Used:

Tuesday, May 30, 2017

Imagine Card with Maggi

3:30 AM 0 Comments

Hi there Cheery Lynn fans, Maggi here to share a fun all occasion card today.  The word, imagine, brings so many thoughts to mind; I could use this card for a birthday, graduation, a fun hello card, the possibilities are endlesss!  

Cheery Lynn dies and the colorful cut-apart card from Graphic 45's World's Fair collection worked so well together to make this vibrant card.  I used design papers from the collection to die cut all the layers for my card.  It's a large card, about 5 1/2" x 7 3/8".  I began by layering the blue paper that I diecut with the Coved Rectangle Stitch And Cut Tool .  Next layer is the floral layer diecut with the Horizon Coved Rectangle Boutique Stacker Frame set.  Then a bright orange layer cut with Card Maker Rectangle Scalloped 6 Piece Die Set and finally the floral oval layer cut with Polynesian Sails Oval Die.


Of course, I had to add some flowers and these I made with the Bohemian Collection - Indie Bouquet - 6 Die Set.  They are so easy to make, I just cut 3 different flowers from the die set, gave the petals a twist with my tweezers to give the flowers some body and stacked and glued them.  Then I added some leaves from the Flourish Leaf Strip 5 Piece Die Set and that's it!


Cheery Lynn Designs dies used:


Thanks for joining us today!
Maggi Harding

Monday, March 20, 2017

Spring Flowers with Maggi

3:30 AM 5 Comments

Hi there Cheery Lynn fans!  Maggi here with a spring treat for you today.  After those awful storms that roared through parts of the US, we need some spring!  My project today is a large (6.5" x 12") thickboard Etcetera tag.  Let me tell you, I had more fun with this project than anything I've done in a while!

I wanted to showcase some of the pretty flowers you can make with Cherry Lynn dies AND I wanted to play with my new Distress Oxide inks and Alchemy Metallique Wax.  This is the result!  I started out with a stencil and white masking paste to create the textured quadrefoil design you see.  After that completely dried, I started playing around with the Oxides.  To achieve the effect you see here, I used little finger tip sponges and sponged on different colors of ink and then I lightly misted the ink; enough so the oxidation process was initiated but light enough so that the colors did not pool.  After that was dry, I applied aged brass all around the sides of the tag as well as random swipes over the tag.
The piece in the center is metal and came from a tin bucket that I altered a while ago.  I knew I'd use it sometime!  I've used two Cheery Lynn die-cuts underneath the center piece.  On the bottom is a Horizon Coved Rectangle Boutique Stacker Frame and on top of that is a Celtic Oval Boutique Stacker Frames.  I used some Stampendous aged teal embossing powder around the edges of the oval die-cut.
I inked all the flowers and leaves with Oxide Ink to get that soft faded look.  For the blue flowers and leaves, I used an ink color that was similar to the color of the cardstock.  For the orangish flowers, I started with yellow cardstock and applied both fossilized amber and spiced marmalade inks, again only lightly misting.  The orange flowers are made with the Sweet Williams Dies and the blue, with the Floral Bouquet Kit 8 Piece Die Set.

I used Flourish #14 2 Piece Die Set and Flourish #4 Die  to diecut the leaves and greenery.  

This large flower was made with the Stacker Flower 5 Die  and I used the  Small- Heart Lollipop Fringe Cutie Die to make the flower's center.  I painted and ink a tiny canvas and mounted it and the flower onto the tag.

Instead of a traditional bow at the top, I opted to use a piece that I molded using air dry clay and a Baroque mold.  After it dried, I applied Alchemy Metallique aged brass wax as a coloring agent.  The small piece at the bottom near the largest flower was made the same way.

Cheery Lynn Designs dies used:


Other Supplies:
Tim Holtz Etcetera medium tag
Distress Oxide Ink
Prima Art Alchemy Metallique Aged Brass Wax
Prima IOD Baroque 3 mold
Air Dry Clay
Stampendous Aged Teal embossing enamel
Yellow, green, blue cardstock
3" square canvas
Prima Art Alchemy Opal Magic Violet Gold acrylic paint

Thanks for joining me on the Cheery Lynn blog today!
Maggi Harding

Tuesday, January 10, 2017

Time to Start Thinking about Valentines!

3:30 AM 3 Comments
What could be prettier than a tag all dressed in roses?  I've layered up Graphic 45's Mon Amour papers to create a gorgeous romantic tag.

I use so many layers that sometimes they're hard to see!  Starting at the bottom is the tag base layer, the one with the tiny pink roses on it.  On top of that I add a black print diecut using Horizon Coved Rectangle Boutique Stacker Frames Die.  Next is a pink print layer just peeking out around the corners cut with  the A2 Frames Rectangular Scalloped 7 Piece Die Set .  On top of that is a floral layer cut with Pierced Stacker 3 6 Piece Die Set - XL21, topped with an oval cut using the Mirror Mirror Doily Frame 3 Piece Die Set.

Then I added that pretty sentiment tag.  I ruffled that up and put a double layer of foam tape on the back to pop it up in the center and curled opposing corner edges.  Next I made two sizes of roses using the Large Rose 7 Piece Die Set  and the  Medium- Rose 7 Piece Die Set.  I embellished those with pretty flourishes using the Flourish #11 Die  and leaves from the Floral Bouquet Kit 8 Piece Die Set.  Top it off with a pretty tied bow and you've got a sweet romantic tag to put with a nice gift of chocolate or champagne.  Whatever your sweetie loves!

Cheery Lynn Designs Supplies List:

Thanks for visiting us today!


Monday, December 19, 2016

Maggi with a Christmas Layout!

3:30 AM 0 Comments
My furbabies are my favorite subjects for layouts and this one is of my sweet Tisha when she was still a puppy at 6 months old.  I used Graphic 45's St Nicholas papers to create layers and layers.

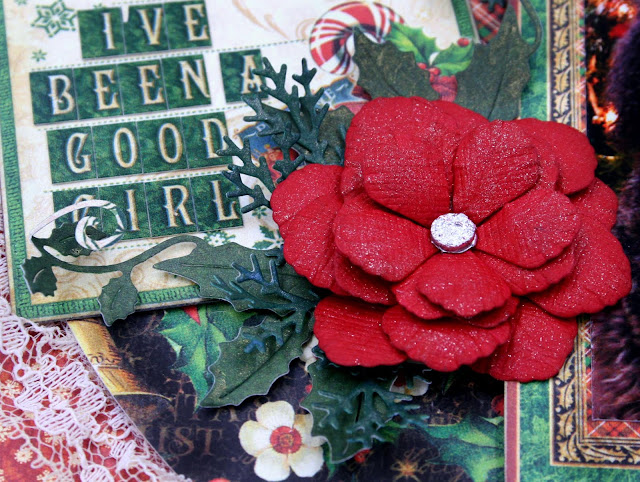
I love using diecuts for layers, and behind my photo I've used Celtic Oval Boutique Stacker Frames Die  and behind that, Horizon Coved Rectangle Boutique Stacker Frames Die.  One of my favorite dies this Christmas creating season has been the Holly Corner Die - B184.  I've used it under my flowers and around my photo.  

I made 3 different flowers for my layout.  This one is made with the Black Eyed Susan Strip 5 Piece Die Set - B338.  That's a great die because you cut 4 flower layers all at once.  Then give them a little dimension by shaping the paper, then stack the layers and you have a pretty dimensional flower.


This flower is made with Judy's Blooms Die - C184.   This set comes with two different sized blooms and I used both to layer up this flower.  The sparkle was achieved with a silver Wink of Stella pen.  I also like to add a little color to my leaves and I often use Lindy's mists for that purpose.  I use the dabber caps on my mists and just dab on a bit of color.

 I used the Wreath Strip 7 Piece Die Set - B216 to add some pine boughs to my clusters. I just tucked the wreath pieces, that I colored with Lindy's Frosty Forest Green, around the flowers.

One more flower to share with you today!  These I made with the Sweet Williams Die Set - D137.  This set also comes with two sizes of blooms and I used both sizes.  I put two large blooms on the bottom and then two of the smaller on top.  I shaped these simple by inserting a petal in my tweezers and giving it a twist.  That's a fast and simple way to give flowers some dimension.  The shine on these blooms comes from a red Wink of Stella pen.

Cheery Lynn Designs Dies Used:

Thanks for stopping by the Cheery Lynn Designs blog today!  We appreciate your visit.

Wishing you the very best this holiday season,
Maggi


Saturday, November 19, 2016

Shaking It Up with Maggi

3:30 AM 0 Comments

Have you seen the fabulous new shaker card kits from Cheery Lynn Designs?  I've used the Champagne Bottle Shaker Card Kit to make this tag.  The kit comes with everything you need to make a shaker:  dies, foam, acetate, and even some cool shakers!  Even better, you can buy the individual pieces separately.

Here's a closeup of the shaker which I filled with hearts and congrats shakers from Cherry Lynn.  I also added some bling pieces for fun.  

When I make tags I like to layer them up and use foam or cardboard to pop them up.  On this tag I used a base paper cut from Prima's Romance Novel on the tag, then from the bottom up, I layered the Priscilla Doily, the middle size Horizon Coved Rectangle, and the Mirror Mirror Doily Frame.  I topped that with the champagne bottle shaker and added a pretty bow. Presto!  You've got a fun tag to accompany a wedding gift.  You could put different shakers inside and this would be a great tag for a New Year's Eve bash hostess gift.  The Champagne Bottle Shaker kit comes with champagne bottle and glass shakers.


I appreciate you stopping by today, thanks so much!
Maggi Harding

Wednesday, November 9, 2016

Begin Each Day with a Grateful Heart Tag with Maggi Harding

3:30 AM 4 Comments
Happy fall ya'll!  Yep I'm a southern gal and ya'll is a real word in my vacabulary!  I've used some pretty fall colors to make a grateful tag using some great Cheery Lynn Designs dies and Authentique's Harvest Collection.
I love the Julie Nutting doll stamps and I've used Valentina here to pass on some sage advice.  She is popped up with foam tape and placed over several layers of color.

I started my tag with a dark brown base.  Then I layered on a Celtic Boutique Stacker Frame in a bright orange shade.  Next came a Horizon Coved Rectangle Boutique  Frame in  fall colors print.

Valentina is standing in the pumpkin patch!  I used the Fall Pumpkin Patch die and popped it way up with several thicknesses of foam tape.

I made a couple fall flowers for my tag using the 3D Daisy Flower Die.  These are easy to make, just diecut and roll them up.  A little tip, they are alot easier to roll if you use a quilling tool.  Then I sprayed them with a little Lindy's Starburst Mist to deepen the color and add some sparkle.

To finish my tag off, I diecut some Fall Leaves and tucked here and there on the tag.  That's it; now I have a pretty tag that I can use with a hostess gift.  Wouldn't it be pretty tied to a nice bottle of wine for a friend?

Cheery Lynn Dies Used:


Thanks for visiting today.  Be sure and stop by the Cheery Lynn Designs store and see all their great products.  They've just come out with a line of shaker card kits, do check those out, they are awesome!

Saturday, September 3, 2016

A girly layout with Maggi Harding, guest designer for September

3:30 AM 1 Comments
Hi there Cheery Lynn fans, I am Maggi Harding from Scrap, Travel & Bark, and I am so thrilled to be here as the September guest designer.  What an honor for me!  Wow, do I ever love the Cheery Lynn dies, they are so fabulous.  I love how the paper so easily releases from the dies and that you can cut through two layers of cardstock with the dies.  I am a layouts and tags kinda gal with the occasional off the page project and card thrown into the mix, so today I want to share a layout with you that also goes along with the September 1 challenge theme to use lace.  I love using lace and ribbons on my layouts so I used a pretty heart lace all around my photo.

I used the Victorian Romance Flourish in each of the 4 corners to set the base for my floral clusters.  Then I added Flourish # 7 -CAFLRS7.  To make those flourishes extra pretty, I inked them around the edges.  Inking creates depth and I love layers, depth and dimension.

I have to have layers under my photos so I used the Horizon Coved Rectangle Boutique Stacker - DL 251 to cut a large and medium mat for my photo.

I am totally a flowers kinda gal and I am totally crazy about the Cheery Lynn flower dies!  I used the Black Eyed Susan Strip die B338 to create the pointed petal flowers and the Floral Bouquet Kit B777.  

 I especially love the black eyed susan center, it's so easy to make and looks so fabulous!  I inked the edges of my flowers, shaped the petals with a large ball stylus and they layered them up.

Now flowers need some leaves around them to make them look realistic so I diecut leaves and berries with the Floral Bouquet Kit (B777).  That kit is so versatile because you get two sizes of flowers plus pretty stems, leaves, and berries!  I also added some Lindy's mist to the petals so that the color would be mottled and more realistic.

For these flowers, I used both the small and large flower in the Floral Bouquet Kit (B777).  The center is made up of 3 small flowers.  To make the small flower and the center of the large flower, I just pinched the petals together and gave them a nice scrunch.


Cheery Lynn Dies Used:


Thanks for visiting Cheery Lynn today and especially for viewing my blog post.  I'll be back next week with another project for you.  I am so loving this gig, these dies are the best!!

Monday, August 8, 2016

Hello card by Eva Dobilas

3:30 AM 3 Comments

Hi there, this is Eva.  Today I am sharing a card that is nature inspired.  I also did a little bit of watercoloring.

To start my card I created a card base out of light blue card stock.  Next I die cut the largest Horizon Coved Rectangle Boutique Stacker Frames Die out of watercolor card stock and painted it.  Next die cut Fancy Pots 3 Piece Die Set Leafy Flourish 2 Piece Die SetFeathered Friends 4 Piece Die Set and Sweet Christine 6 Piece Die Set out of watercolor card stock and I painted them all in with water colors.  Next I die cut the Bird Nest out of kraft card stock and built my pottery scene.  

As a final touch I die cut the Hello sentiment and added it to my card.


Hope you like this card and here is the list of dies I used to create it:


Thanks for stopping by and hope to see your cards in this weeks' challenge!

Hugs,
Eva

Thursday, December 31, 2015

Dream with Jenny Alia

3:30 AM 0 Comments

Hi, it's Jenny here today.  Since the challenge is Anything Goes this week I thought I'd try something a little different and dust off my mixed media supplies.  I began with a piece of patterned card stock that I colored with distress ink.  I brushed a little shimmery embossing paste over the top in the upper left corner.  I then ripped a piece of card stock that had been cut with the Lattice #3 die.  I added crackle paint to the top of the lattice die cut and glued it down to the main card layer.  


The Chandelier die was colored with distress ink and embossed with gold and bronze chunky embossing powders.  I also sprayed some white dimensional spray in spots.  The Pierced Banner was cut from another piece of patterned card stock and a gold cord was threaded through the holes and tied in a bow.  Dream is from the Dream Big phrase set and the Sweet Christine flowers were cut with white and colored with pink ink.  I scrunched the flower petals to get an aged look and added rimmed pearls to the center. 


Last I cut a pink card with the  Horizon Coved Rectangle Boutique Stacker die to back it with.  I didn't have the matching coved rectangle die to layer, so I flipped the die over and traced the corner curve on the main card layer before cutting the corners with scissors.  


Cheery Lynn Dies

Thanks for visiting today and Happy New Year!  Make sure to join in this week's Anything Goes challenge, there's still time.

Saturday, August 22, 2015

Frosty The Snowman by Julie Lavalette

3:30 AM 2 Comments

Hi Cheery Lynn friends, it's JULIE here today. This week I am sharing with you a vintage styled Christmas card using one of our latest released Snowflake dies which comes in a set of 2.


I started by cutting out my Snowflakes in white cardstock and then sprayed Adhesive on to them and added extra fine Glitter. This way you get a lovely smooth finish that doesn't show any lumps of glue. I cut them in half and added to the corners of my first layer.


My Snowman I added Snowtex on to his body and an accent on to his hat and whilst still wet I poured some extra fine glitter over them. The embellishments were coloured with Copics and a little Distress ink at the edges for definition to the Snowman's body.


My Snowflower was glittered in the same way, layering twice and adding a Gumdrop. My Pine Branches were coloured with  Copics and Glitter added for an extra frosty look.


Merry Christmas was heat embossed with Red Tinsel Embossing Powder.

Cheery Lynn Dies Used:

Thanks for stopping by today and Good Luck to everyone entering our Weekly Challenge.

Julie x

Saturday, March 28, 2015

Tea Party by Julie Lavalette

3:30 AM 3 Comments

Hi Everyone, It's Julie here today hosting the blog. When I was a little girl I loved having Tea Parties with my pet cat - Lucky, who would sit quite happily watching me. This inspired me to make this card to share with you all today.


Notice how I have mounted my corner die cuts behind my card layer to give a different look and softened the edges of my paper with Ink for a Vintage look.


My layers now together mounted onto my card which measures roughly 6.5 x 5.


My centre image was stamped in Black Archival ink and heat embossed with clear ink. I added Distress ink to age and shade my paper, placing onto the Alpine Flourish Doily with a little Silicone Glue to raise my topper slightly.


My cute little cats were also placed on with Silicone Glue. Aren't they adorable !

Cheery Lynn Dies Used :


Thanks for stopping by today to see my post and good luck to everyone entering our Weekly Challenge.


Julie xx

Thursday, March 5, 2015

Springtime Mix of Layered Doilies

3:30 AM 5 Comments
Greetings and happy Thursday to you!  It's Rhonda here today to host the blog for you.

I have a creation today inspired by our current challenge theme of Doilies. The color scheme here is a nod toward Spring. I've also featured one of our pretty flower dies, the Black Eyed Susan Strip.

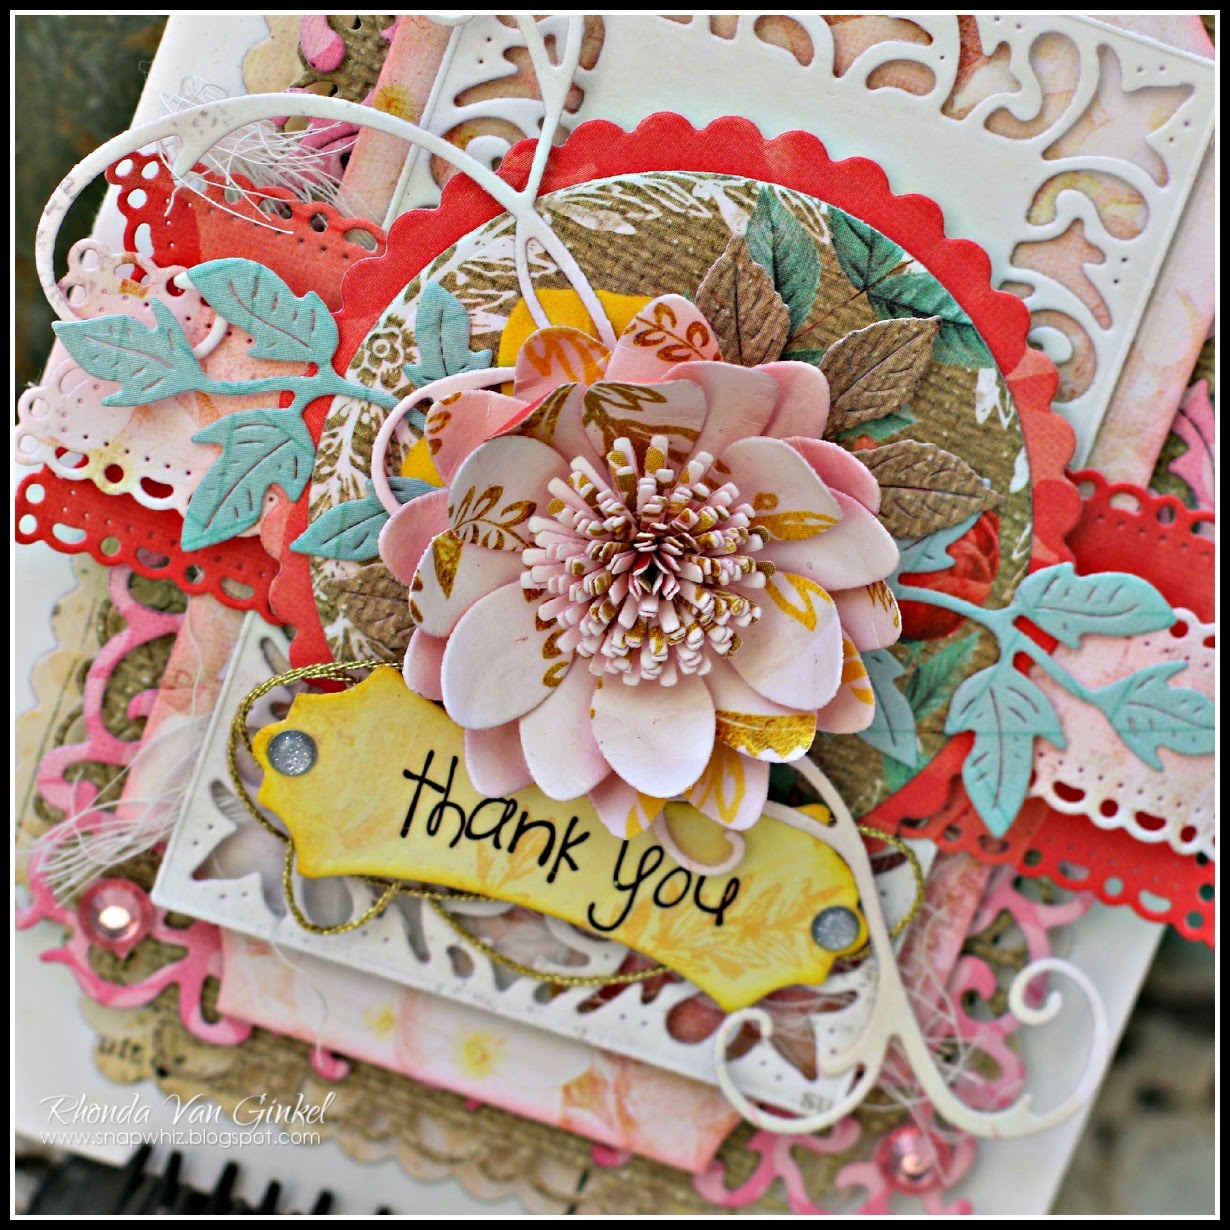
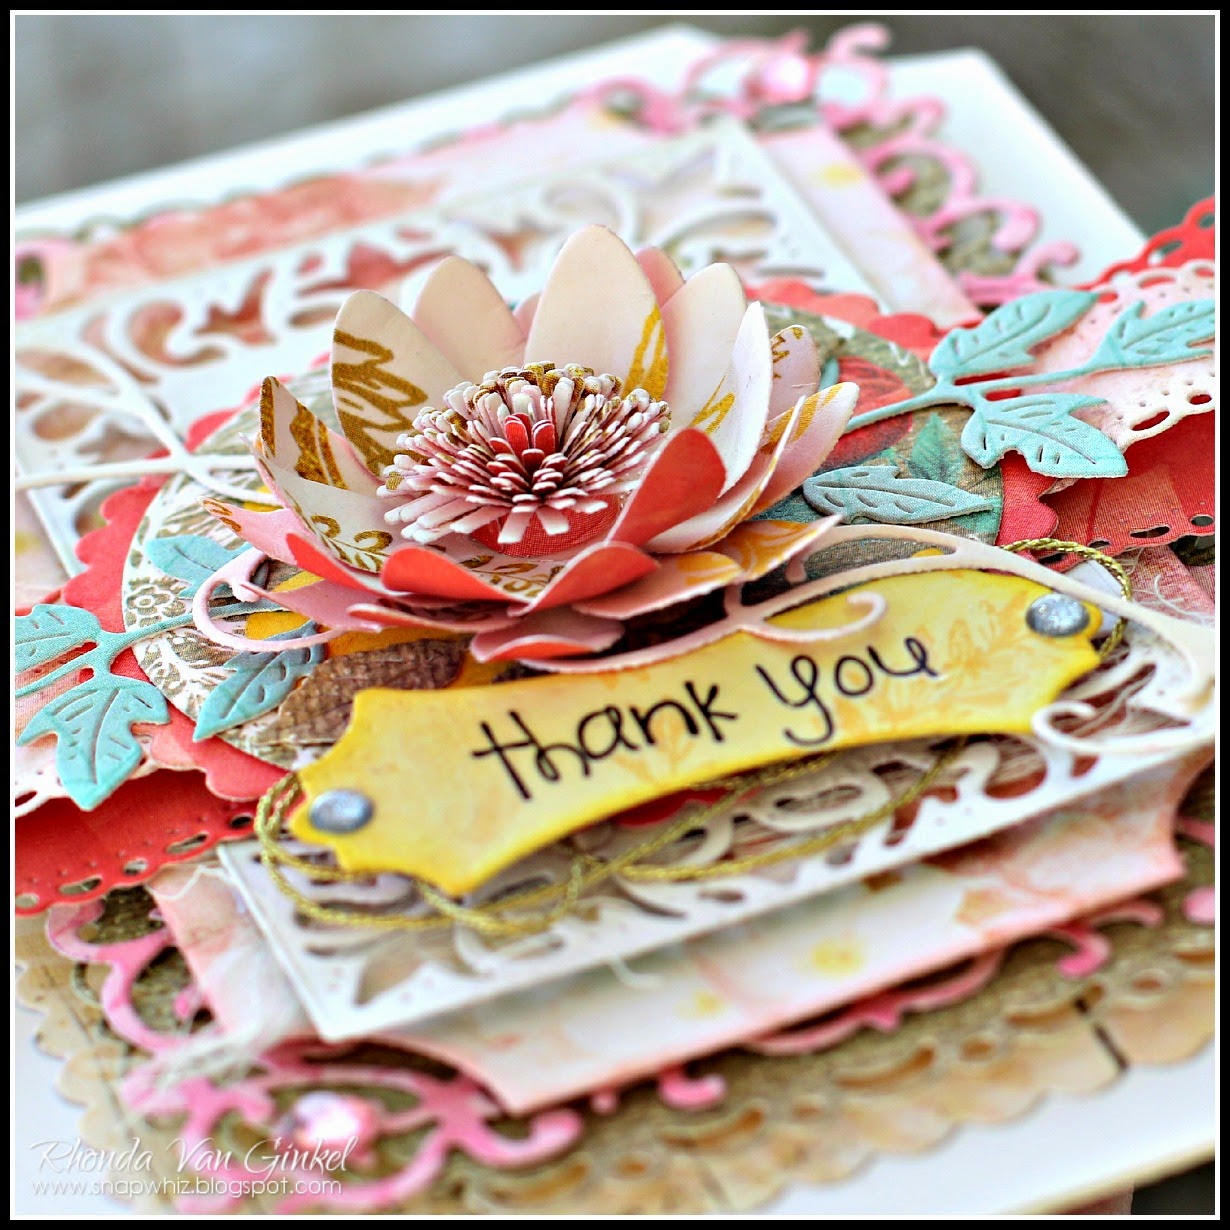
"Thank You"
Coved Rectangle Card for Cheery Lynn Designs by Rhonda Van Ginkel

The base of my card was created using the Coved Rectangle Silver Stacker on the fold of my paper. By placing the fold of my paper just inside of the die, it created my base card shape.

Coved Rectangle Card for Cheery Lynn Designs by Rhonda Van Ginkel

The next layers are the Coved Rectangle Scalloped - LG in a woodgrain paper, followed by the Horizon Boutique Coved Rectangle which is attached with foam dimensional. On top of that, I placed the Alpine Flourish Doily in pink followed by the Coved Rectangle Classic which was also attached with foam dimensionals.

The next layer is cut from the Card Maker Rectangle Classic, with the Dutch Daisy Boutique Stacker cut from the interior. On top of this you find the two layers of Horizon Fishtail Banners nested under the Scalloped Circle and Circle Classic dies.

Coved Rectangle Card for Cheery Lynn Designs by Rhonda Van Ginkel

The flower here is the Black Eyed Susan Strip and for the leaves, I chose the Flourish Leaf Strip as well as a few leaves from the Tea Rose Medium. The Sentiment Frame #1 and Add A Flourish along with a few gems completed the card. I adhered a bit of gold string under the sentiment as well.

Cheery Lynn Designs Dies Used:
Coved Rectangle Classic - Silver Stackers - L-10
Horizon Coved Rectangle Boutique Stacker Frames - DL251
Dutch Daisy Boutique Stacker A2 Frame (set of 4) - DL293

Please be sure to join us this week for our challenge - "Doilies"!  You could win a $20 gift certificate just for playing along!!!

Thanks so much for stopping on over for a visit today.

Copyright Statement


All content, including designs, pictures and words are the exclusive property of the author of each blog post. Information shared here is for inspiration only and may not be copied for publication, competition or profit. Thank you for your cooperation.

SOCIAL MEDIA 2


Follow Us @jointhemakersmovement


All content, including designs, pictures and words are the exclusive property of the author of each blog post.
Information shared here is for inspiration only and may not be copied for publication, competition or profit. Thank you for your cooperation.