Showing posts with label Coved Rectangle. Show all posts

Saturday, February 24, 2018

Say it with Flowers by Julie Lavalette

3:30 AM 4 Comments

Hi Cheery Lynn Fans, it’s JULIE here today and I am sharing some more inspiration using another of our beautiful Mega Doilies on my card that measures approximately 8 x 8 inches square.


The Italian Flourish Doily comes in 3 sizes and on this card I have used 2 of them on my layers. Both were cut out in white cardstock and some Distress ink added to the edges. I like to not put glue on the edges of my Doilies, only adding some to the centre. I find this helps to put a little movement into the design and softens the look.


My Daisies have 4 layers on them with a little Distress ink and a Pearl added into the centres.  You will notice that two of the layers of petals are folding down the way and two folding up the way, this helps give stability to the flowers.


Happy Birthday was stamped with Archival ink and mounted onto a little cheesecloth and foam strips for extra dimension.


Finishing off with Pearl Strands, Accents of Pearls on my flourishes and a pretty double layered Butterfly.

Cheery Lynn Dies Used -
DL251 Horizon Coved Boutique Stacker Frames  

Thanks so much for stopping by today.

Crafty Hugs, 
Julie x

Sunday, February 11, 2018

Love and Cherub by Julie Lavalette

3:30 AM 2 Comments

Hi Cheery Lynn Fans, it’s Julie here and today I am sharing some inspiration using one of our fabulous Mega Doilies. These Dies are fantastic for scrapbooking with but look equally as good using as accents on cards for a WOW factor and cut beautifully. 


My card today measures approximately 8 x 6 inches and the border strip on my card is just over 2 inches. I mounted the same colour of cardstock to the inside and on my border strip which gives contrast and helps my Doily pop.


I cut into my paper using my heart Die. You can also use the heart border edge die to cut it out of the paper should you wish.


My flowers were shaped on my Embossing mat and shaded with Distress ink. I used small Pom Pom balls in the centres of my flowers which I coloured with Alcohol Ink to get my desired shade.


My sentiment was stamped onto my diecut adding a cherub which I made from a mould and paper clay. 


Finishing off my card with lots of Pearl Accents.

Cheery Lynn Dies Used -

Thanks so much for stopping by today.

Happy Crafting, 
Julie x
Thursday, November 17, 2016

Cardinal Christmas Greeting Card by Ginny

3:00 AM 0 Comments
Hey there peeps! Time again for me to share a project I created with the fabulous dies from Cheery Lynn!  I've got a pretty winter bird tag image with natural fibers, poinsettias and leaves and a perfect sentiment to bring a little joy to the holiday.  This card is 5 x 6 1/2 inches so there's lots of room to layer up the paper patterns.
I cut the poinsettias, gave them a little inking, stamped some text, shaped and added glitter and "snow" for a proper frosty look. Tucking in a little seam binding helps to fill in the arrangement and anchor the corner.
Adding the sentiment over one of the flowers helps add depth. More flourishes and another smaller bloom balance the card without hiding the focal image.
~Cheery Lynn Designs Dies~
Okay that's all for me. Wishing you all a happy and productive day with lots of time to be creative : ) G
  

Saturday, August 22, 2015

Frosty The Snowman by Julie Lavalette

3:30 AM 2 Comments

Hi Cheery Lynn friends, it's JULIE here today. This week I am sharing with you a vintage styled Christmas card using one of our latest released Snowflake dies which comes in a set of 2.


I started by cutting out my Snowflakes in white cardstock and then sprayed Adhesive on to them and added extra fine Glitter. This way you get a lovely smooth finish that doesn't show any lumps of glue. I cut them in half and added to the corners of my first layer.


My Snowman I added Snowtex on to his body and an accent on to his hat and whilst still wet I poured some extra fine glitter over them. The embellishments were coloured with Copics and a little Distress ink at the edges for definition to the Snowman's body.


My Snowflower was glittered in the same way, layering twice and adding a Gumdrop. My Pine Branches were coloured with  Copics and Glitter added for an extra frosty look.


Merry Christmas was heat embossed with Red Tinsel Embossing Powder.

Cheery Lynn Dies Used:

Thanks for stopping by today and Good Luck to everyone entering our Weekly Challenge.

Julie x

Friday, June 12, 2015

Hello from Afar Card by Corina Finley

3:30 AM 4 Comments

Hello and thank you for joining me, Corina, on this wonderful Friday!

As summer vacation is fast approaching, I decided to create a travel themed card. I used travel themed pattern paper along with Cheery Lynn Dies for a vintage look. Postcards, ticket stubs, maps and pictures, on a card base cut from the Coved Rectangle stacker die, tie this card altogether.


Above I used the Pierced Stacker #4 to cut the map and picture pattern paper. I used the largest Hello from the Hello (Set of 2) as my sentiment. I outlined the die cut with a black pen to give depth and used a glitter pen on the kraft cardstock for shimmer. 

Below you will see an up close picture of one Ticket from the Pair of Tickets die set. I used the Old Parchment embossing plate to add texture to the ticket and the small post card behind. You can also see that I have incorporated two of the Curved Border dies along the left side. 


Dies used:
I hope you will play along in our weekly Cheery Lynn Designs Challenge 188 - Creative Corners. You could win a $20 shopping spree at the online Cheery Lynn Design Store.

Thanks for joining me today!

Take care,
Live, Laugh & Create

Saturday, March 28, 2015

Tea Party by Julie Lavalette

3:30 AM 3 Comments

Hi Everyone, It's Julie here today hosting the blog. When I was a little girl I loved having Tea Parties with my pet cat - Lucky, who would sit quite happily watching me. This inspired me to make this card to share with you all today.


Notice how I have mounted my corner die cuts behind my card layer to give a different look and softened the edges of my paper with Ink for a Vintage look.


My layers now together mounted onto my card which measures roughly 6.5 x 5.


My centre image was stamped in Black Archival ink and heat embossed with clear ink. I added Distress ink to age and shade my paper, placing onto the Alpine Flourish Doily with a little Silicone Glue to raise my topper slightly.


My cute little cats were also placed on with Silicone Glue. Aren't they adorable !

Cheery Lynn Dies Used :


Thanks for stopping by today to see my post and good luck to everyone entering our Weekly Challenge.


Julie xx

Thursday, March 19, 2015

Nature Themed Dies with Rhonda

3:30 AM 7 Comments
Greetings and happy Thursday to you! It's Rhonda here today to host the blog for you.

For today's project I mixed a few of our nature themed dies (Happy Halloween Twiggy Wreath, Cattails and Reeds and Quill and Ink Pot) together with our pretty Lilith Edger and Dutch Daisy boutique stacker frames to mix things up a little bit. I think it takes on a soft and romantic feel.


I started with a base white A2 cardstock background, then added the Dutch Daisy Boutique Stacker Frame to it. Next, I cut a Cardmaker's Rectangle Scalloped, then used the Lilith Doily Edger on one side. Next, I cut the Happy Halloween Twiggy Wreath and the Horizon Fishtail Banners.


The medium Horizon Fishtail Banner is a bit long for the card, so I cut a little bit from the middle and adhered behind my pink Scalloped Rectangle and Edger cut layer. I cut the Coved Rectangle and adhered behind the pink Scalloped Rectangle. 


I used the Quills and tucked them under the banners, then the Princess Tree was layered as well and tacked down with the flowers arranged on top.  Here you can see the dimension of the Sweet Williams and Darling Daisies. The Tiny Fanciful Flourishes are tucked in under either side of the flowers.

Cheery Lynn Designs Dies Used:
Quill and Ink Pot - B369
Cattails and Reeds - B389
Princess Tree - B180
Happy Halloween Twiggy Wreath - B469 
Darling Daisies - A196
Ivy Strip - B304 
Horizon Fishtail Banners - DL278
Dutch Daisy Boutique Stacker A2 Frame - DL293
Tags 4 - B263
Sweet Williams Strip - B307
Tiny Fanciful Flourish - B387 
Coved Rectangle Classic Stacker - XL-10 
Lilith Doily Edger - B404
Card Maker Rectangle Scalloped - CM2 

Please join us this week for our new challenge, Celebrate! You can win a gift certificate to the online Cheery Lynn Designs store just for playing along!

Thanks so much for stopping on over to the blog today, have a super week!
~ Rhonda

Thursday, March 5, 2015

Springtime Mix of Layered Doilies

3:30 AM 5 Comments
Greetings and happy Thursday to you!  It's Rhonda here today to host the blog for you.

I have a creation today inspired by our current challenge theme of Doilies. The color scheme here is a nod toward Spring. I've also featured one of our pretty flower dies, the Black Eyed Susan Strip.

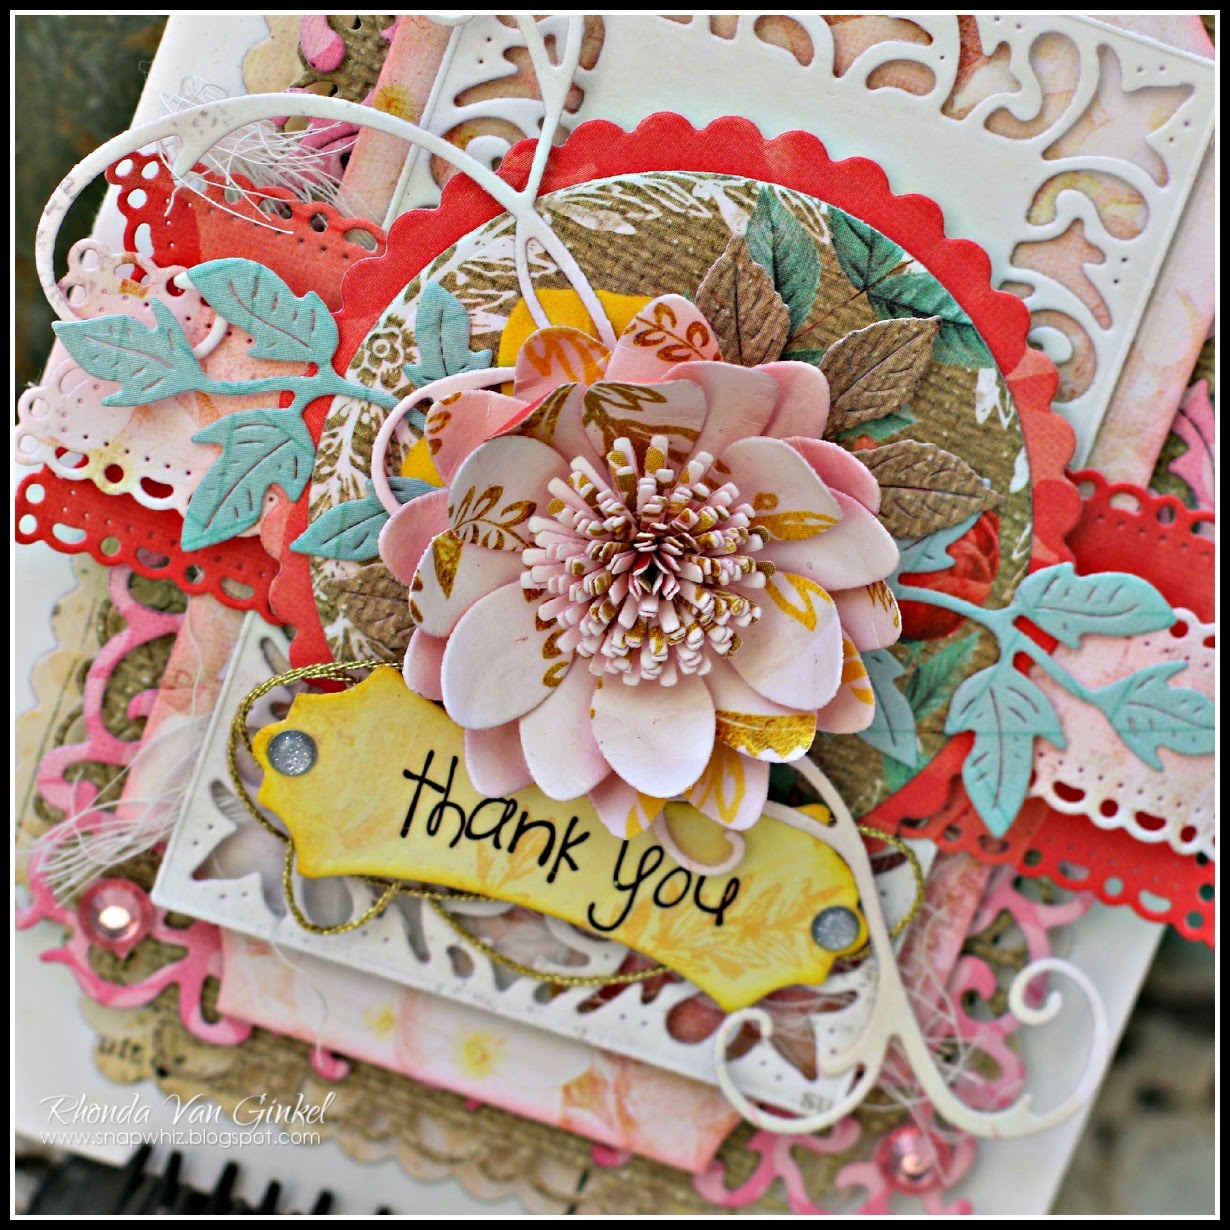
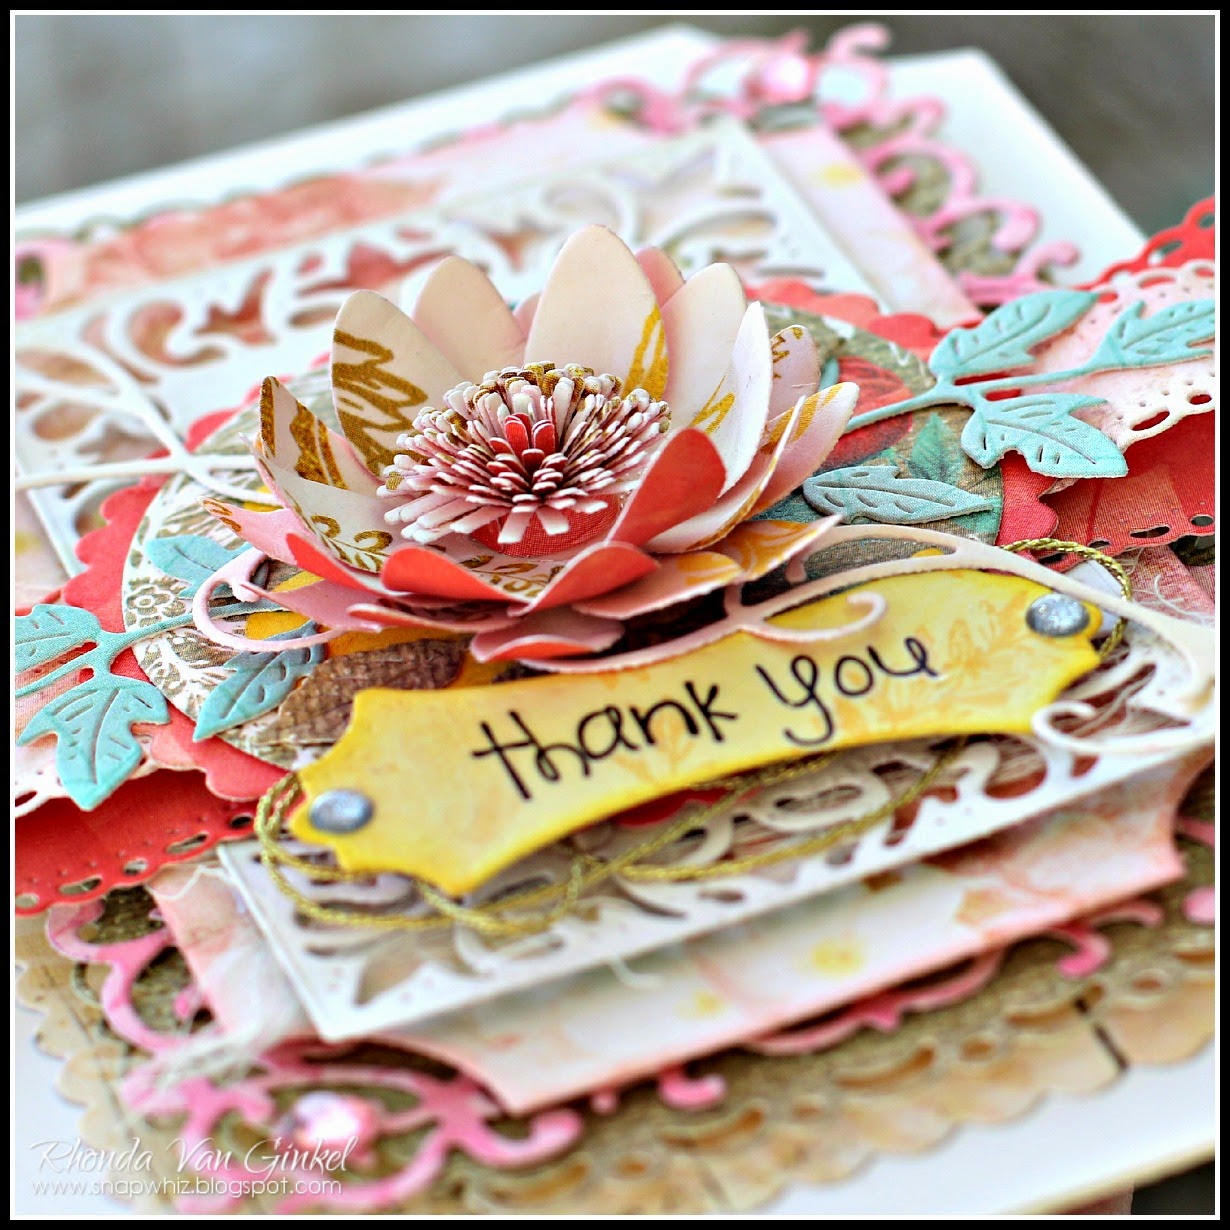
"Thank You"
Coved Rectangle Card for Cheery Lynn Designs by Rhonda Van Ginkel

The base of my card was created using the Coved Rectangle Silver Stacker on the fold of my paper. By placing the fold of my paper just inside of the die, it created my base card shape.

Coved Rectangle Card for Cheery Lynn Designs by Rhonda Van Ginkel

The next layers are the Coved Rectangle Scalloped - LG in a woodgrain paper, followed by the Horizon Boutique Coved Rectangle which is attached with foam dimensional. On top of that, I placed the Alpine Flourish Doily in pink followed by the Coved Rectangle Classic which was also attached with foam dimensionals.

The next layer is cut from the Card Maker Rectangle Classic, with the Dutch Daisy Boutique Stacker cut from the interior. On top of this you find the two layers of Horizon Fishtail Banners nested under the Scalloped Circle and Circle Classic dies.

Coved Rectangle Card for Cheery Lynn Designs by Rhonda Van Ginkel

The flower here is the Black Eyed Susan Strip and for the leaves, I chose the Flourish Leaf Strip as well as a few leaves from the Tea Rose Medium. The Sentiment Frame #1 and Add A Flourish along with a few gems completed the card. I adhered a bit of gold string under the sentiment as well.

Cheery Lynn Designs Dies Used:
Coved Rectangle Classic - Silver Stackers - L-10
Horizon Coved Rectangle Boutique Stacker Frames - DL251
Dutch Daisy Boutique Stacker A2 Frame (set of 4) - DL293

Please be sure to join us this week for our challenge - "Doilies"!  You could win a $20 gift certificate just for playing along!!!

Thanks so much for stopping on over for a visit today.

Friday, February 27, 2015

Happy Thoughts Card by Corina Finley

3:30 AM 4 Comments

Hello....Happy thoughts coming your way....from me to you!

Corina here with you today, to share my Spring inspired card!

The vibrant floral pattern paper, sentiment word paper and white cardstock was the starting point. I die cut these papers with the French Flair Stacker die set.

I then added the Polynesian Sails Oval Doily on top of the French Flair Stacker. I stamped my sentiment on a white Coved Rectangle Stacker die cut and matted it on a Scalloped Coved Rectangle Stacker die cut. I then placed it in the center but slipped it under the left side of the Polynesian Sails Oval Doily.


I cut the Mega Fanciful Flourish from white cardstock and inked with Evergreen Bough Distress ink and sprayed with Goosebumps clear texture spray. I created two Chrysanthemum Strip flowers and used Spun Sugar Distress ink on one and worn lipstick ink on the other.

My new favourite "filler" flower is the dandelions die. I tuck a few here and there as a "Baby's Breath" style of flower.

I could not resist adding beading to the inner circle of the Polynesian Sails Oval Doily. I thing that this touch adds elegance to the card.


Dies used:

Dandelions (Set of 2) - B453


I hope you will play along in our weekly Cheery Lynn Designs Challenge 173 - Anything GoesYou could win a $20 shopping spree at the online Cheery Lynn Design Store.

Thanks for joining me today!

Take care,

Corina Finley
Live, Laugh & Create

Friday, February 13, 2015

Love Card with Corina Finley

3:30 AM 2 Comments

Happy Early Valentines!

Corina here with you today and I have a Valentines Card to share.

I created this card a little differently then I normally do. The majority of the time I create a card with a technique in mind, that I want to try and play with. For this card the Lattice Heart & Vines die cut was my starting point:


I then went into my container of previously cut die cuts and pulled out other Valentines themed items. I had a lot of small hearts from the negative (part that cuts out) of the Sophia's Heart Doily and also a portion of the Doily. Also a small and x-small Heart Chain Borders.

I chose a Love Stamp for my Sentiment and a 6 x 6 pattern paper pad.

Created the base using a medium grey cardstock. Matted with a light grey cardstock and then pattern paper next. I adhered my border with the Heart Chain border across it.  


I cut a Coved Rectangle from pattern paper and the matching Scalloped Coved Rectangle from red cardstock. I stamped my Love Sentiment to the bottom portion and used pop dots to secure the matted Coved Rectangle.

I cut the Vines off the Lattice Heart and inked the heart red. I coloured the vines black and added Glossy Accents to them. I used the vines as my foliage under my Sweet William flower with a red enamel rose bead in the center.

Added the tiny heart border and the small hearts to the card and glossy accented each of them.


Dies used:

Lattice Heart & Vines - B368


I hope you will play along in our weekly Cheery Lynn Designs Challenge 171 - Tickled Pink. You could win a $20 shopping spree at the online Cheery Lynn Design Store.

Thanks for joining me today!

Take care,

Corina Finley
Live, Laugh & Create

Friday, September 26, 2014

Copy Cat Card with Corina Finley

3:30 AM 3 Comments

Hello Everyone,

Corina here with you today with a Question!

Do you remember the card below that I posted back on Friday, July 25, 2014? The card was called Christmas in July!


Do you see the similarity between the two cards? The Card "Map" or sketch is the same. A flip of the large flower, another flower instead of the snowflake and created using a different colour palette.


I love how using the same Cheery Lynn Design dies in different colours can create spectacular results! Try doing this with a favourite card of yours!


As you can tell the Fishtail Banners are a favourite of mine! I find them so versatile. I even used pieces from the top of the largest Fishtail banner to tuck under the tears of the pattern paper.


I also mimicked the writing on the pattern paper to my Shasta Daisy flower by stamping on each layer before assembling them. Applied a little ink to the edges and a rhinestone!

So next week I am challenging myself to work with the colour pink.  So make sure to check in next Friday and see what I have come up with!

Dies used:
Shasta Daisy - B310

Sweet Christine - B434

Coved Rectangle - XM-10
Scalloped Coved Rectangle - DL195
Horizon Fishtail Banners (3 Dies) - DL278

Tiny Fanciful Flourish Right & Left (Set of 2) - B387


I hope you will play along in our weekly Challenge 151 - Die Cut FlowersYou could win a $20 shopping spree at the online Cheery Lynn Designs store!

Thanks for joining me today!

Take care,
Corina Finley

Live, Laugh & Create!

Friday, August 15, 2014

Noel Card with Corina Finley

3:30 AM 1 Comments
 
Hello Fellow Cherry Lynn Design Fans!
 
Corina here with you today, to share my Clean & Simple Christmas card using three of the New Releases Die Designs.

 
I know I said 'Clean & Simple' - meaning clean lines and less is more approach! The die cuts play the lead role.  The card has a lot of layering and I embossed the Ornate Ornament, Noel and Dancing Snow Flurries dies all with a clear iridescent embossing powder to make them glitter.
 
I found it difficult not to embellish my card further - I love creating Cheery Lynn flowers and find my projects are not complete without at least one!
 
 
New Release Dies used:
 
Previous Release Dies used:
 
 
I hope you will play along in our weekly Challenge - Fun with Letters. You could win a $20 shopping spree at the online Cheery Lynn Designs store!
 
Thanks for joining me today!
 
Take care,
 
Live, Laugh & Create

Copyright Statement


All content, including designs, pictures and words are the exclusive property of the author of each blog post. Information shared here is for inspiration only and may not be copied for publication, competition or profit. Thank you for your cooperation.

SOCIAL MEDIA 2


Follow Us @jointhemakersmovement


All content, including designs, pictures and words are the exclusive property of the author of each blog post.
Information shared here is for inspiration only and may not be copied for publication, competition or profit. Thank you for your cooperation.