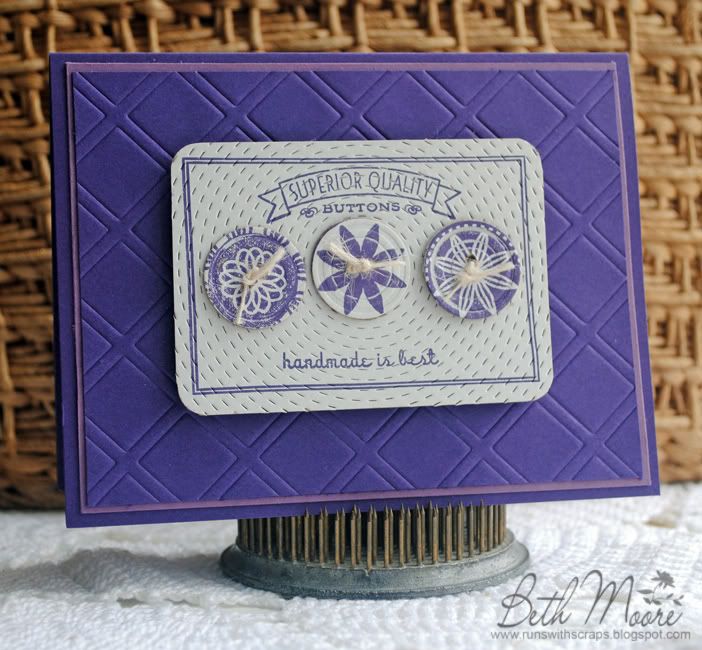
One of the things that I absolutely love about the Lattice2 die that I used to create the background of this card is that you can use it to die cut your paper (by running it through your machine like you would any other die template) like the cards I showed you in this post right here, or you can use it to emboss (by running it through your machine like an embossing plate with your embossing pads) like I've done with this card I am showing you today. Dies like the Lattice2 and Lattice1 from Cheery Lynn Designs give you so much more for your money because they can be used to emboss or cut... imagine the endless design possibilities made easy with just one die! These Lattice dies are also the perfect size to fit the front of an A2 card exactly and I love that, although today, I trimmed the die cut down a bit to layer it under a lighter shade of purple to add a touch more color to this clean and simple card.

I recently got some new stamps that I knew blended perfectly with the beautiful Dimensional Buttons3. To highlight them for this card, I used a pre-cut piece of chipboard (these ATC size pieces of chipboard come white on one side and brown on the other), and cut three of the larger buttons from one of the chipboard cards. Afterwards, I sorted through my supplies to find a few small "round" stamps that would fit the front of each of the buttons and stamped them for added color and interest. I rounded the edges of another piece of the pre-cut chipboard with my Corner Chomper and ran it through my Big Shot with the Large Round Stitcher Plate (that's what creates that gorgeous circle faux stitched look on the white chipboard). I stamped the chipboard piece, tied up the buttons with some twine and then added them to the chipboard. I then adhered the button card to the front of the Lattice2 embossed card front using some Pop Dots for even more dimension.


Beth, I am glad you reminded me that the Lattice can be just embossed. I like the unusual subject of your card. I could see it being done in pink or blue for a baby card also!
ReplyDeleteVery nice, Beth!
ReplyDeleteJust great!!Love the simple and so sofisticate look!
ReplyDeleteGreat job, Beth of demonstrating how to stretch those dies uses! Lovely card, I really like the stitching when combined with the buttons.
ReplyDeleteI am so in love with that stamp set, I went and looked it up on the site! Gorgeous! It took a minute to realize you did not just stick a card of buttons on that! LOVE IT!
ReplyDelete