Showing posts with label Dimensional Butterfly Bundles. Show all posts

Saturday, March 30, 2013

Flowers, 'n Doilies, 'n Butterflies! Oh my!

3:30 AM 10 Comments
It is with great sadness, that Jodi will be leaving this week.  We are hoping to convince her to come back to us in the Fall.  Please leave her some love, letting her know how much you have enjoyed her creations.

Hello! Today’s layout features a few of the stunning doily dies from Cheery Lynn Designs, and well as an assortment of their flower dies. 


Such a sweet array of flower dies to chose from, and so many different flowers can be made from each die! 
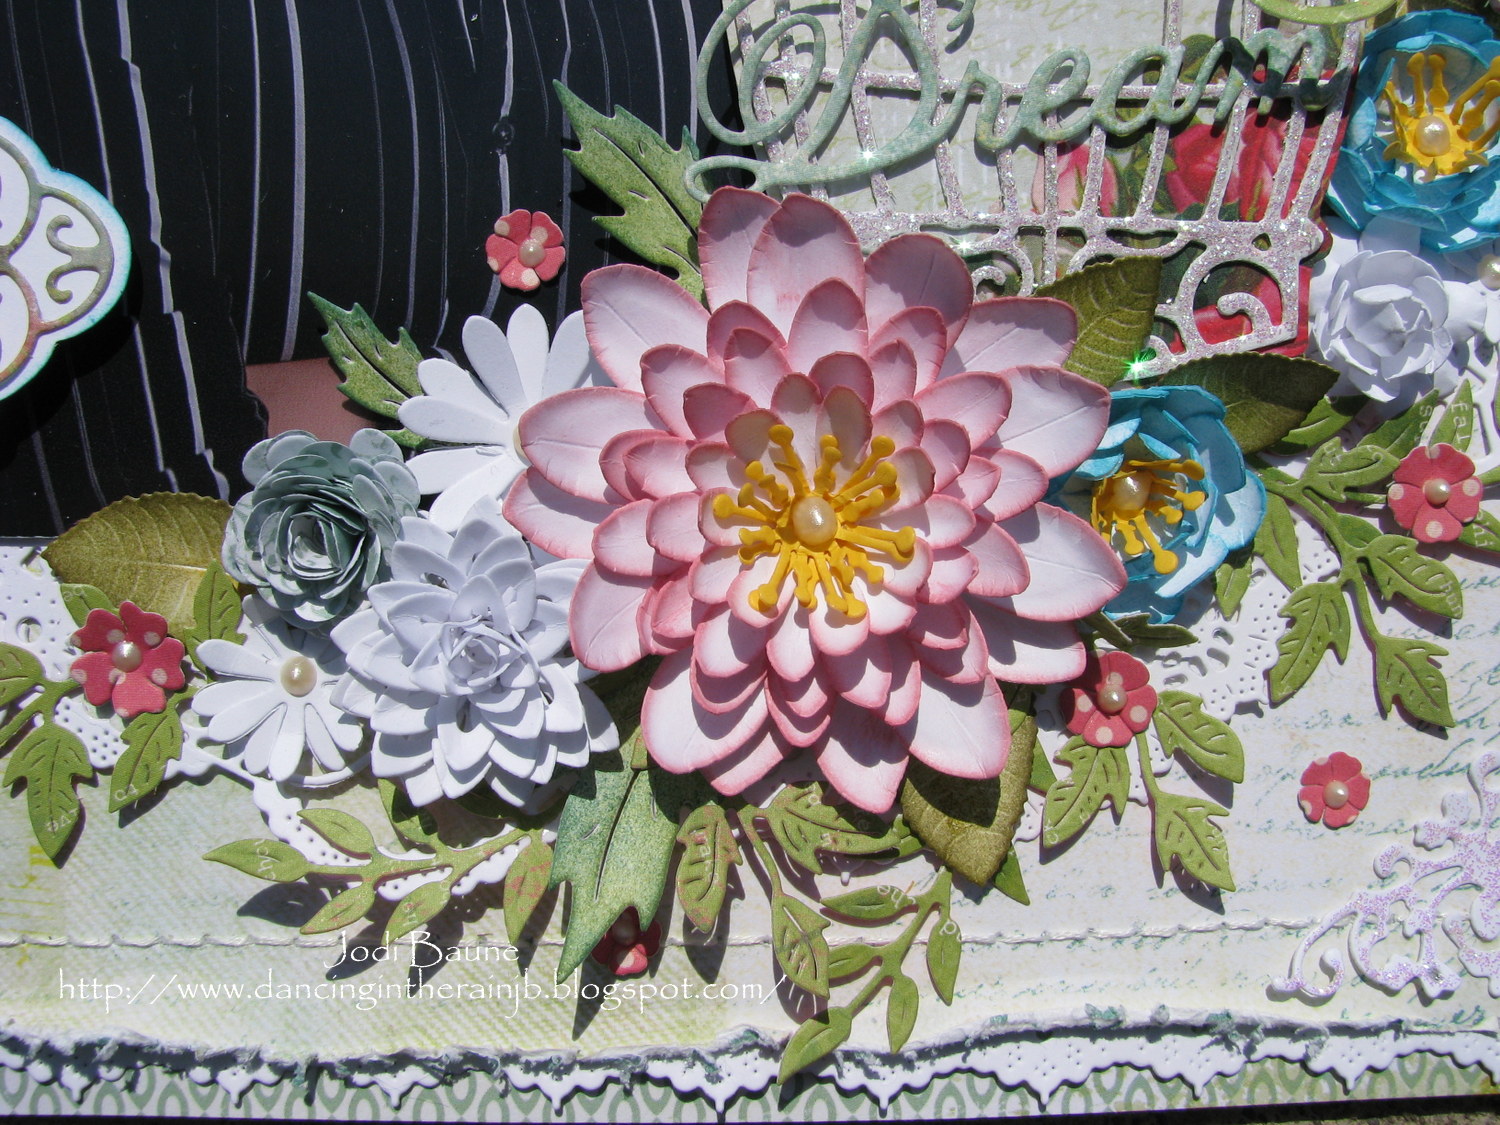

Cheery Lynn puts such exquisite detail in each of their dies… it never ceases to amaze me!! 


Dies used: Sentiment Frame #1

There is still time to enter this weeks challenge for your chance to win the $20 shopping spree! Details Here
Thanks for stopping by!

Saturday, March 23, 2013

Forever Bouquet

3:30 AM 8 Comments
Hello! I’m want to share some fun ideas I had taking my dies “outside the box” this week!
I started by taking one of my favorite dies, the French Lattice Small Frame and cutting it apart to form corners for my layout. I just adore the pattern of this lattice! It’s delicate flair set the tone for my layout. Using the largest of the Mini Pearl Circle Reflections Boutique, I cut a circle for my background. I placed Lace Corner Deco B all around the edge of the circle to give it a lacy edge. The Victorian Garden Doily Frame surrounds my photo, matted with the Scalloped Rectangle Reflections Boutique. Tucked under my photo is Window A, framing my journaling words.
There is still time to enter this weeks challenge for your chance to win the $20 shopping spree! Details Here
Thanks for stopping by!


Saturday, February 9, 2013

Best Wishes

3:30 AM 9 Comments
Hello! Today I have a card featuring some of the new winter dies.
 
The card base is cut using the Scalloped Rectangle Reflections Boutique set. I added texture to the white portion of the background using the Petite Hearts Embossing Plate. I added some trim from the Expandable Tiny Borders plate, and Lady Kate Edger for lace.

 
The flower cluster was created using Build a Flower #3 to create the yellow flower. Cutie Fringe 4 makes the most adorable spiky flowers, shown here in burgundy. The Daisy Strip has three different sizes on one die, making cutting so much quicker! Two different sizes are tucked into the bouquet. Foliage is from Build a Flower #3, Rose Leaf Strip, Stacker Flower #1 Leaf, and Olive Branches. To the bottom right corner is the new Best Wishes Phrase, and a Mini Butterfly fluttering about.
There is still time to enter this weeks challenge for your chance to win the $20 shopping Spree! Details Here
Thanks for stopping by!


Saturday, January 5, 2013

Today & Everyday of the Year

3:30 AM 5 Comments
Hello! I hope you all had a wonderful holiday! Today I have a layout I created for Cheery Lynn Designs using the Main Kit from My Creative Scrapbook!
I want to share with you how I added a bit of life and texture to my fence. First I cut the Victorian Picket Fence.
I added a bit of color by using pouncers and Ranger Distress Inks in Vintage Photo and Pumice Stone.
Next, I added a touch of Ranger Distress Paint in Picket Fence color. The distress inks blend into the paint for a softer look.
After the paint dried, I followed up with a touch of Ranger Distress Paint in Clear Rock Candy for more distressing and texture.
Here is a close up of the result.
Dies used:
Lace Light Deco Border
There is still time to join this week challenge at Cheery Lynn Designs for your chance to win a $20 shopping spree! Details Here
 

Thursday, October 25, 2012

Vintage card + tutorial - Kianel

3:30 AM 12 Comments
Hello dear Cheery lynn designs lovers,
Kianel here today with a vintage card and a tutorial.
Today i am showing you how to create a very elegant frame for any shape of the XL or little stackers that has inverted scallop option.
 The card is about 16x16cm. The base of the card is made using the Mini pearl french flair mega doily, biggest size. The paper i used is white and i then inked it and stamped it.
Using the XL french flair stackers, i cut size 4 in printed paper and placed it on white cardstock to cut a bit larger, for it to fit my Kaleidoscope shape.
I added an elegant frame to decorate my image, using Little scalloped oval stackers and Little inverted scallop oval stackers (see the tutorial right under this project).
 I used the same idea for the expandable tiny borders that i decorated with thread too, having exactly the same design! Mini fanciful flourish, wreath strip, 3 butterflies from the mini dimensional butterflies set.
 I added a sentiment "Love", tiniest one in the top corner.
To build my flower, i used the Cherry blossoms that i inked and stamped with a text. I shaped it using embossing tool and placed a brad in the center. 
I added olive branches on the sides, a mini dimensional butterflies and a sentiment frame #1 for my text.
Dies from Cheery Lynn Designs, inks from Ranger and Colorbox, printed paper from MME, stamps from Cartoscrap / Stampabilities / Hampton Arts, embellishments from a french online store.

Let's now focus on this frame and i am going to show you how to make one easily:

All it takes to do it is  the Little scalloped oval stackers largest size and a smaller Little inverted scallop oval stackers. You can do that with the ovals, but also with the circle and the squares.

 First, cut a scalloped oval.
 Take the die that you will use of the inverted scallop die and mark the "highs" with a pen on the back of the die (don't hesitate to do that on several areas all around the die to make sure you align correctly before cutting (here is just to show you how that looks): that is to be able to put them in line with the "lows" of the scalloped die. Not sure i am making myself clear here but i guess you'll see what i mean on the next step, lol. Put the die in the middle and cut.
So here is what you get, pretty cool isn't it? Don't worry if it's not "perfect", you can hide the "wrong" parts with decorations later on. It takes several attempts to get the perfect one.
To make my frame elegant, i just used some cotton thread and laced it around the cut frame. First time i wind it around like that. (Just attach your thread with a tiny piece of double sided tape for the beginning and then just go through the frame).
And here is what you get after you went through the whole frame another time but in the other direction.
Now you just have to grab your stackers and give it a go as this is really cool!

 Don't forget to join our weekly challenge for a chance to win a 20$ shappoing spree and discover the marvellous projects of the challenge blog DT girls!
Have fun with your dies!
Love from France, Kianel.


Thursday, September 6, 2012

zig zag card - Kianel

3:00 AM 4 Comments
Hi there,
Kianel here with you today to show you another card i made and, yeah, no stamping on that one either! wow! (except for the small texts). I gave it a go to this cool shape (sorry, i absolutely don't remember where i saw it but i've been thinking about trying it for a while now). So this card is all dies.
The card is 20,5cm high and almost 20cm wide and when it's open, it's about 15cm deep.
The cool thing is that you can make it thin again whenever you want!


The base is made out of 2 A4 sized cardstock and decorated with the frills and hearts border.


On the left side, i've placed a Lace corner deco E that i inked in pale pink and a Fanciful flourish. On the back end, i placed the text "Happy birthday" which is the text from the Happy birthday die that i cut apart and took the present away. You can also see there one of the dies from Small exotic butterfly set and a tiny one from Mini dimensional butterflies with angel wings.


On the right side, i placed the same fanciful flourish and lace corner deco E. But this time, on back end, i made a sort of "collage" using several dies.
There you can see one of the dies from the small exotic butterflies set #2.


The flower is made out of several Cherry blossoms and mini fanciful flourish plus leaves from the Build a flower #2 set.


I placed the Bird cage that i gave dimension to and used the tiniest butterfly of the sortiment inside. the tiny butterflies are from Mini dimensional butterflies set. The small tag on it is from Sentiment frame #1 set.


On the central part of the card, i fixed a English party doily that i inked with distress. 
Small butterflies from Mini dimensional butterflies set are here too. And the gorgeous "L" letter is from the flourish font.
The text is stamped on Sentiment frame #1.


 I created a dimensional flower using 3D pads and the marvellous Build a flower set #2.

All dies are from Cheery Lynn designs. Papers are Pink Paisley. Stamp texts from Magnolia. Colouring is made with distress inks and Creative Inspirations shimmery paints.

Hope you will like this card and don't forget to come and join the fun of our weekly challenge for a chance to win a 20$ shopping spree! Love from France, Kianel.

Thursday, August 30, 2012

No stamps card! - Kianel

3:30 AM 9 Comments
Hello dear Cheery Lynn Designs lovers!
Kianel here with you today. You know how i like to challenge myself so this time i decided to go for a no stamp card (well, i must admit it felt excruciating not to use any, lol!) on a christmas theme and to use one die as a mask. You'll have to forgive my poor attempt as i was way too far from my comfort zone here... Anyway, here is the card:
It's about 16cm x16cm. The base is made with size 4 of Kaleidoscope lace mega doily.

To make my background, i took the inner diecut of the Mexican tile pattern and used it as a mask with brown ink. Pretty cool effect you get i think.
The flower is made with several dies: the first petals are from the Build a flower #2 set, inked with distress and covered with Creative inspirations shimmer paint. I then rolled some pink tulle and finally placed the inner part of the Notre Dame cathedral doily under. I then added The mini leaf and the leaves from the Build a flower #2 set. When placed on the card, i added some pearl band bits here and there.

The border is called celtic weave and is sooo delicate!
Small butterflies from the mini dimensional butterflies are placed here and there.
I finally added the smallest text of the Merry christmas set (to which i took the snowflakes off).

Don't forget our weekly challenge for a chance to win a 20$ shopping spree and the opportunity of becoming one of our weekly spotlights!
Take care and have fun with Cheery Lynn dies! Love from France, Kianel.

Saturday, August 25, 2012

Thank You

2:30 AM 10 Comments
Hello! Jodi here with another 12x12 layout for you today.
I just love the new Chicken Wire Frame! It adds fantastic texture! I hand cut pieces out of two frames and added a bit of distress ink here and there to give the wire a bit more of a worn look. The new Thank You sentiment can easily be added as a title to a layout as well as used for a card. I added the Wedding Garter atop Lace Light Deco Border at an angle for a bit of interest.
Tags are a fun embellishment to add to any card or layout. I love to use the Classic Coved Rectangle Silver Stacker to create custom tags for my specific project.
My flower was created with petals from the newly released Build a Flower #2 set, the stamen and little red flowers are from the Build a Flower Embellishment #2 and Build a Flower #1 sets. Foliage from Small Leaves #2, Mini Fanciful Flourish, and Pine Branches.
I wanted to share a close-up of the Chicken Wire. The details are just amazing!!
There is still time to enter this weeks challenge for your chance to win the $20 shopping spree! Details Here
Thanks for stopping by!


Thursday, August 23, 2012

Buggy card - Kianel

3:34 AM 8 Comments
Hello,
Kianel here with you today for a card i made using some more dies from the new release: those are absolutely amazing!!!!
My card is 25cm x16,5cm. For the base of the card i used the size 6 die from the Scalloped rectangle mega doily set and then used the inner part as a template for my patterned paper.

The cute butterflies are from the mini dimensional butterflies set.
On the upper left corner is Lace deco corner deco B.
The frame is the gorgeous Honeycomb frame.

On the left of the card i placed  a big flower made using the Build a flower #2 set and the embellishment #2 set for the stamens.

My sentiment is placed on a label from the fantastic Sentiment frame #2 set together with the smallest of the Mini Dimensional butterflies with angel wings: soooo cute!
Under the sentiment plate and the flower is the celtic band .
My stamp is cut out using a Little circle stacker as a template. I then fixed it on a Kiwi doily.

The big flower is made with the Build a flower #2 set.
Look at the amazing details you can achieve with this set of dies. And the flowers look amazing ( my sister even thought it was a premade flower, lol!). I used 2 types of petals for this flower, white cardstock that i inked with distress inks for yummy color.

There you can also see embellishment #2 set for the small flowers and the baby breath.
Papers are MME and Webster's pages. Dies are Cheery Lynn designs. Stamps are Whimsy stamp and sentiment from Denim tampons. Colouring with distress inks and creative Inspirations shimmer paints.

Don't forget to join our weekly challenge for a chance to win a 20$ shopping spree!
This week's theme is "doily" so have fun!
Lots of love from sunny France, Kianel.

Copyright Statement


All content, including designs, pictures and words are the exclusive property of the author of each blog post. Information shared here is for inspiration only and may not be copied for publication, competition or profit. Thank you for your cooperation.

SOCIAL MEDIA 2


Follow Us @jointhemakersmovement


All content, including designs, pictures and words are the exclusive property of the author of each blog post.
Information shared here is for inspiration only and may not be copied for publication, competition or profit. Thank you for your cooperation.