
Hi Everyone,
The new Reflections Boutique Series of dies by Cheery Lynn Designs allow so much scope in creativity. The system of each set allows for the user to determine the length of the die cuts and of course the set comes in a variety of sizes, and numerous patterns. The Reflection Boutique Series I have used on my card is the Royal Coved Rectangle Mega Doily. The whole series can be found "HERE".
For card-makers the dies can be placed on smaller machines, with cardstock folded in half to create decorative edged card bases, in varying sizes. Another use is for making tags, which I will show you next week. Or, they can be used for making frames for photographs on layouts or on cards as I have done so above.
Mike has completed sevearl videos on these wonderful die sets. The Reflection Boutique Series can be viewed "HERE", and the workshop video can be seen "HERE".

For this weeks card, I have also completed a tutorial (which can be found under this post) on the Darling Daisies flower (above and below), and also a different way of creating leaves using the Cuties 4.


The flower (above and below) was created using the Sunflower die. Five layers were cut from the actual Sunflower die. Each of the flower bases I painted with Creative Inspirations Paint to leave a beautiful shimmer. Creative Inspirations Paint is sheer, so applying a light coat allows for the beautiful paper beneath to still be seen. If you wish to cover the paper beneath, just add a few more coats of paint. The best part is the paint dries quickly, so there is no major waiting times! I was able to ink my edges straight after painting all my flower pieces.
The Sunflower was constructed with 4 layers for the base. I used glossy accents (very small portion) to adhere each layer together - making sure each leave is staggered from the one beneath. The remaining Sunflower die cut was turned upside down and the petals rolled inwards using a skewer (the petals are rolled inwards, from being upside down, so that the painted side shows when petals are rolled in). Adhere to base of Sunflower, then adhere the centre of Sunflower to the middle (this hides the inside of the paper as your flower is upside down). I placed several pearl pieces to the centre of my flower, but this isn't really necessary as the die cut centre piece is embossed.

The Dimensional Leaves and the tips of the Olive Branches were used to complete my flower. The Dimensional Leaves were also painted with Creative Inspirations Paint, then curled using a skewer to add a more realistic appearance. If you click on the photograph, it will enlargen so you can see the detail more of how I have rolled the leaves around the skewer. Edges were inked with 'Walnut Stain' distress ink. The paint seeps into the fine detail of the leaves, showing off the viens of the leaves ... is very pretty.

Inside of the card I used the Royal Coved Rectangle Mega Doily again to create a frame for the sentiment. The foliage of the Japanese Garden Lace Oval die was used to decorate. I added a hand-dyed silk ribbon to decorate.

This weeks challenge of the Cheery Lynn Designs Blog is 'Doilies', with a chance to win a $20 voucher to spend at Cheery Lynn Designs. You can find the challenege details "HERE". Also, do not forget the Design Team call, you can find all the information "HERE".
Hope everyone has a fantastic week!!
Dies Used:
DL136 Japanese Garden Lace Oval (inside branches used)
DL192 Royal Coved Rectangle Mega Doily (Reflections Boutique Series)
Darling Daisies Flower Tutorial
 You will need 6 petals from the Cuties 4, and 2 petals of each of the Darling Daisies flowers. Paint, and ink all edges if required.
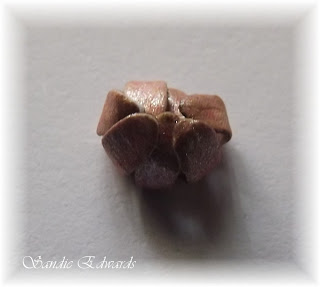
 Put aside the two smaller flower die cuts. Starting with the largest flower die-cut, adhere flower layers together, staggering the petals in each layer you add. Using one of the smaller petals, gently and only slightly roll the petals upwards and adhere to flower base (see above photograph). With remaining small die cut, turn upside down and curl each petal tightly around the tip of your skewer so that your flower now looks like the one in the photograph below. Adhere to centre of flower to complete flower.
Darling Daisies Flower Tutorial


Remove the petals from the Cuties 4 die cut as in the below photograph. Curl the leaf using a skewer from the tip to base (really squeezing the paper/cardstock up gives a wrinkle affect which is appealing to me). Also, curl the very tip up or down (do a variety it looks great). If you play a little with them in the 'curling process' you will be amazed at how a simple petal can turn into quite a realistic leaf. Tuck leaves beneath flower petals, using tiny glue dots to complete arrangement.


Totally gorgeous and your flower tutorial is wonderful. They are on my wish list!! Beautiful job on everything Sandie.
ReplyDeleteSandie you are so creative with Cheery Lynn's Flowers! Thanks for the great tutorial! Such a beautiful project and love the sunflower too!!
ReplyDeletewell done!thank you!
ReplyDeleteBeautiful card, Sandie and an excellent tutorial. Thank you for all the extra work and fabulous step by step instructions.
ReplyDeleteThis is so beautiful!
ReplyDeleteI just love your flower, thanks for sharing the tutorial
Wow Sandie this is totally Gourgeous , even the flowers look vintage.... Thank you for the tips.
ReplyDeleteHugs Elaine
This is gorgeous, Sandie! Your flowers are incredible!
ReplyDeleteGorgeous Sandie, and love your tutorial,thanks for sharing it
ReplyDeletehugs
Donna xx
Such incredible talent!!! Fabulous tutorial! TFS!!
ReplyDeleteBeautiful flowers as always Sandie. Love the card and the tutorial is great. Thanks so much!
ReplyDeleteOh my this is so beautiful! Love your flower design and the way you circled the petals up like that! So very pretty! I just ordered some flower dies this week so soon I can make some flowers too...yippee!!!!
ReplyDeleteQueen of flower! That's how i am going to call you from now on! You sure have a thing for those treasures (i just don't have the patience, ah ah ah!!!!)! An amazing tutorial Sandie and another masterpiece!
ReplyDeleteLove from France, Kianel.
What a wonderful tutorial! Thanks for sharing your gorgeous work.
ReplyDeletewow, great design and i really appreciate your beautiful design, love it so much.
ReplyDelete